
For schools · Run your day
Track progress on the mat
Mark techniques from Mat view during class, check one student’s progress, and see who is ready to test.
Jump to a part
Step by step
The same steps as the video, with what to look for on each screen. The orange box shows where to look.
Mat view
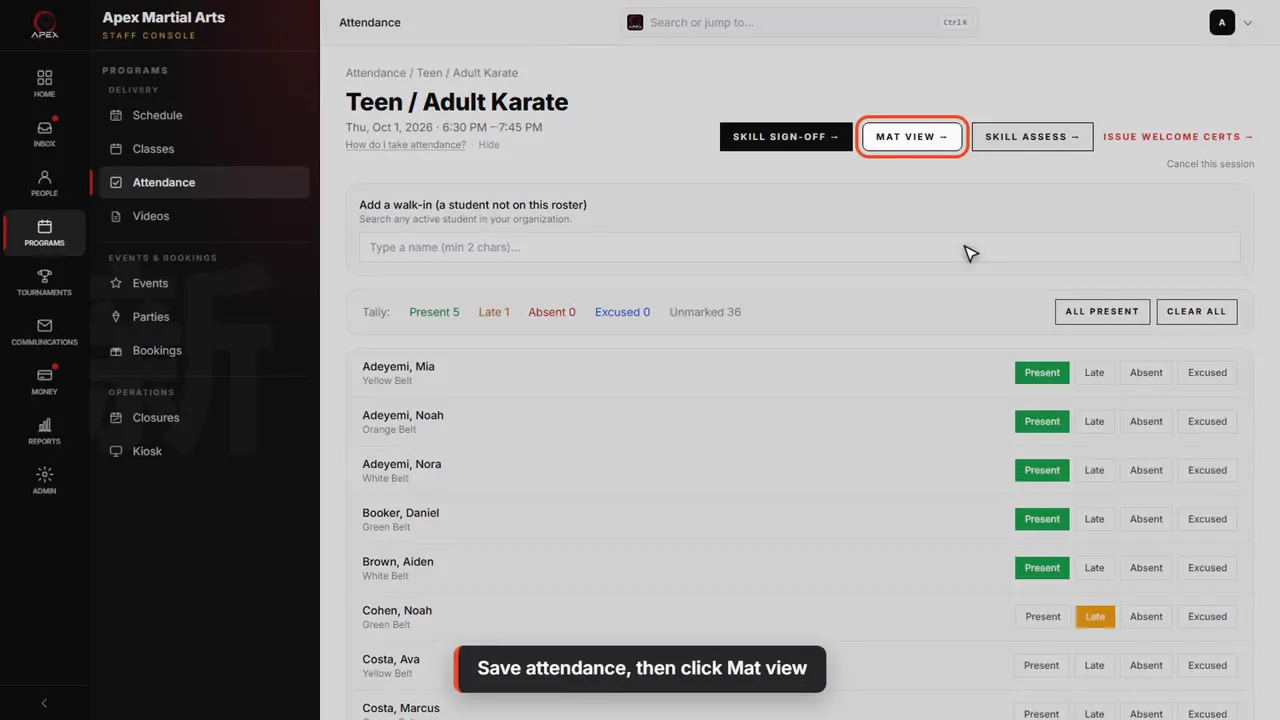
Save attendance, then click Mat view
Take attendance, then click Save attendance at the bottom of the roster. Then click Mat view at the top. It's built for a tablet on the mat.
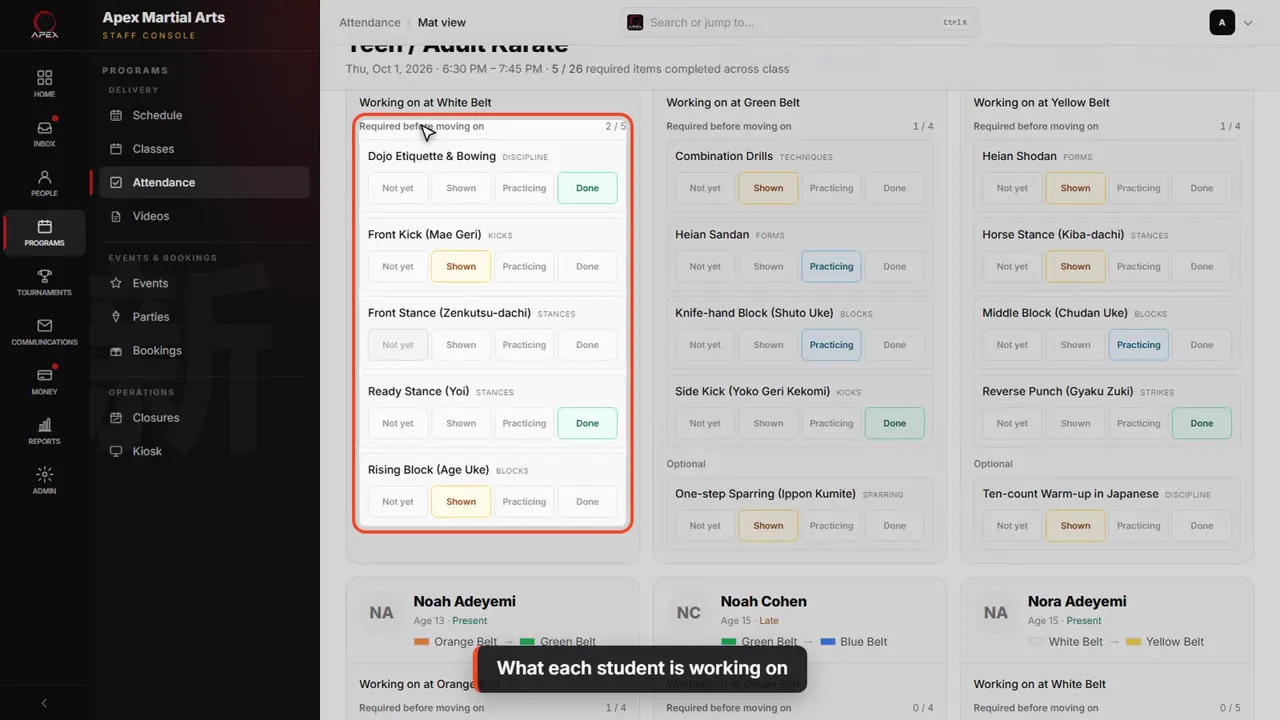
What each student is working on
Every student marked present or late gets a card with their belt and what they're working on at that belt. Required items come first: they're finished before moving on.
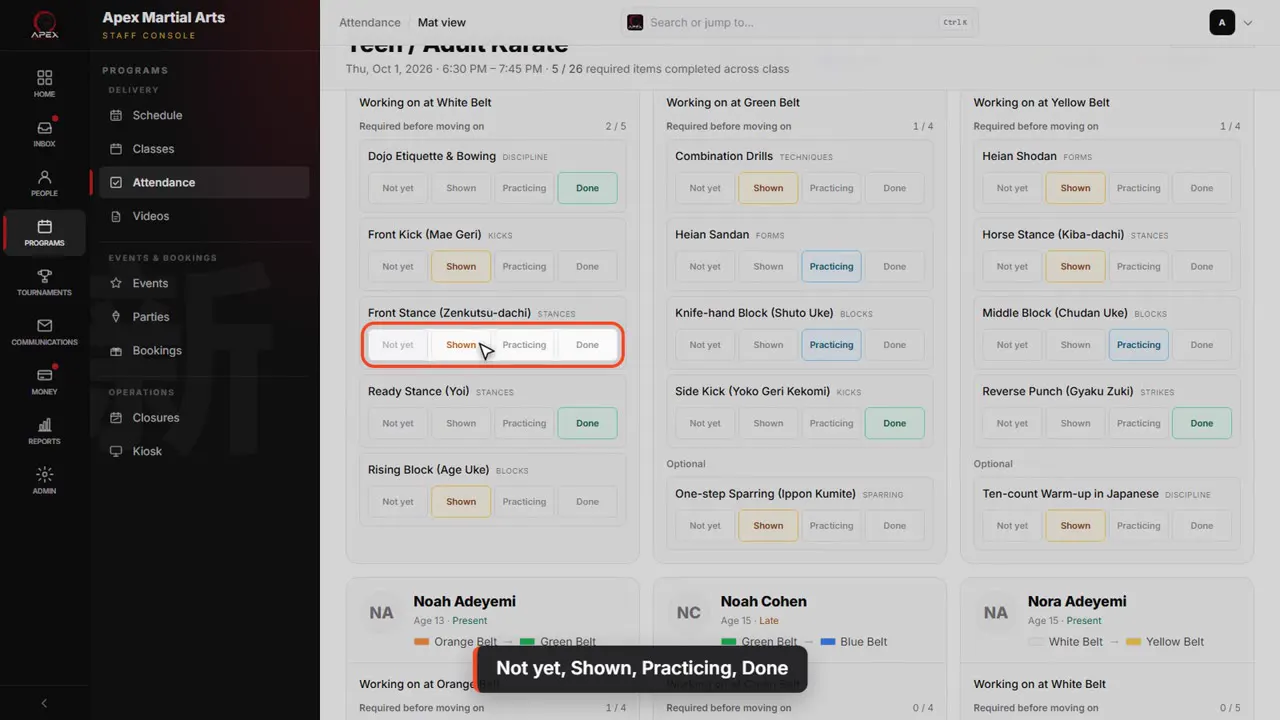
Not yet, Shown, Practicing, Done
Each item has four buttons: Not yet, Shown, Practicing, and Done.
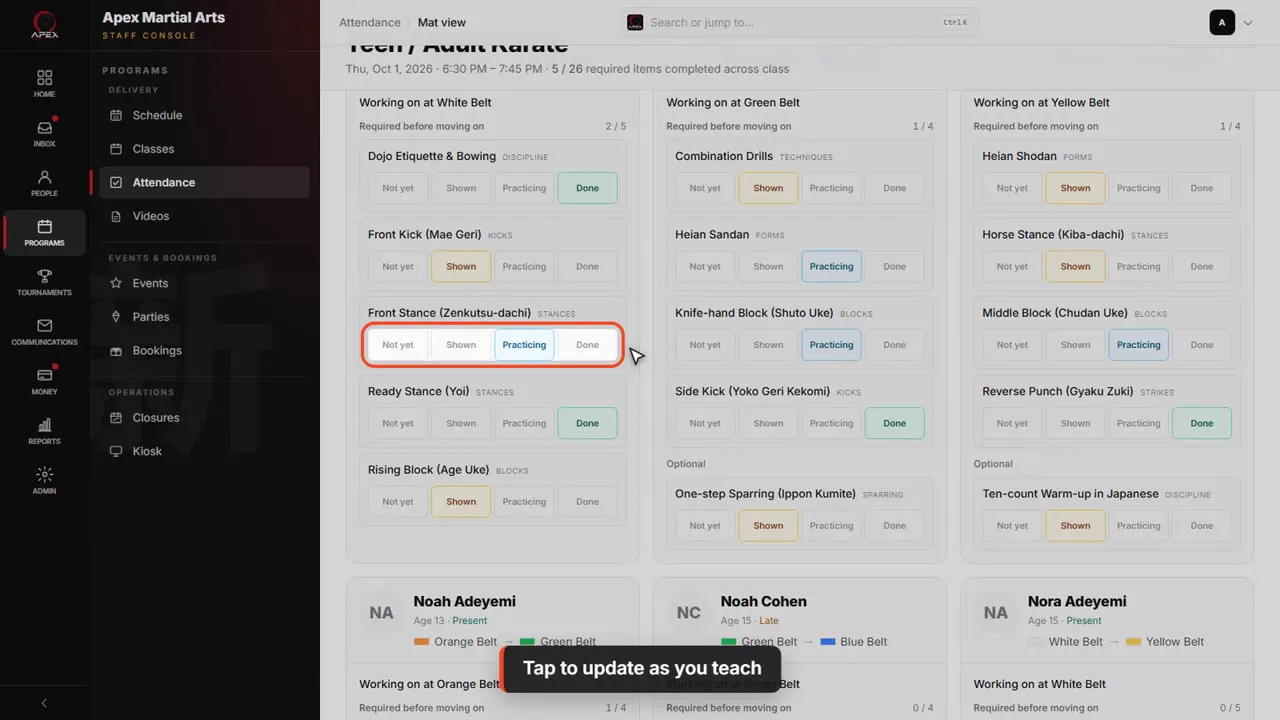
Tap to update as you teach
Showed something new today? Tap Shown. While the student is still working on it, tap Practicing. When they've got it, tap Done. It saves the moment you tap.
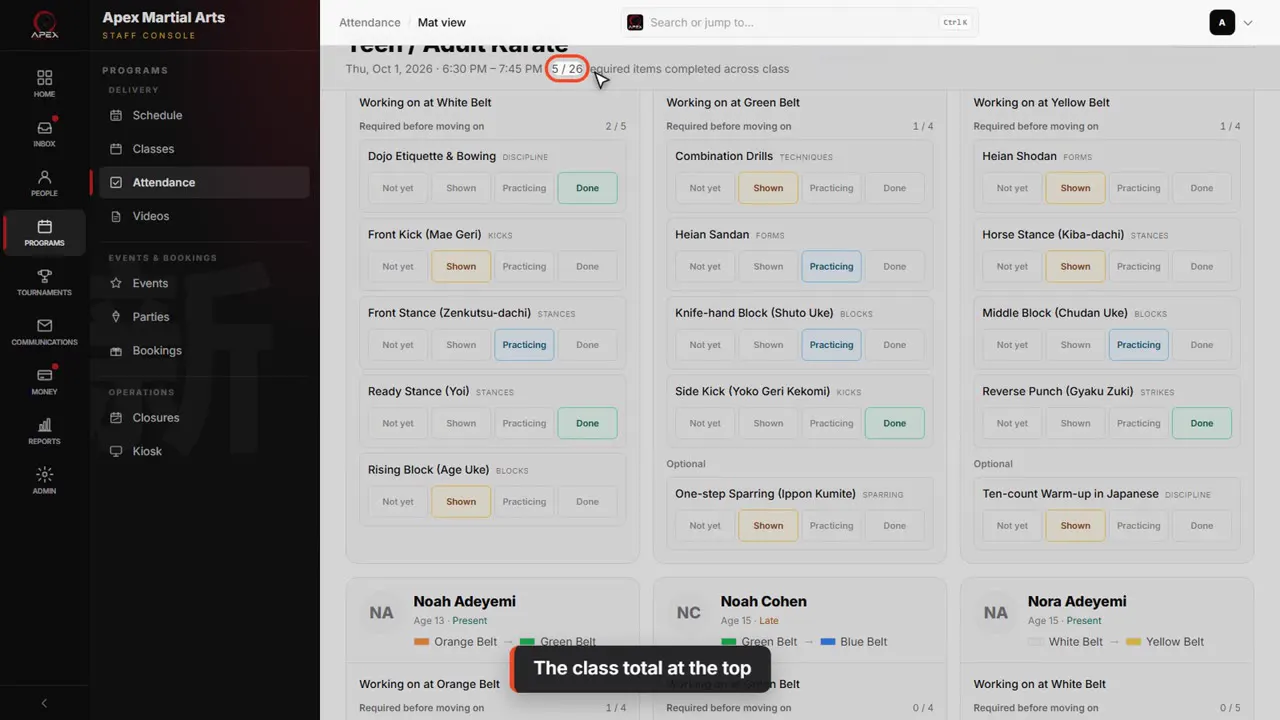
The class total at the top
The count at the top shows how many required items the whole class has completed, so you can see where to focus.
A student's progress
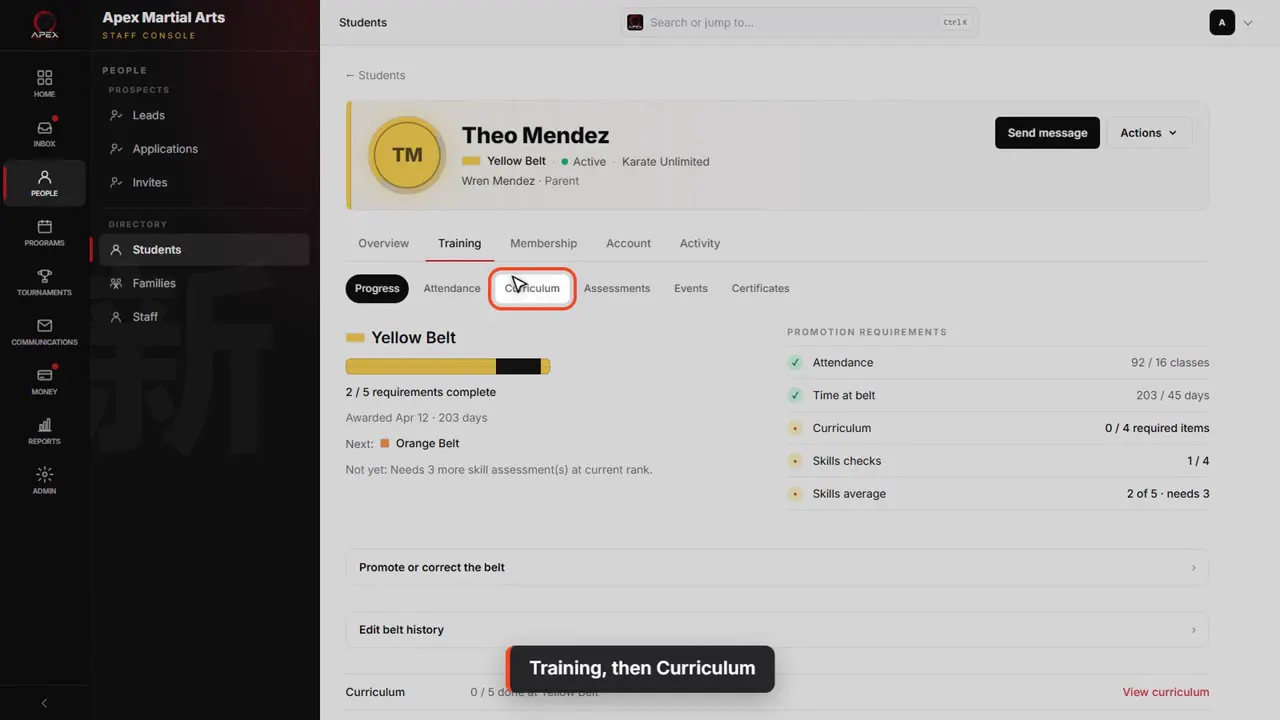
Training, then Curriculum
Each student's page tracks curriculum too. Open the student, click Training, then Curriculum.
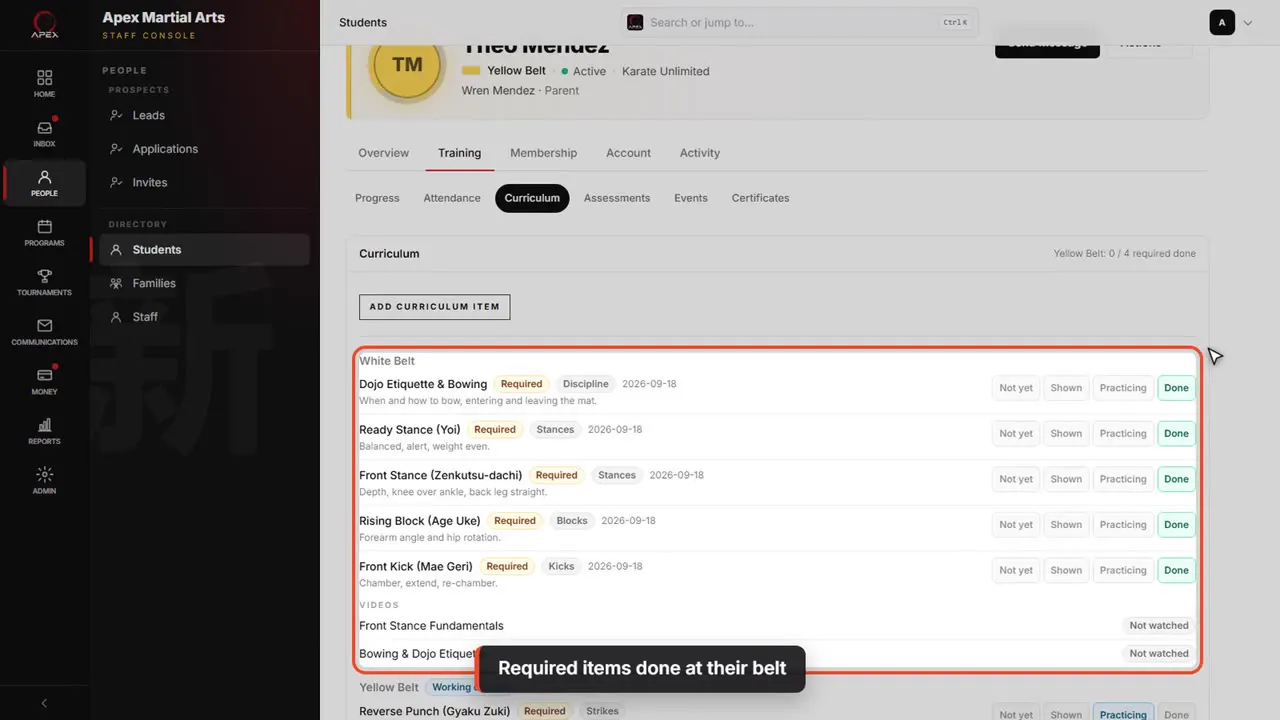
Required items done at their belt
At the top is their belt, and how many of its required items are done. Below, their items are listed belt by belt.
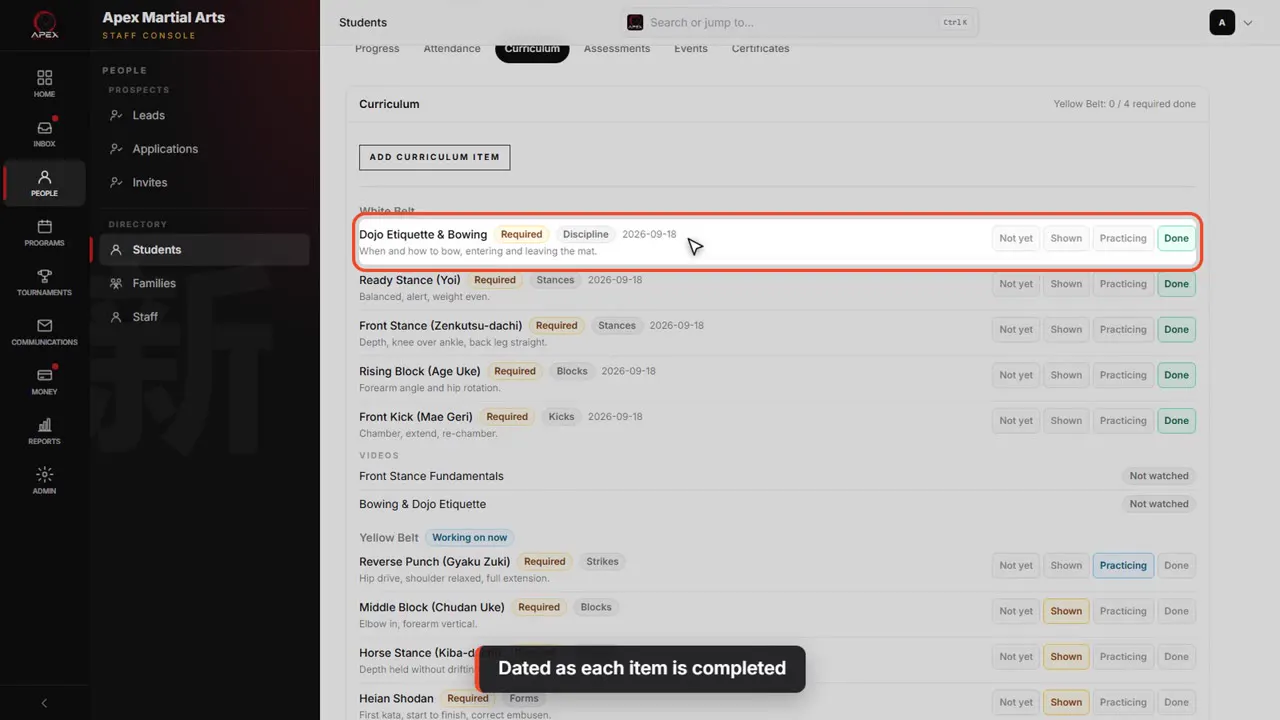
Dated as each item is completed
Completed items show the date they were finished, which is handy when a parent asks how their child is doing.
Who is ready to test
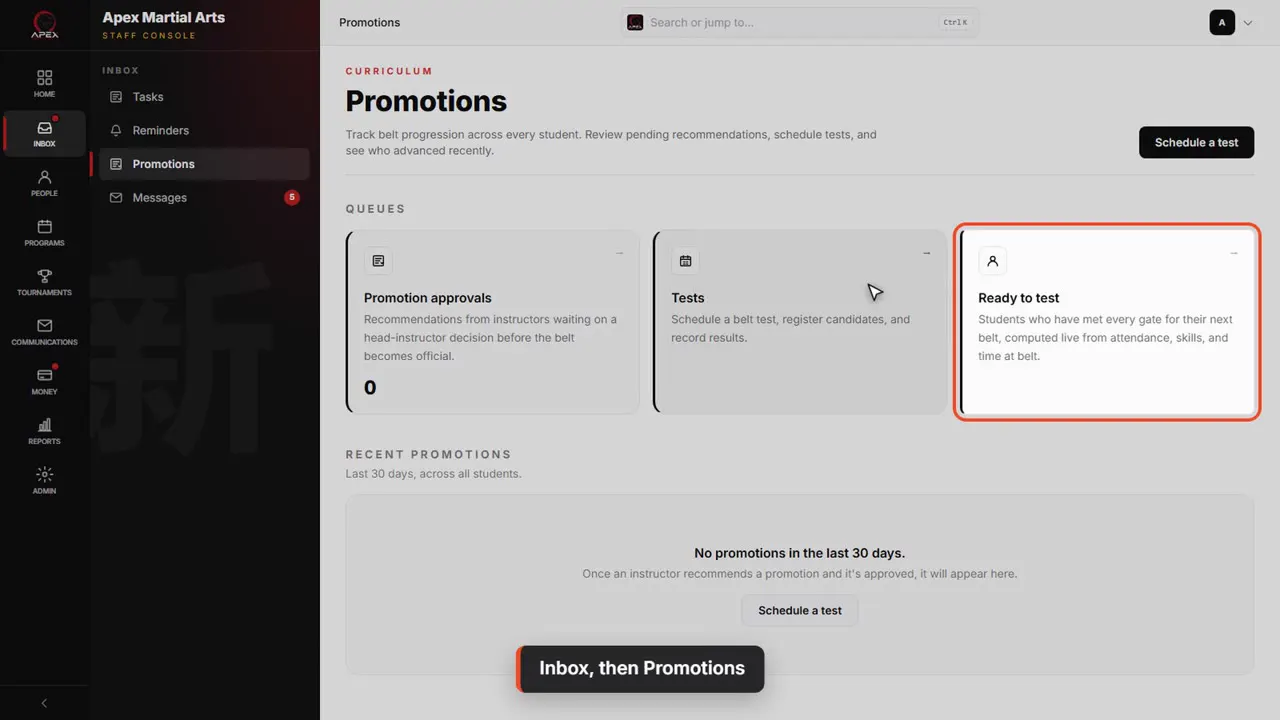
Inbox, then Promotions
To see who's ready for their next belt, click Inbox in the sidebar. Then click Promotions, just below it. Open the Ready to test card.
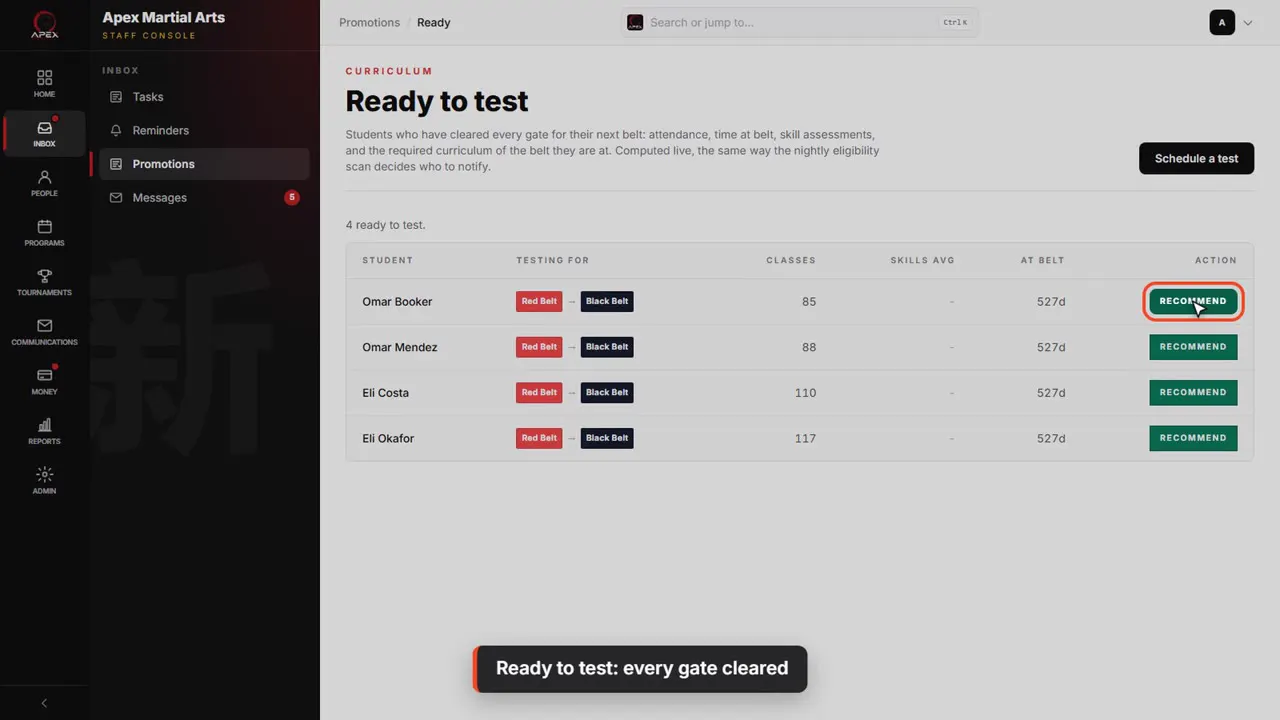
Ready to test: every gate cleared
It lists students who've cleared every gate for their next belt: classes, time at their belt, skill ratings, and required curriculum. Recommend sends them for approval.
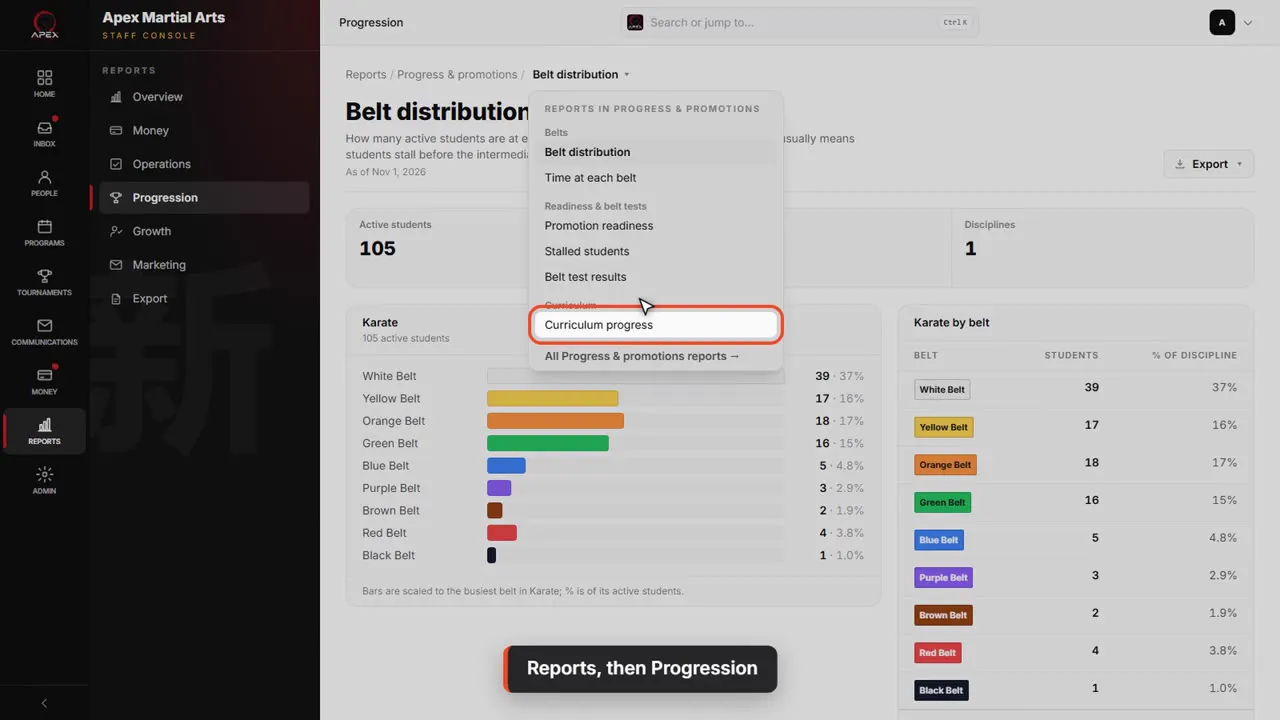
Reports, then Progression
For the whole school, click Reports in the sidebar, then Progression in the menu beside it. Open the report menu at the top of the page and choose Curriculum progress.
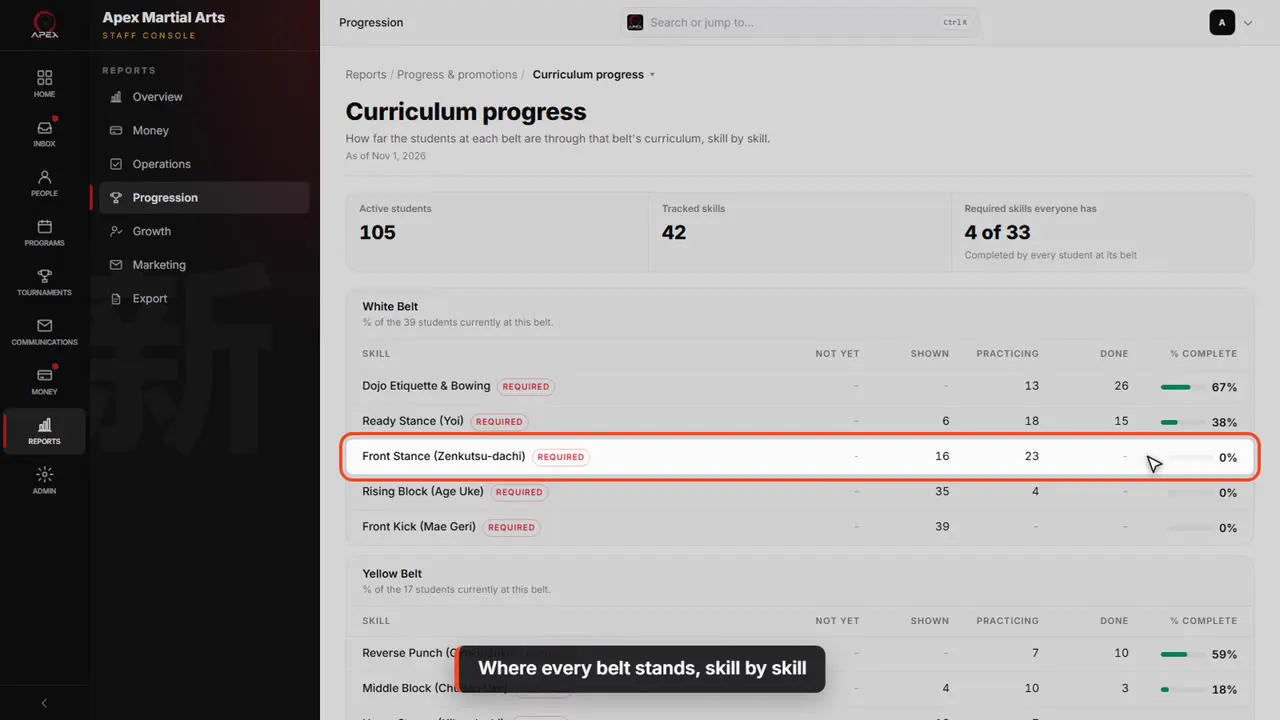
Where every belt stands, skill by skill
It shows every skill at each belt and how far your students are through it, so you can spot techniques that need more class time.
Shown with a demo school. Your screens show your own school, and may look a little different.
Read the whole video as text
Once your curriculum is set up, instructors track it as they teach. In this video you'll update progress from the mat, read a student's curriculum, and see who's ready for their next belt.
Take attendance, then click Save attendance at the bottom of the roster. Then click Mat view at the top. It's built for a tablet on the mat.
Every student marked present or late gets a card with their belt and what they're working on at that belt. Required items come first: they're finished before moving on.
Each item has four buttons: Not yet, Shown, Practicing, and Done.
Showed something new today? Tap Shown. While the student is still working on it, tap Practicing. When they've got it, tap Done. It saves the moment you tap.
The count at the top shows how many required items the whole class has completed, so you can see where to focus.
Each student's page tracks curriculum too. Open the student, click Training, then Curriculum.
At the top is their belt, and how many of its required items are done. Below, their items are listed belt by belt.
Completed items show the date they were finished, which is handy when a parent asks how their child is doing.
To see who's ready for their next belt, click Inbox in the sidebar. Then click Promotions, just below it. Open the Ready to test card.
It lists students who've cleared every gate for their next belt: classes, time at their belt, skill ratings, and required curriculum. Recommend sends them for approval.
For the whole school, click Reports in the sidebar, then Progression in the menu beside it. Open the report menu at the top of the page and choose Curriculum progress.
It shows every skill at each belt and how far your students are through it, so you can spot techniques that need more class time.
That's curriculum tracking: tap as you teach, and check Ready to test to see who's up for their next belt.
Up next · Run your day
Find any student
Open any student’s page in two clicks with the search box at the top of every page.
Watch next: Find any studentBefore this: Add a new family
Stuck?
In QuickKicks, open Admin, then Support (or Help, in the simpler menu), and send us a message. Or email hello@quickkicks.app.