
For schools · Set up your school
Set up your belts
Start your belt ladder from ready-made belts, put them in order, and add a belt with what it takes to earn it.
Jump to a part
Step by step
The same steps as the video, with what to look for on each screen. The orange box shows where to look.
Where belts live
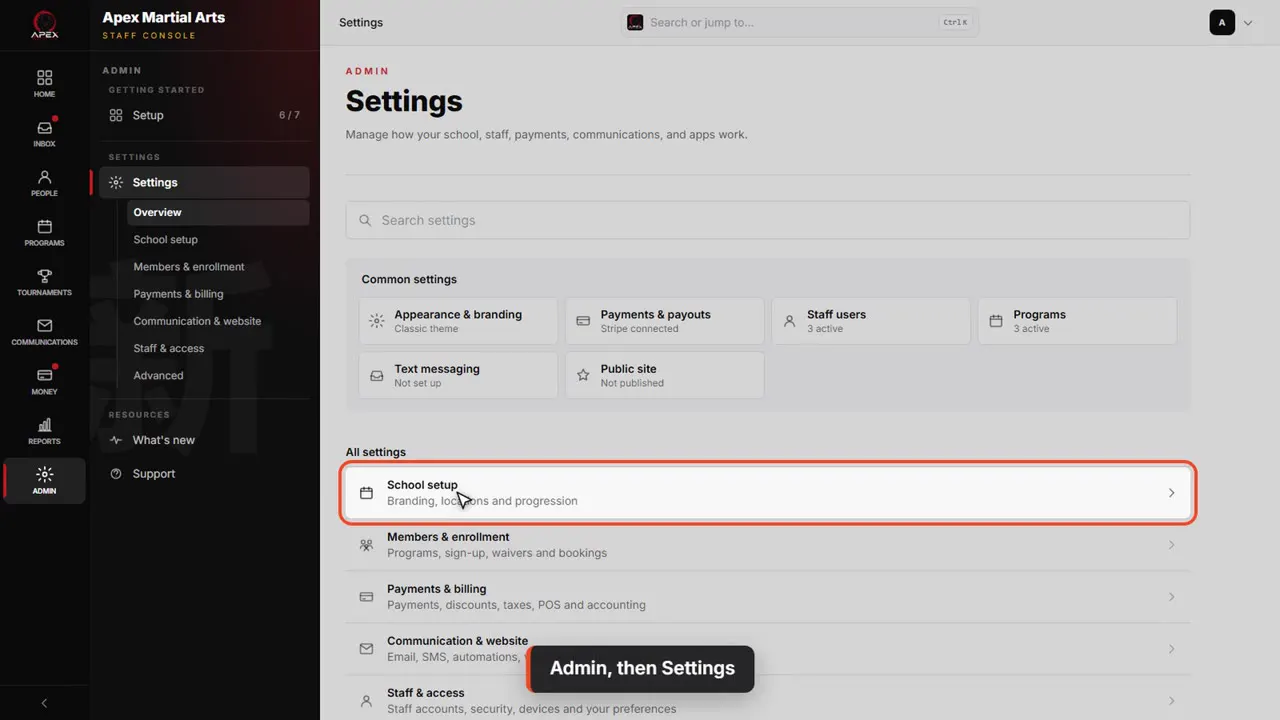
Admin, then Settings
Everything about your belts lives in Settings. Click Admin, then Settings. Belts are in the first group, School setup.
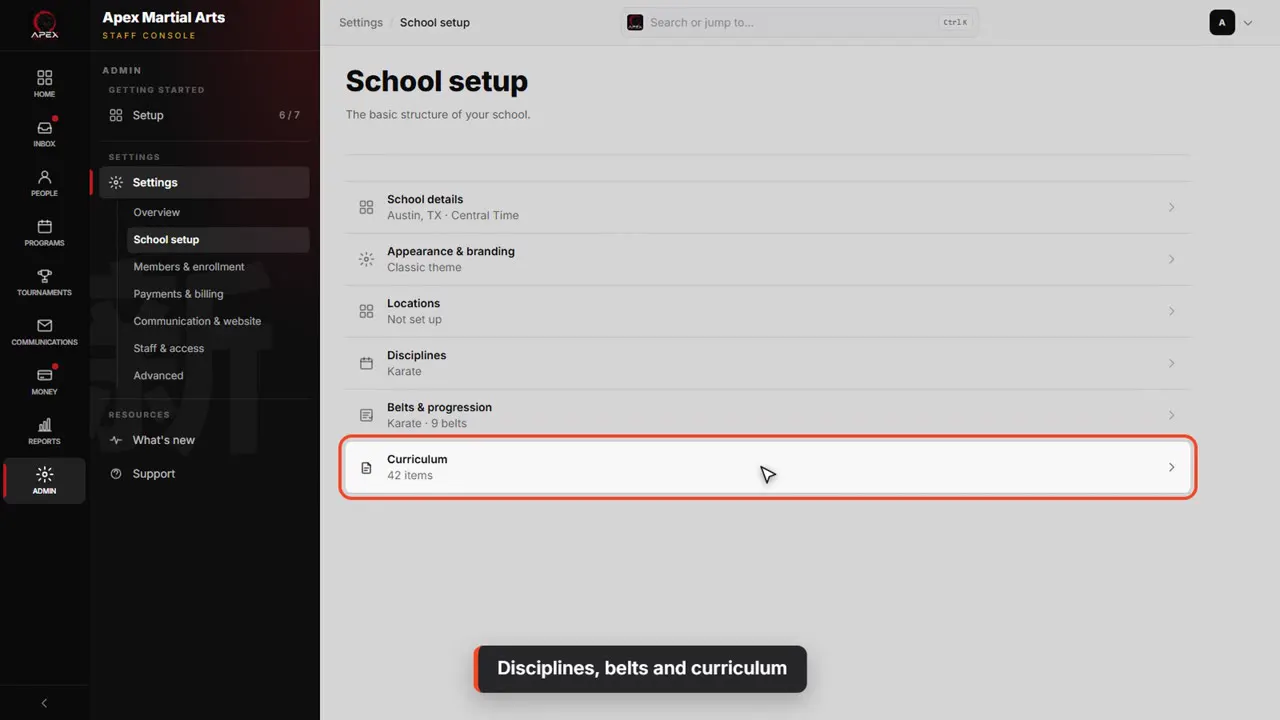
Disciplines, belts and curriculum
School setup holds the structure of your school. Three of these are about progression: disciplines, belts and progression, and curriculum. This video covers the first two.
Disciplines
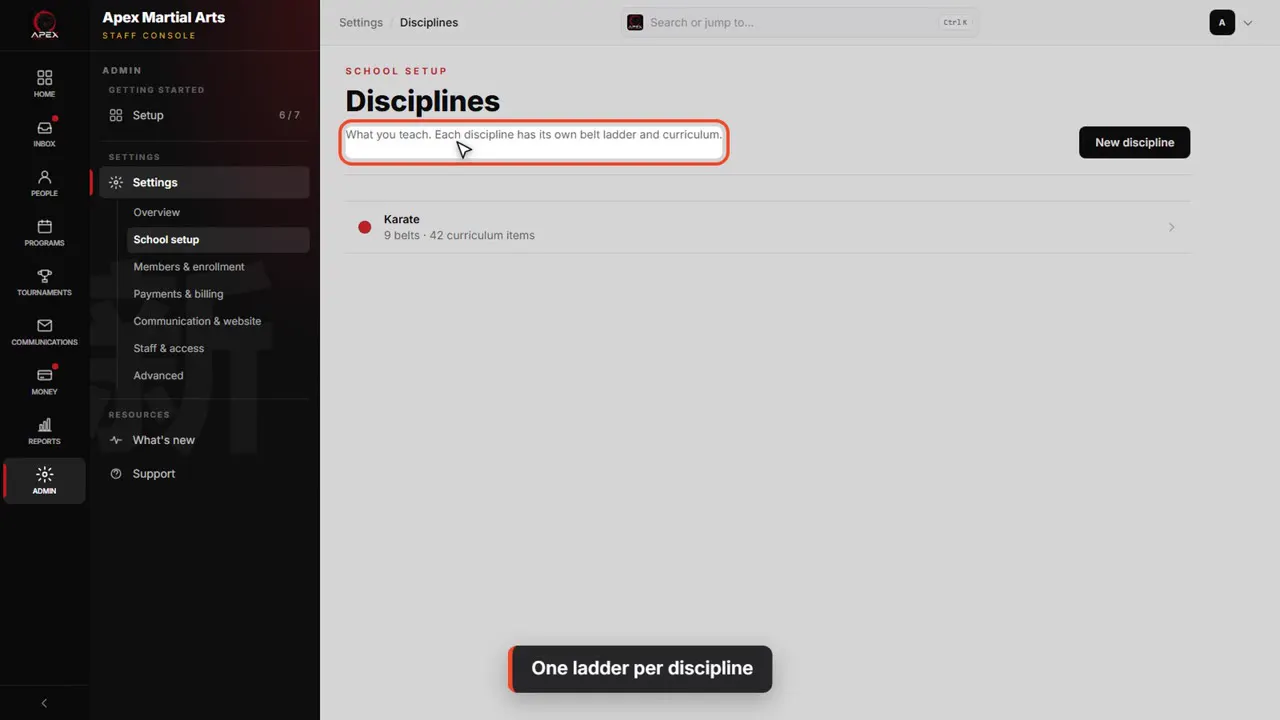
One ladder per discipline
A discipline is a style you teach. Apex teaches karate. Each discipline has its own belt ladder and its own curriculum, so a school that also teaches jiu-jitsu keeps the two apart.
Start from starter content
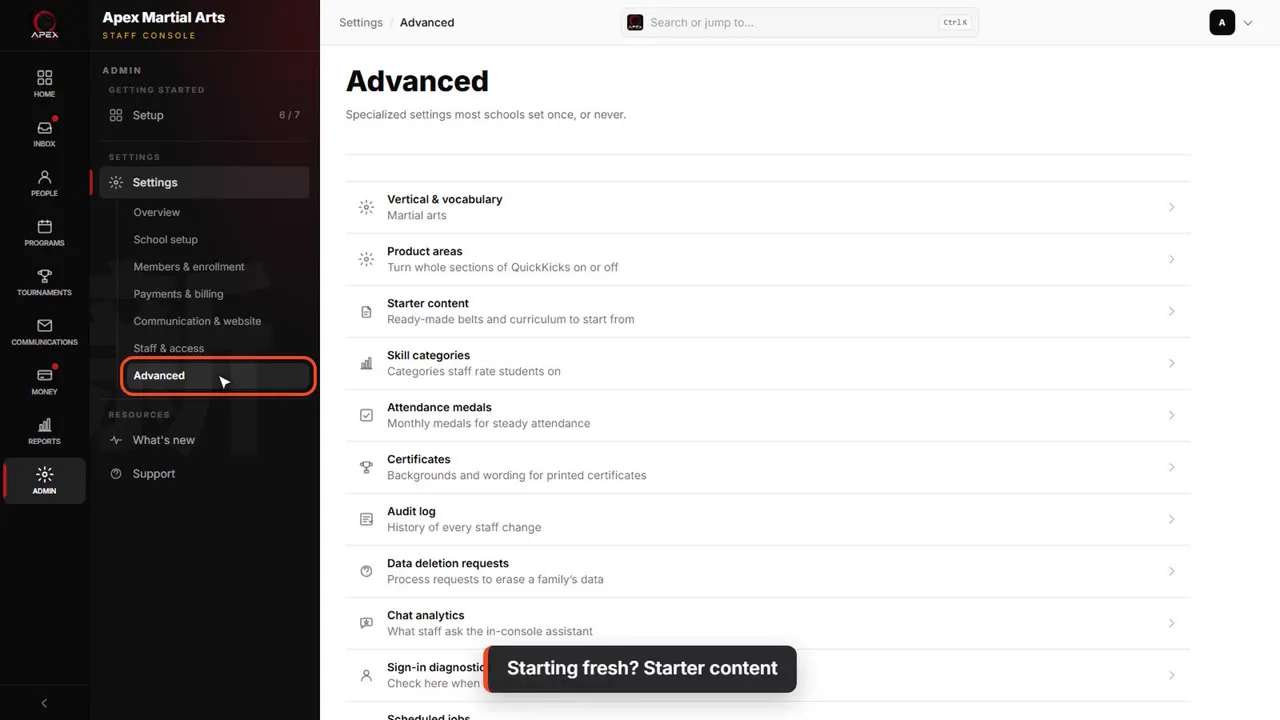
Starting fresh? Starter content
Starting from scratch? The fastest way in is starter content. You'll find it under Settings, then Advanced, then Starter content.
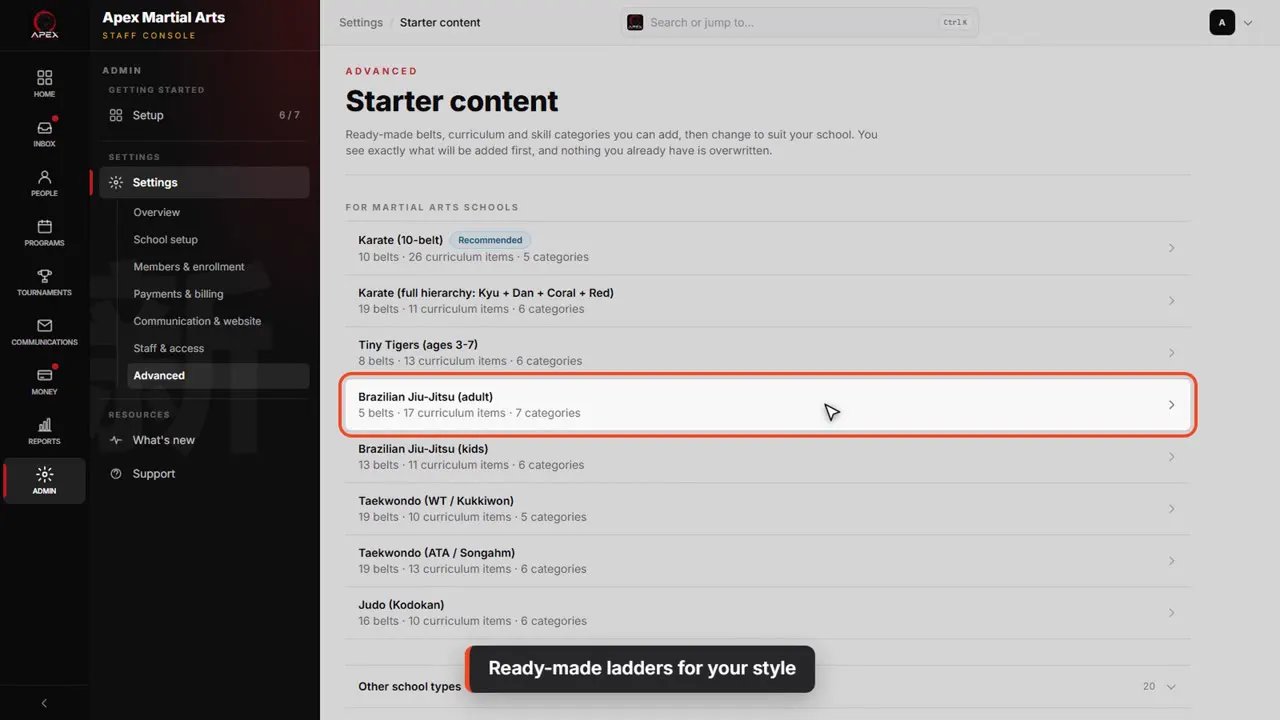
Ready-made ladders for your style
Each one is a ready-made ladder for a style, like ten-belt karate, Brazilian jiu-jitsu or taekwondo, with its curriculum and skill categories. Click one to see what it holds. Let's look at jiu-jitsu.
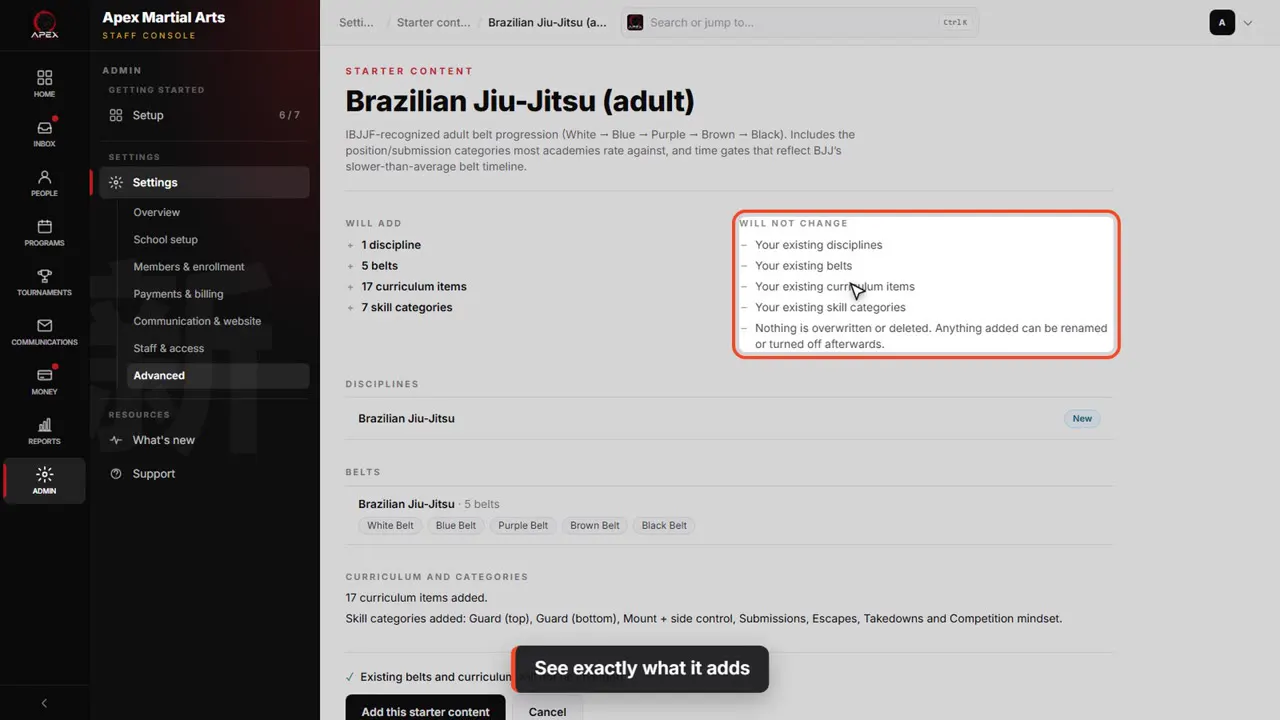
See exactly what it adds
Before anything changes, you see exactly what it will add: a new jiu-jitsu discipline, its five belts and its curriculum. And what it won't touch. Nothing you already have is overwritten.
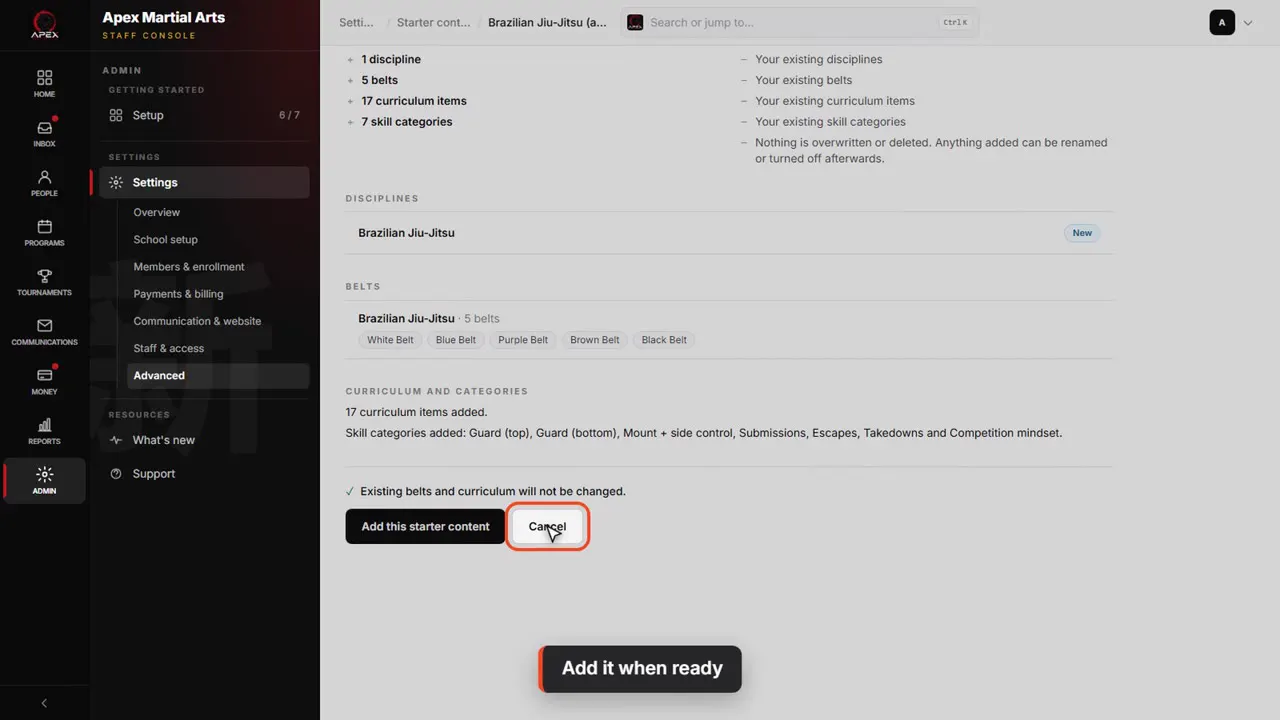
Add it when ready
Happy with it? Click Add this starter content, then Yes, add it. You can rename or turn off anything afterwards. Apex doesn't teach jiu-jitsu, so we'll leave this one.
Your belt ladder
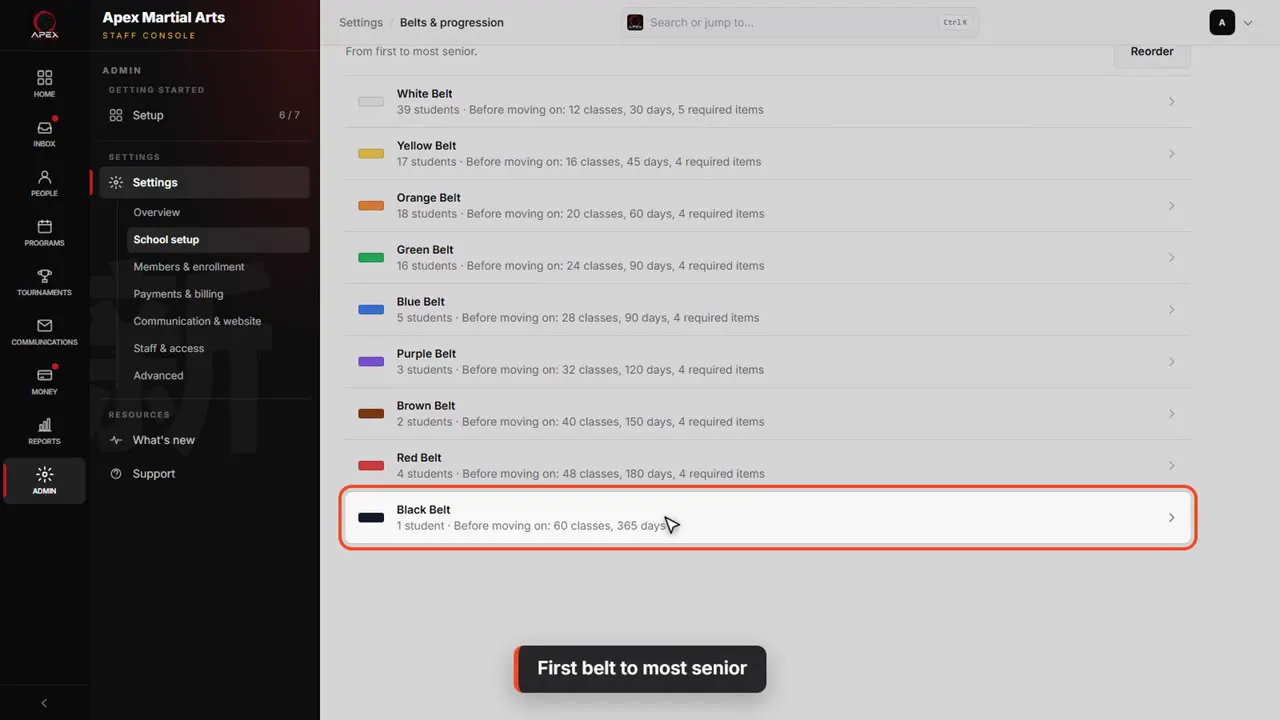
First belt to most senior
Your ladder is in School setup, under Belts and progression. Belts are listed from first to most senior, each with its color.
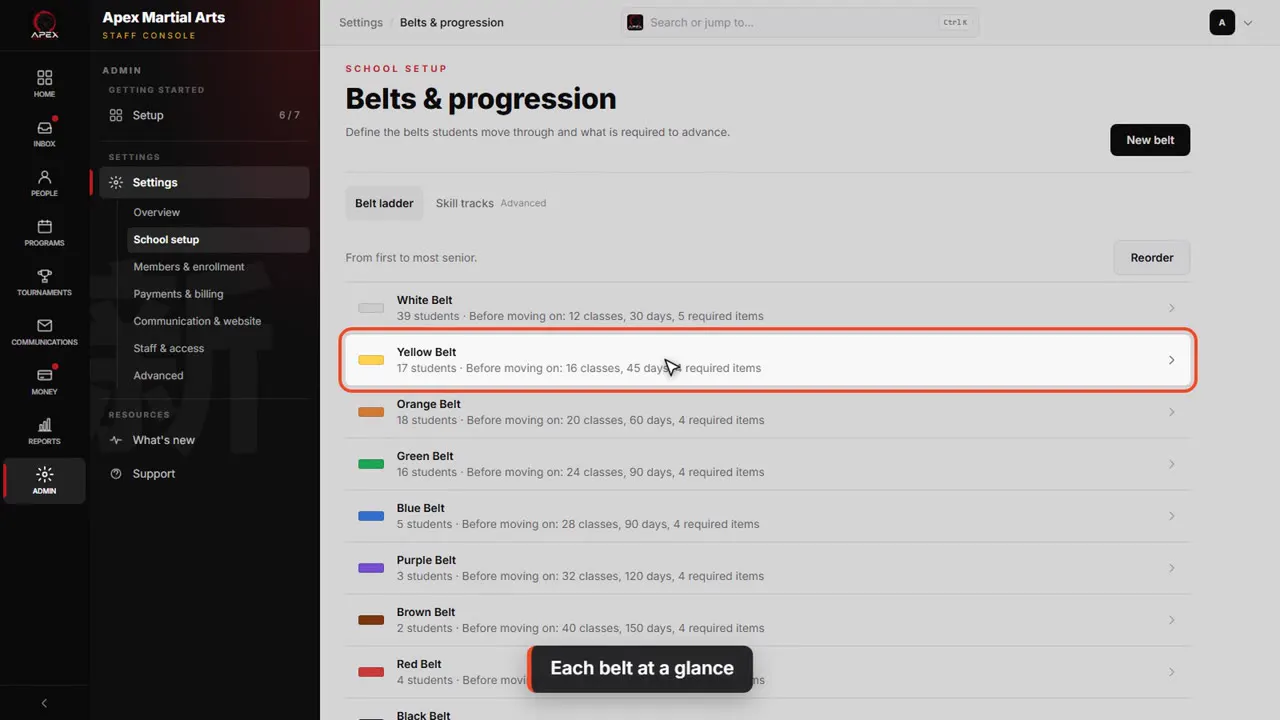
Each belt at a glance
Under each belt is a summary: how many students hold it, then what they need before moving on: the classes and days at the belt, and how many curriculum items are required. A yellow belt needs sixteen classes and forty-five days.
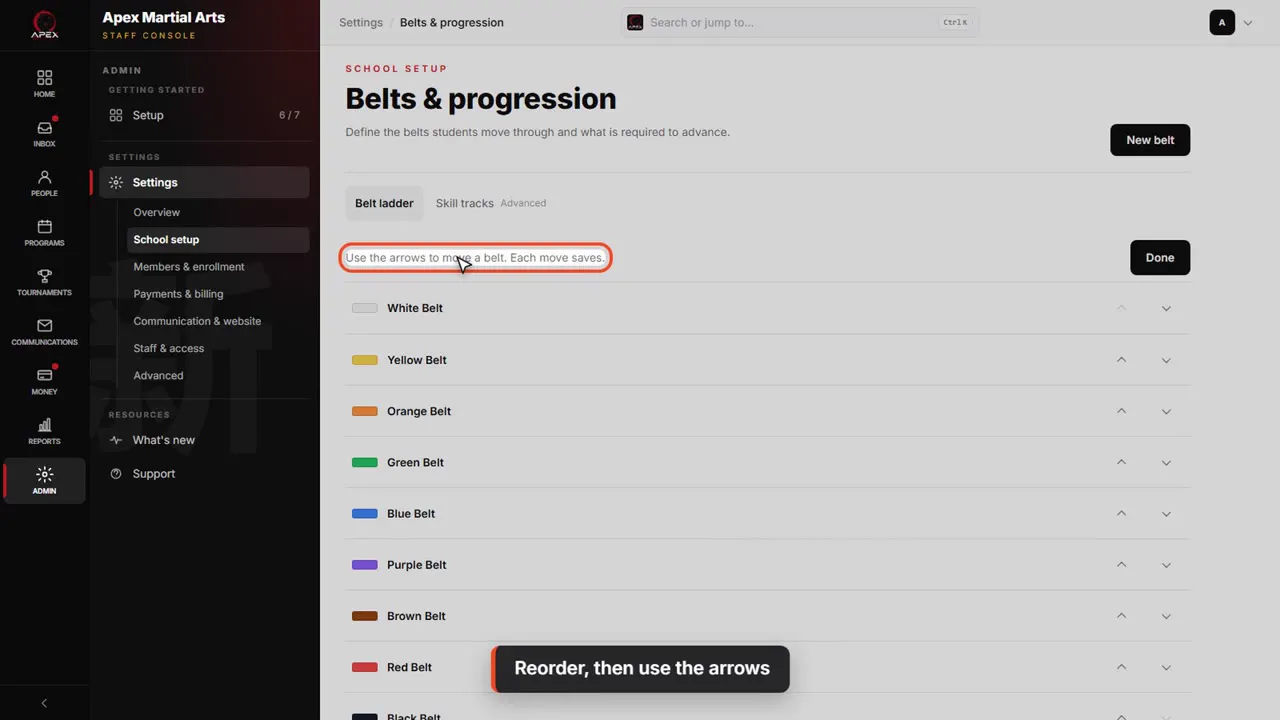
Reorder, then use the arrows
To change the order, click Reorder, then use the arrows to move a belt up or down. Each move saves right away, so there is nothing to save afterwards.
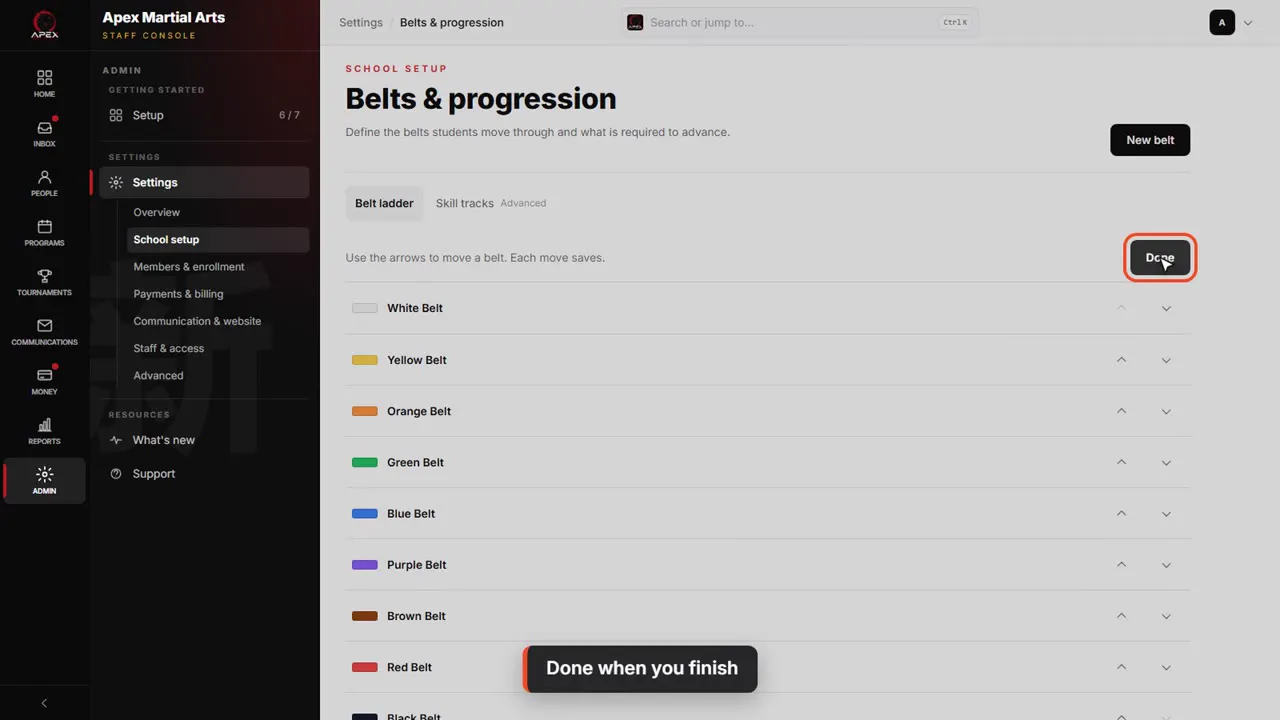
Done when you finish
Click Done when the order looks right.
Add a new belt
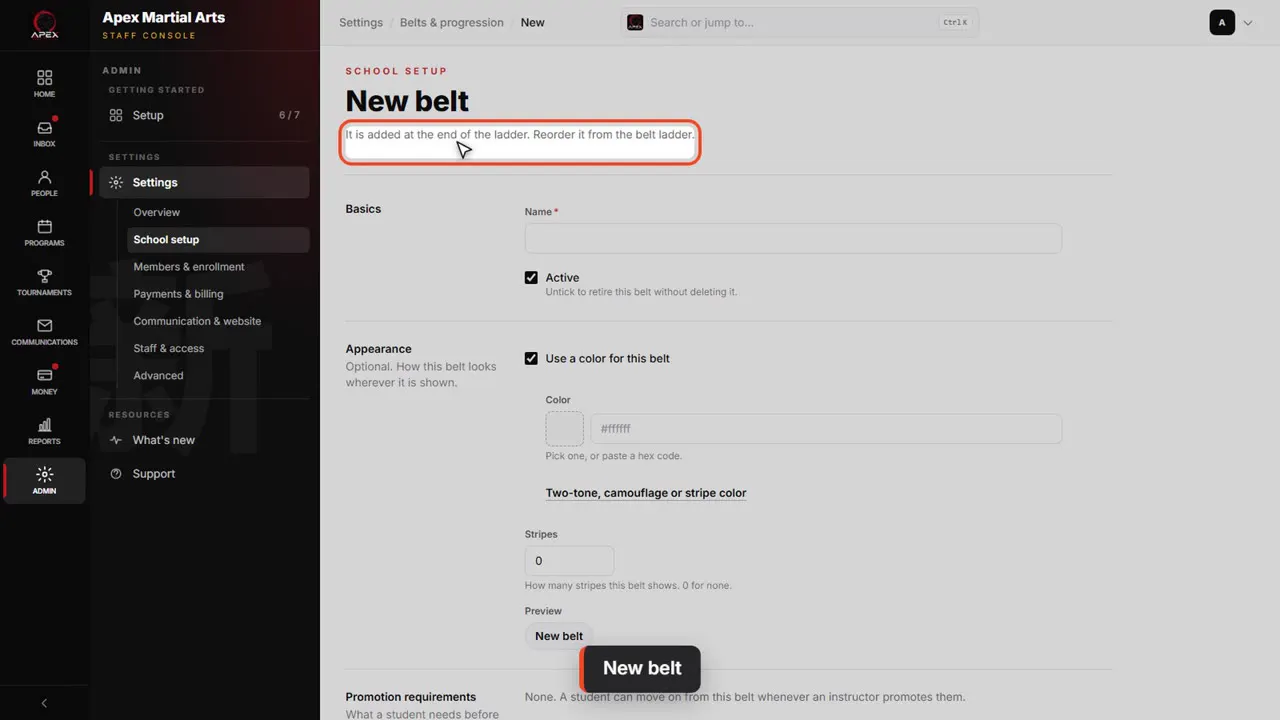
New belt
To add a belt, click New belt. It goes on the end of the ladder. Let's add a camo belt.
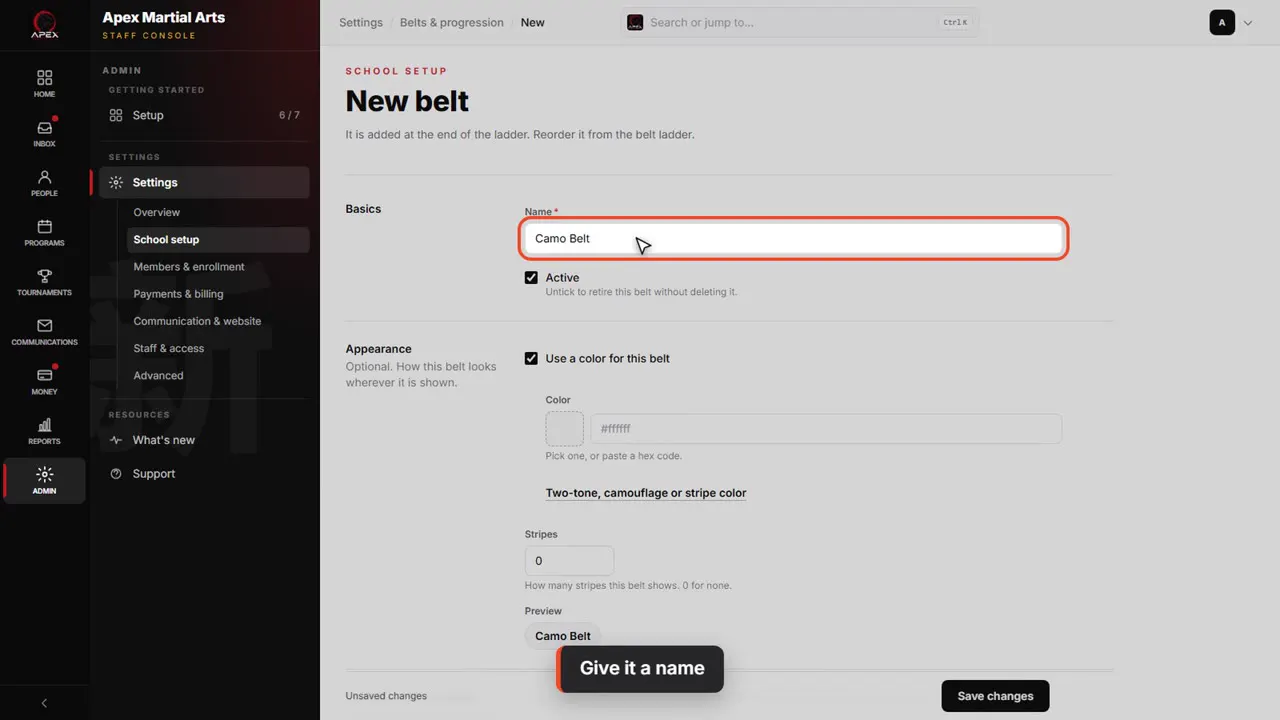
Give it a name
Give it a name. If you teach more than one style, you also pick which ladder it joins.
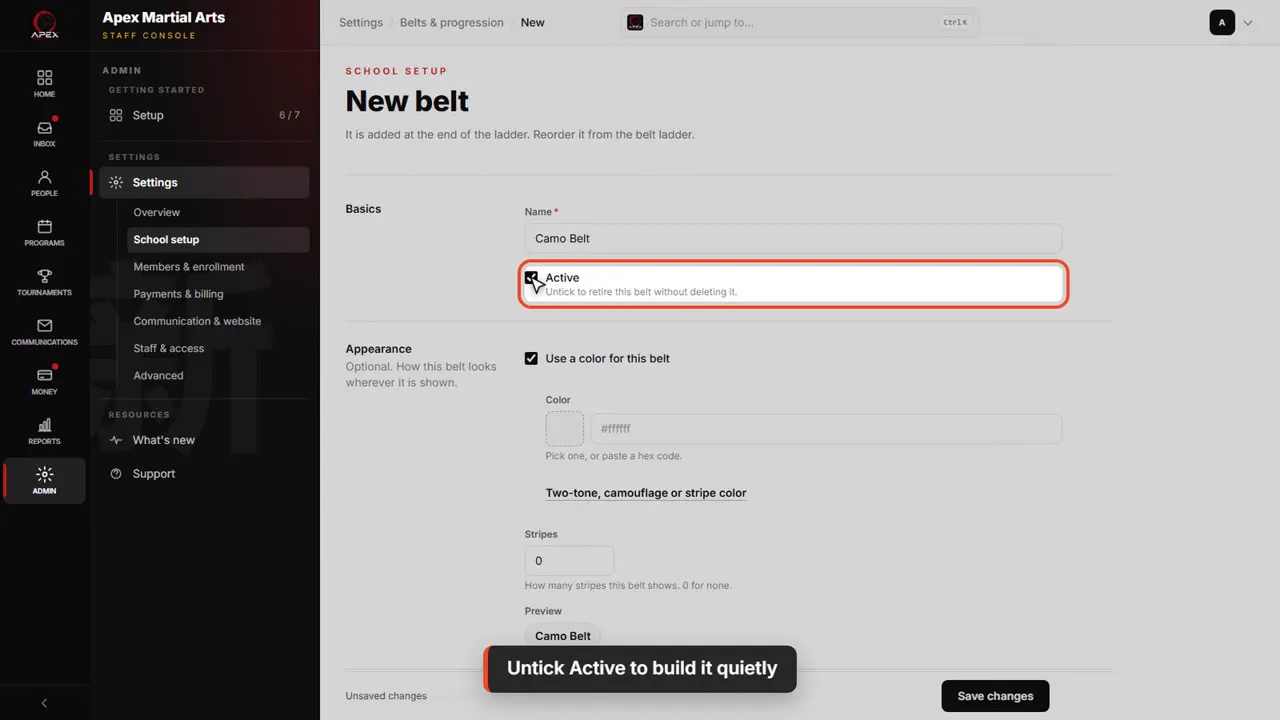
Untick Active to build it quietly
We'll untick Active, so nobody can be promoted into it while it's being set up. Tick it again when it's ready.
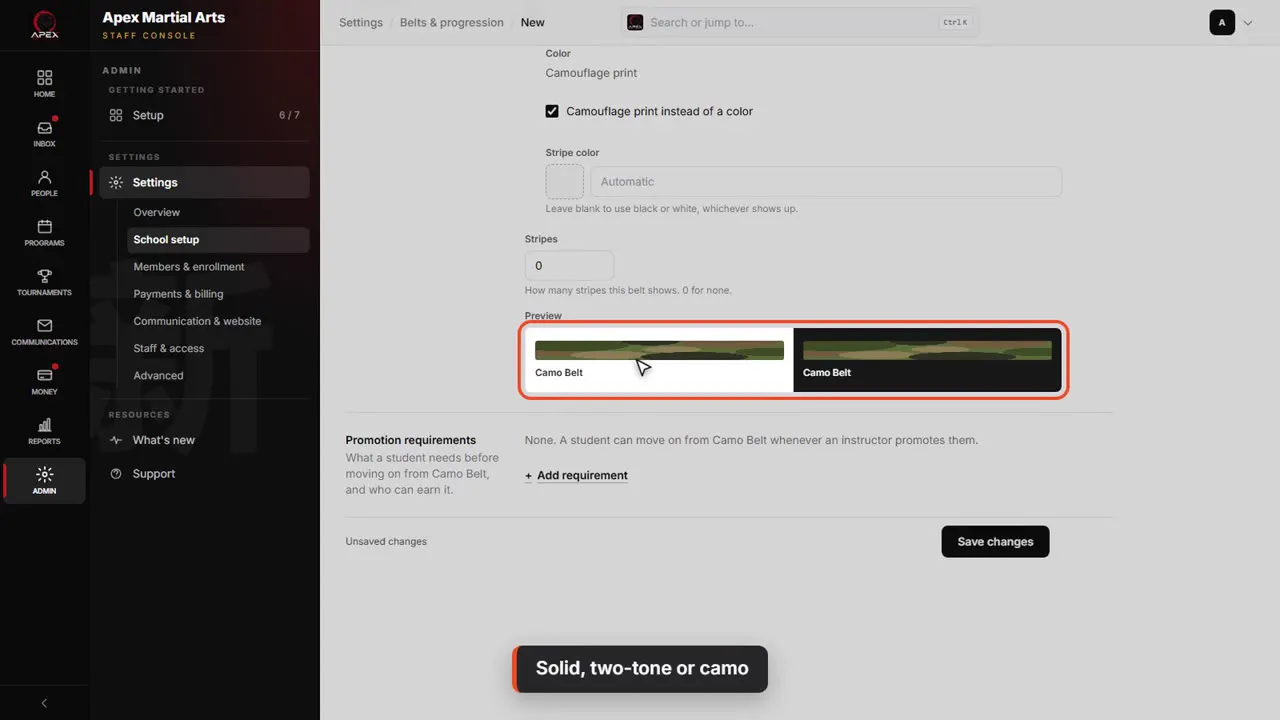
Solid, two-tone or camo
Now the look. Pick a color, or click Two-tone, camouflage or stripe color for more. Add a second color for a two-tone belt, or tick Camouflage print. The preview shows exactly how it will look.
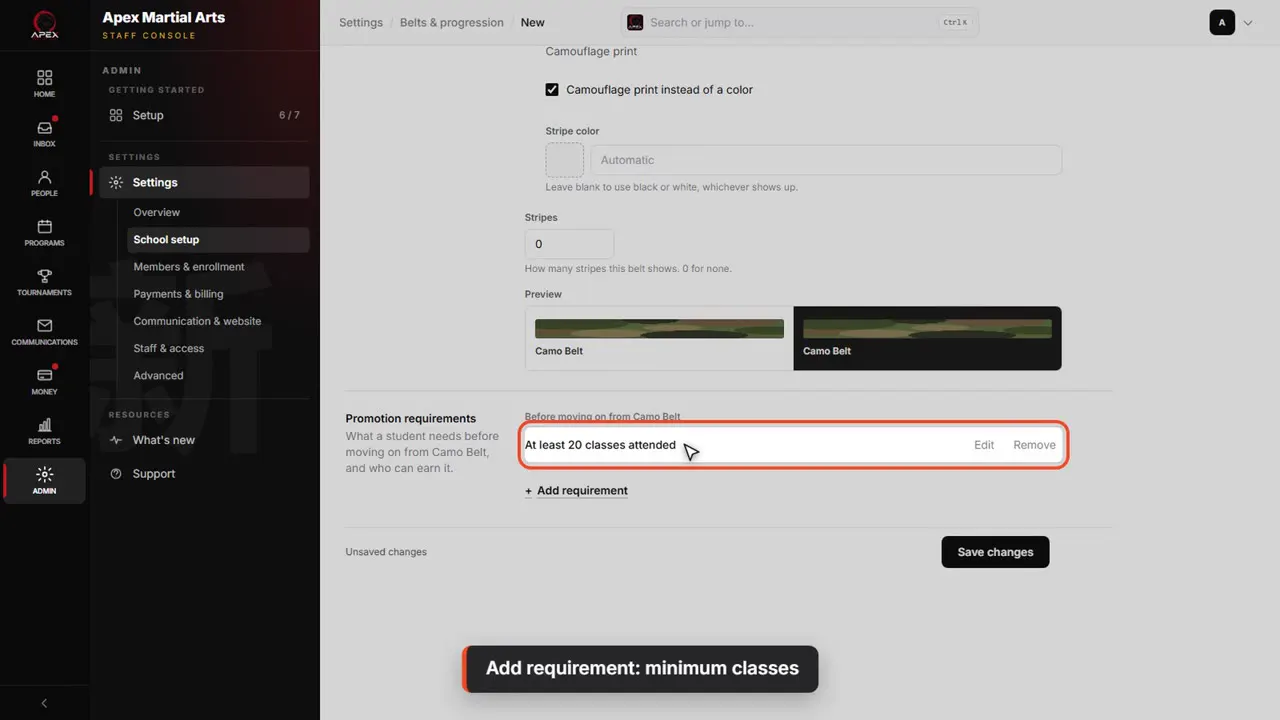
Add requirement: minimum classes
Next, the requirements. Click Add requirement and pick Minimum classes. Type twenty, then click Done: twenty classes at this belt before a student shows up as ready to promote.
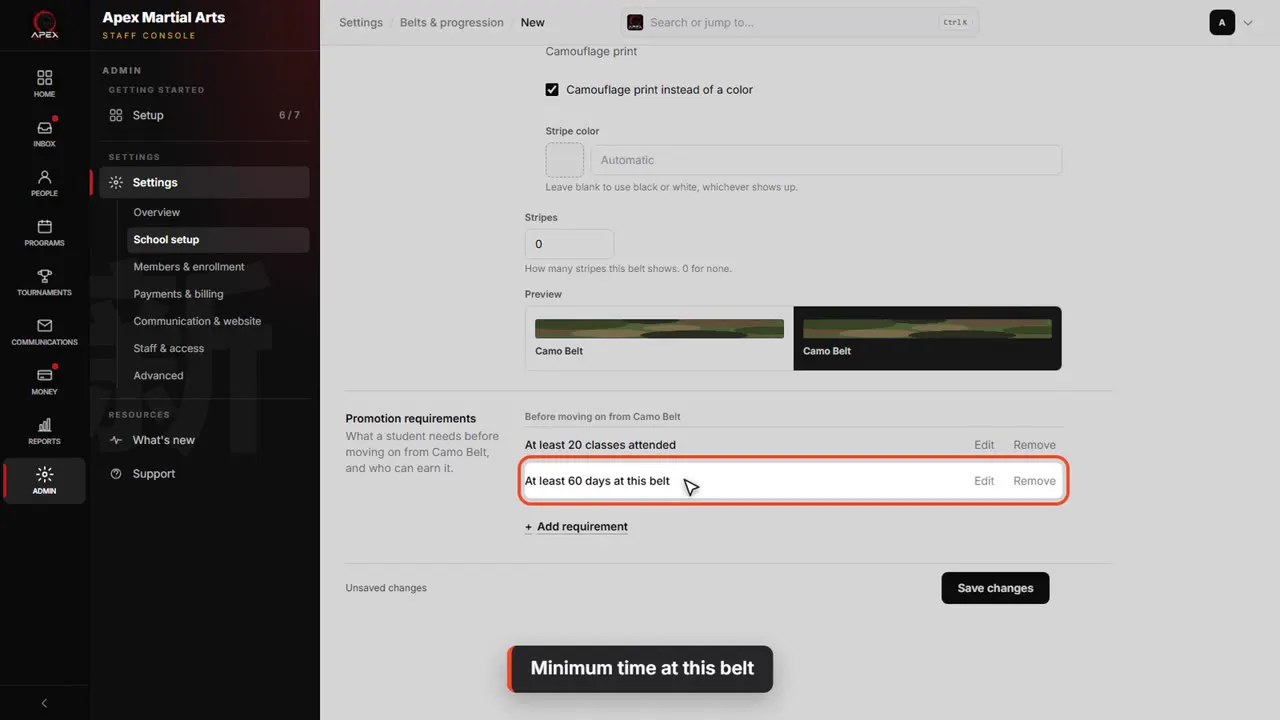
Minimum time at this belt
Add Minimum time at this belt the same way, and type sixty. That's sixty days, about two months at this belt, before a student shows up as ready.
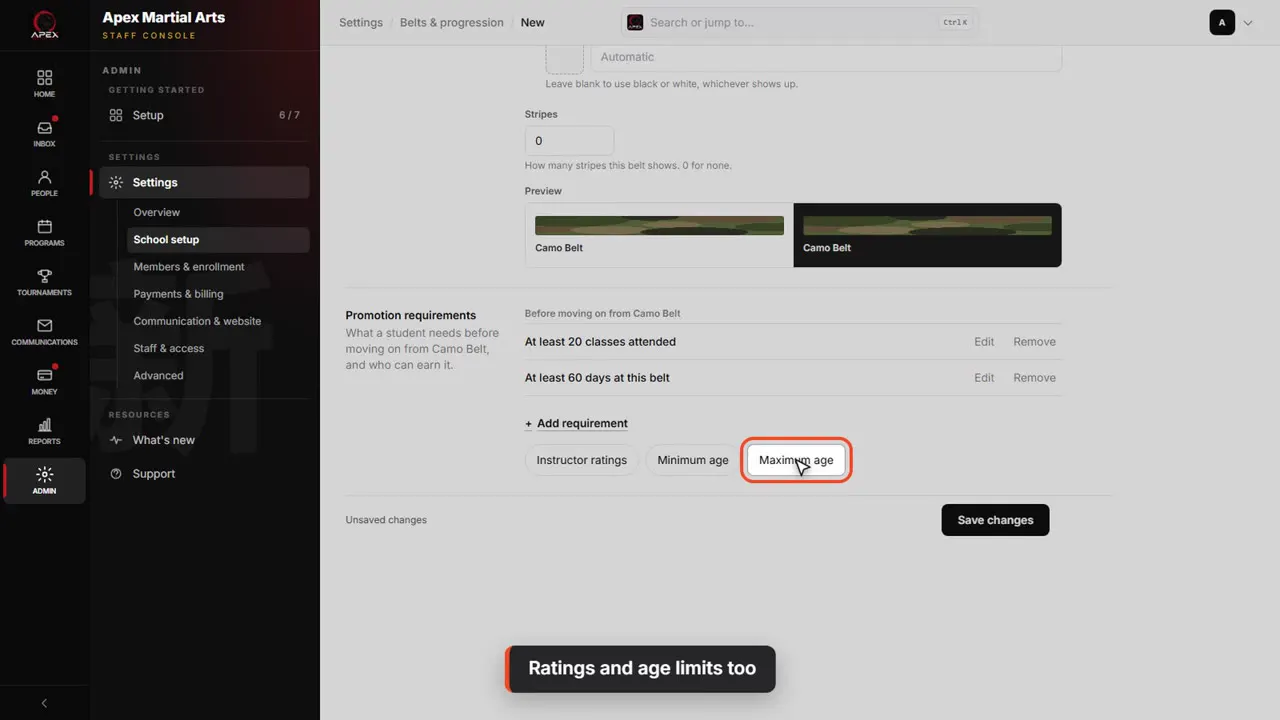
Ratings and age limits too
There are more: instructor ratings, and a minimum or maximum age, handy for kids' ladders. Add only the ones you use.
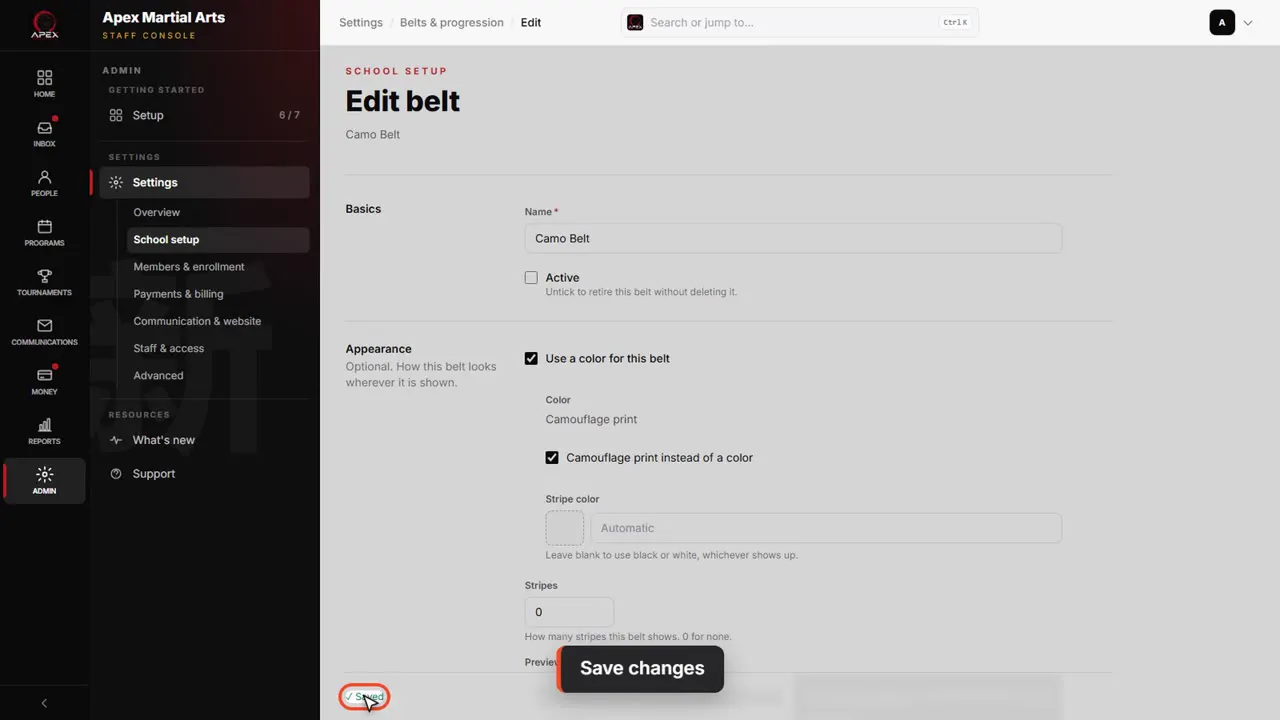
Save changes
Click Save changes, and the new belt is on your ladder. You land on its own page, where you can keep editing.
Change or remove a belt
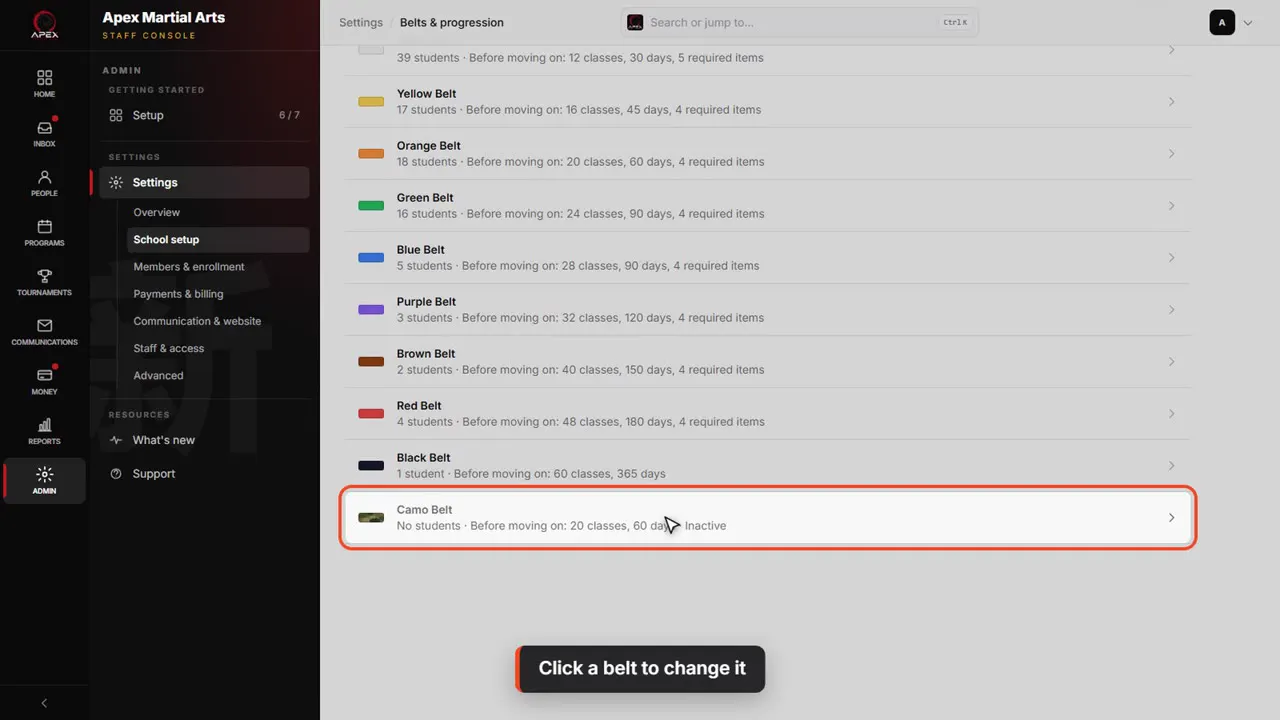
Click a belt to change it
To change a belt later, click it on the ladder. Everything you just set can be changed on its page.
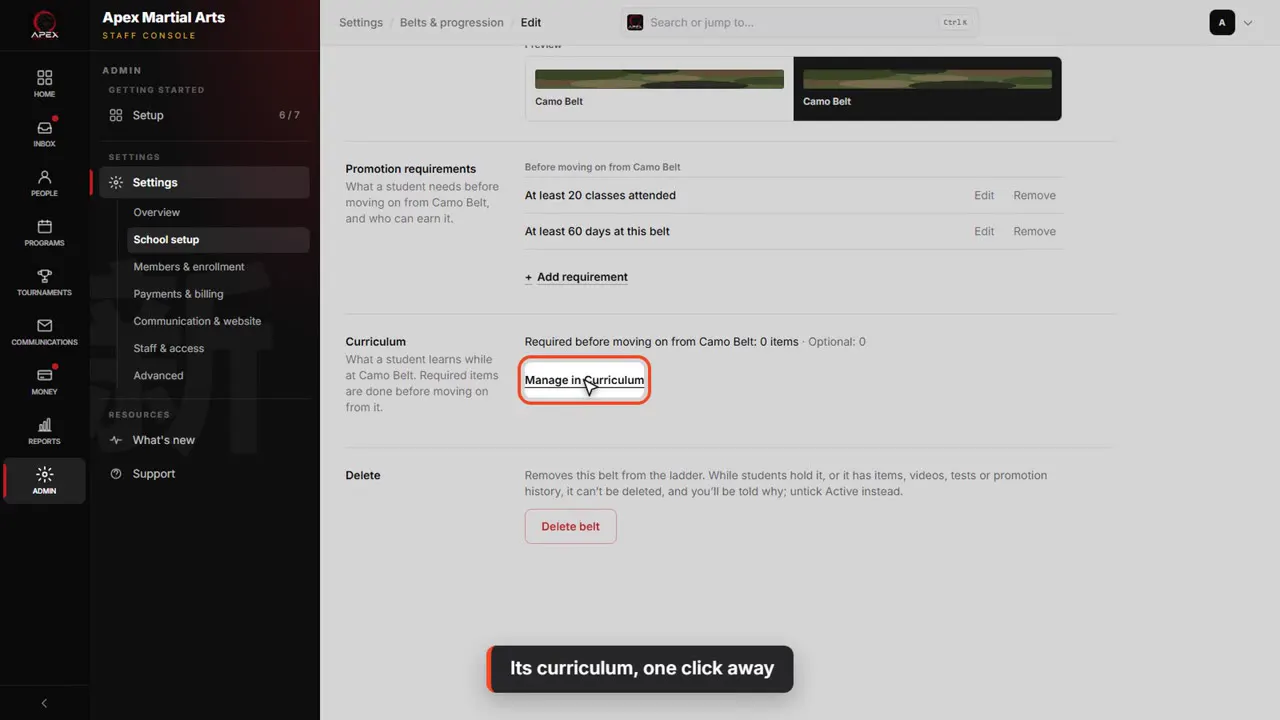
Its curriculum, one click away
Each belt's page also shows its curriculum, with a link to manage it. That's the next video.
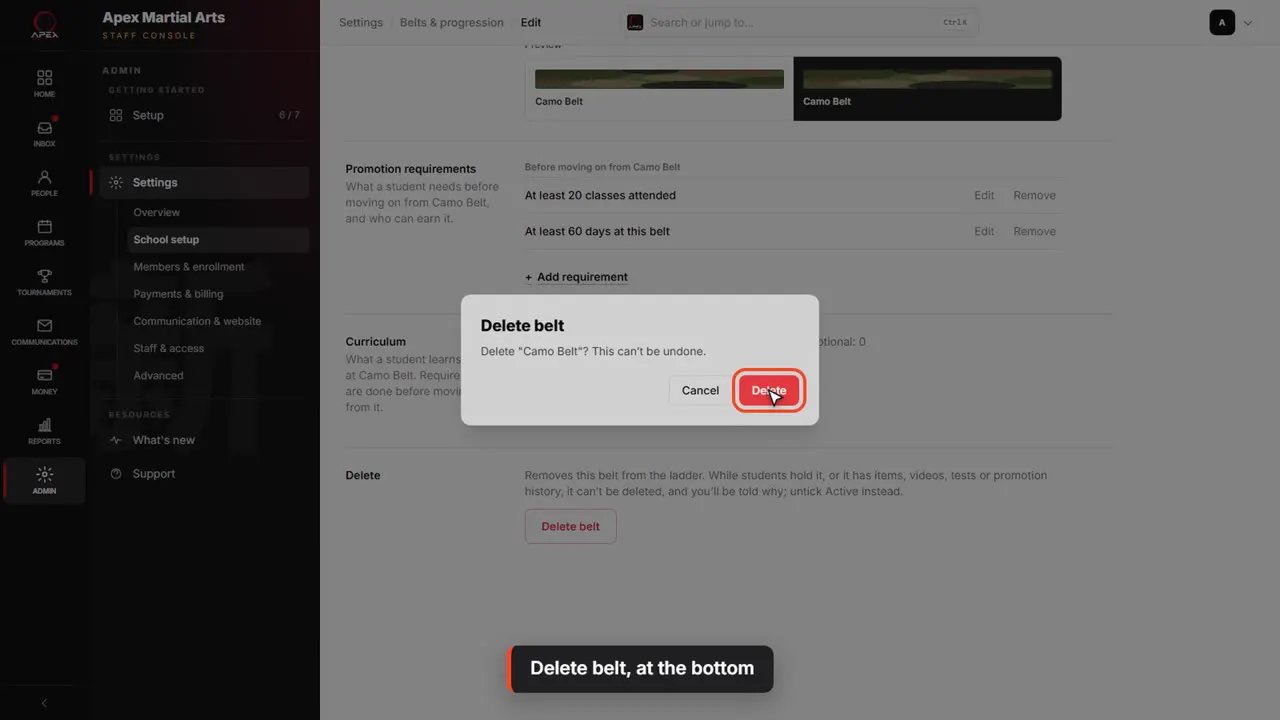
Delete belt, at the bottom
To remove a belt, click Delete belt at the bottom of its page. A belt that students hold, or with curriculum or promotion history, can't be deleted. You'll be told why, and can untick Active instead. Otherwise, click Delete to confirm.
Skill tracks
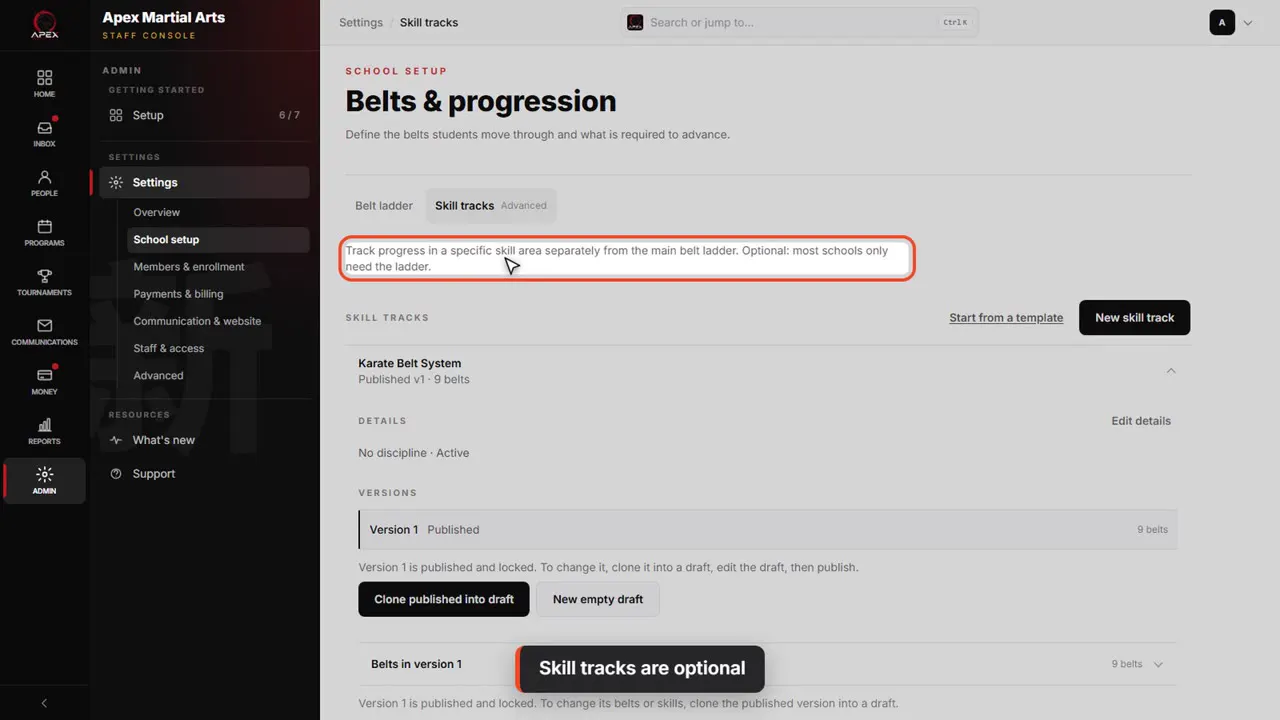
Skill tracks are optional
Next to the ladder are skill tracks, marked Advanced. They let you track a skill area separately from your belts. Most schools only need the ladder.
Shown with a demo school. Your screens show your own school, and may look a little different.
Read the whole video as text
In this video you'll set up your belt ladder: the belts your students work through, and what it takes to move up from each one.
Everything about your belts lives in Settings. Click Admin, then Settings. Belts are in the first group, School setup.
School setup holds the structure of your school. Three of these are about progression: disciplines, belts and progression, and curriculum. This video covers the first two.
A discipline is a style you teach. Apex teaches karate. Each discipline has its own belt ladder and its own curriculum, so a school that also teaches jiu-jitsu keeps the two apart.
Starting from scratch? The fastest way in is starter content. You'll find it under Settings, then Advanced, then Starter content.
Each one is a ready-made ladder for a style, like ten-belt karate, Brazilian jiu-jitsu or taekwondo, with its curriculum and skill categories. Click one to see what it holds. Let's look at jiu-jitsu.
Before anything changes, you see exactly what it will add: a new jiu-jitsu discipline, its five belts and its curriculum. And what it won't touch. Nothing you already have is overwritten.
Happy with it? Click Add this starter content, then Yes, add it. You can rename or turn off anything afterwards. Apex doesn't teach jiu-jitsu, so we'll leave this one.
Your ladder is in School setup, under Belts and progression. Belts are listed from first to most senior, each with its color.
Under each belt is a summary: how many students hold it, then what they need before moving on: the classes and days at the belt, and how many curriculum items are required. A yellow belt needs sixteen classes and forty-five days.
To change the order, click Reorder, then use the arrows to move a belt up or down. Each move saves right away, so there is nothing to save afterwards.
Click Done when the order looks right.
To add a belt, click New belt. It goes on the end of the ladder. Let's add a camo belt.
Give it a name. If you teach more than one style, you also pick which ladder it joins.
We'll untick Active, so nobody can be promoted into it while it's being set up. Tick it again when it's ready.
Now the look. Pick a color, or click Two-tone, camouflage or stripe color for more. Add a second color for a two-tone belt, or tick Camouflage print. The preview shows exactly how it will look.
Next, the requirements. Click Add requirement and pick Minimum classes. Type twenty, then click Done: twenty classes at this belt before a student shows up as ready to promote.
Add Minimum time at this belt the same way, and type sixty. That's sixty days, about two months at this belt, before a student shows up as ready.
There are more: instructor ratings, and a minimum or maximum age, handy for kids' ladders. Add only the ones you use.
Click Save changes, and the new belt is on your ladder. You land on its own page, where you can keep editing.
To change a belt later, click it on the ladder. Everything you just set can be changed on its page.
Each belt's page also shows its curriculum, with a link to manage it. That's the next video.
To remove a belt, click Delete belt at the bottom of its page. A belt that students hold, or with curriculum or promotion history, can't be deleted. You'll be told why, and can untick Active instead. Otherwise, click Delete to confirm.
Next to the ladder are skill tracks, marked Advanced. They let you track a skill area separately from your belts. Most schools only need the ladder.
That's your belt ladder. Next, we'll fill in what students learn at each belt.
Up next · Set up your school
Build your curriculum
Add the techniques students learn at each belt, mark the ones they must know, and attach videos and handouts.
Watch next: Build your curriculumBefore this: Set up your school
Stuck?
In QuickKicks, open Admin, then Support (or Help, in the simpler menu), and send us a message. Or email hello@quickkicks.app.