
For schools · Set up your school
Build your curriculum
Add the techniques students learn at each belt, mark the ones they must know, and attach videos and handouts.
Jump to a part
Step by step
The same steps as the video, with what to look for on each screen. The orange box shows where to look.
How it is organised
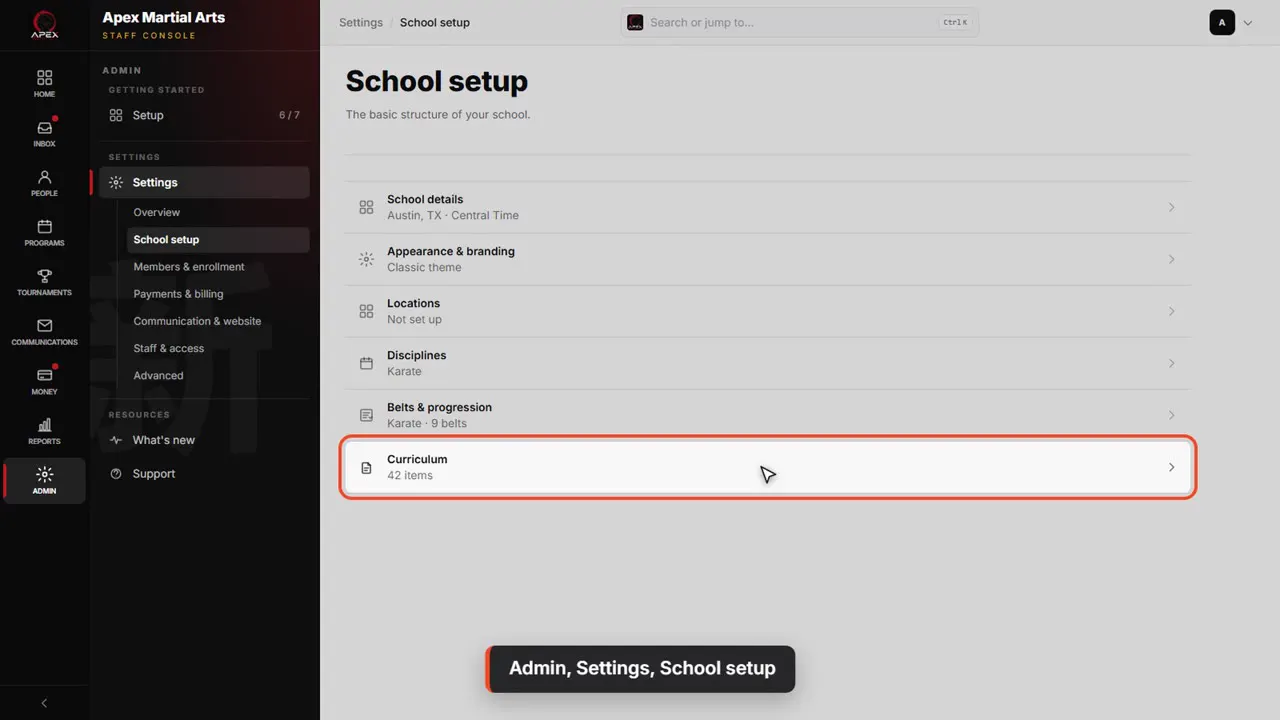
Admin, Settings, School setup
You'll find your curriculum under Admin, then Settings, then School setup, then Curriculum. Every technique, form and bit of etiquette lives here.
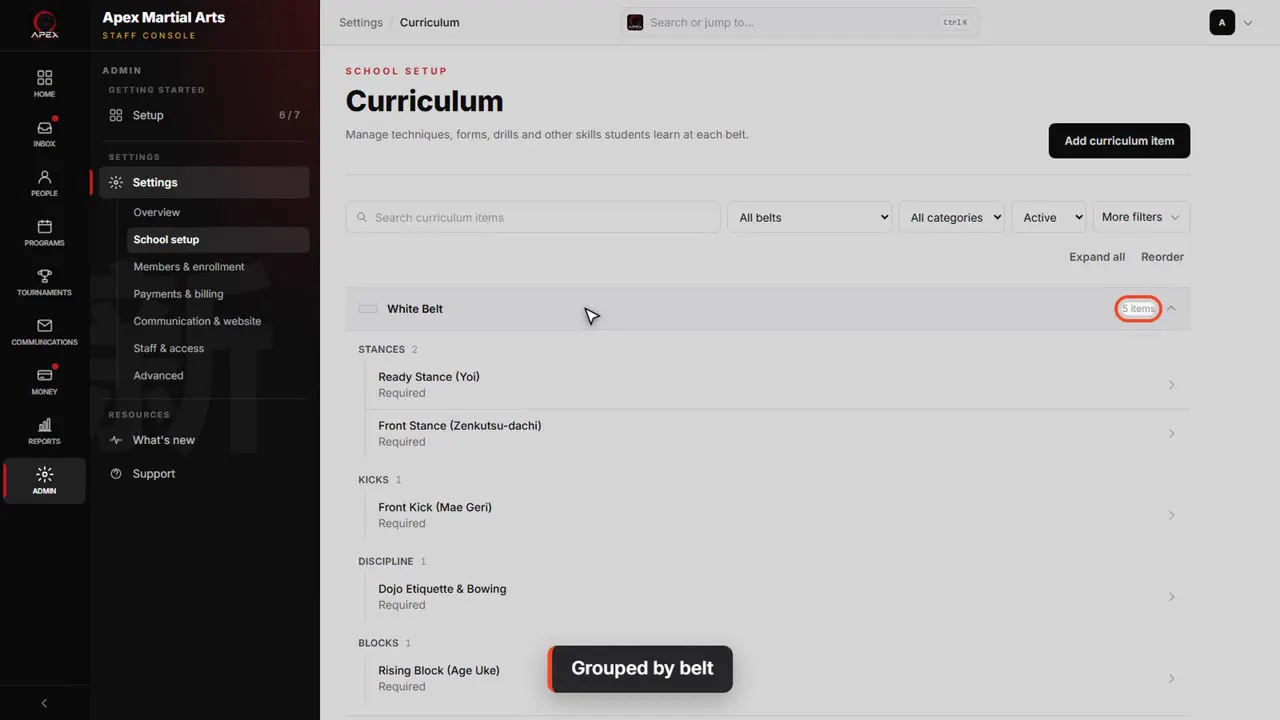
Grouped by belt
Items are grouped by the belt they belong to, and each group shows how many items it holds. Click a belt to open or close it.
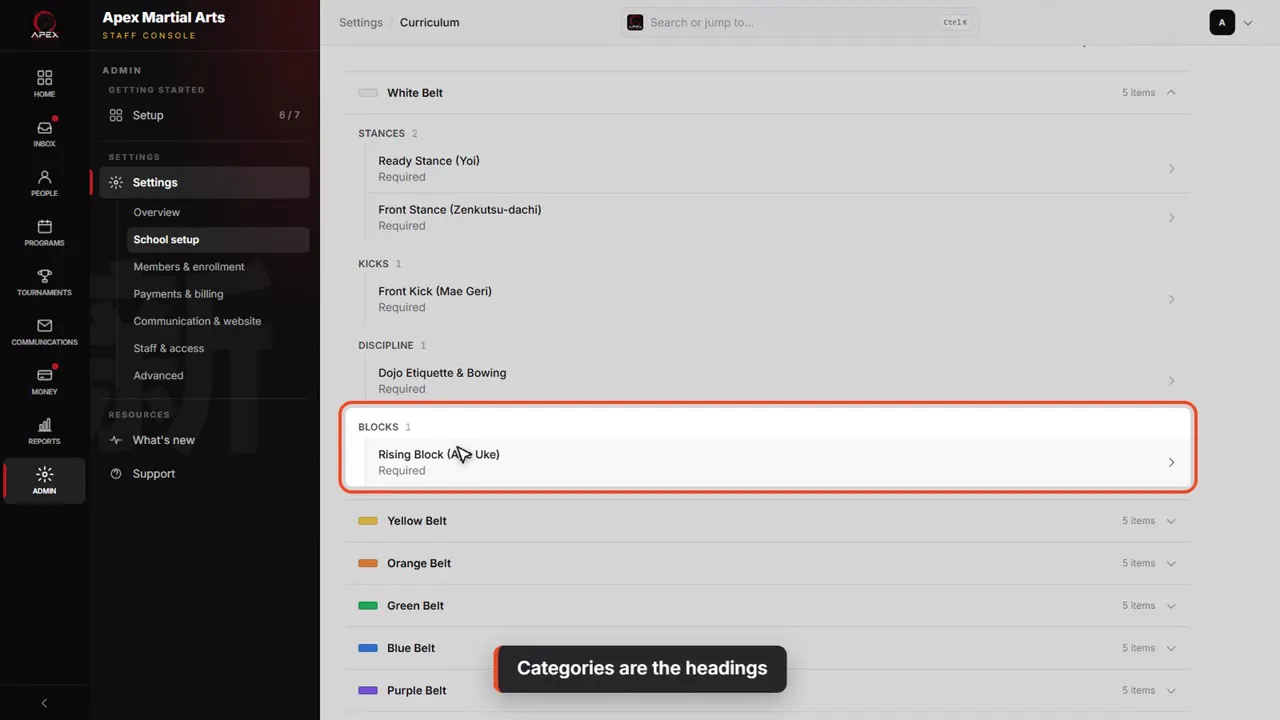
Categories are the headings
Inside a belt, items sit under their category, like stances, kicks or blocks, so a long list stays easy to scan.
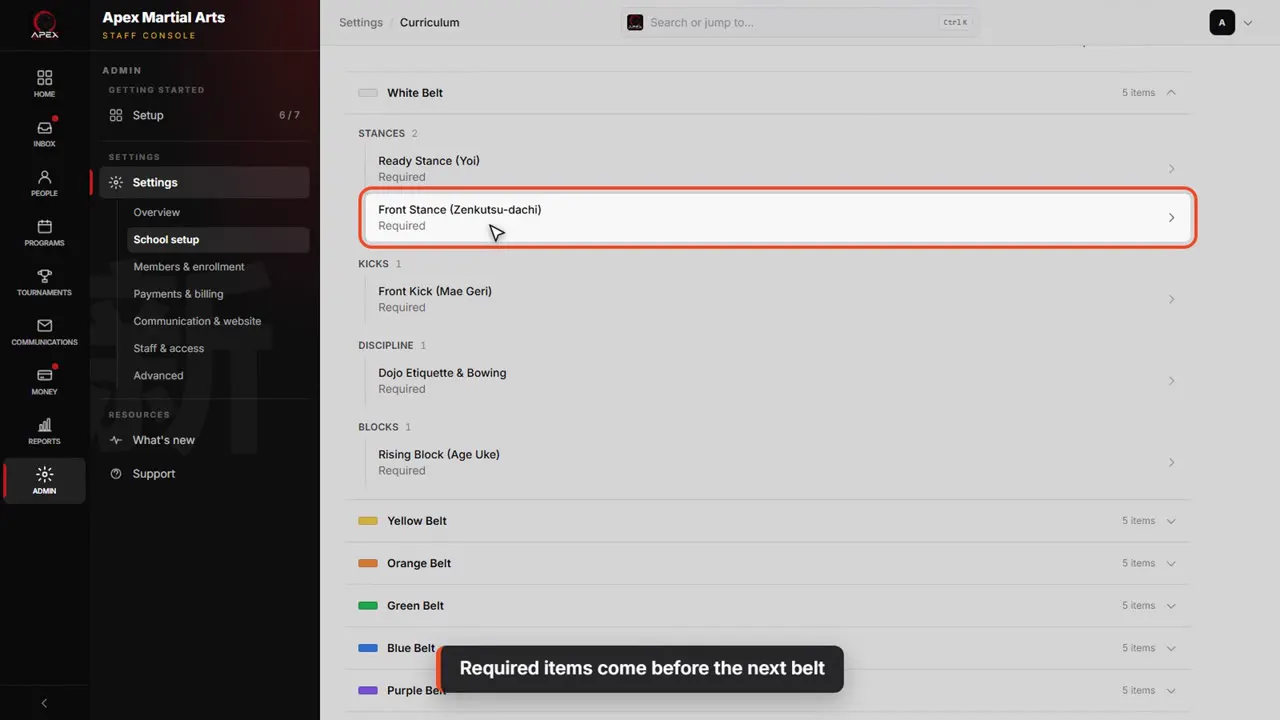
Required items come before the next belt
Under each item it says Required or Optional. Required items must be done before a student can move on from that belt and show up as ready to test.
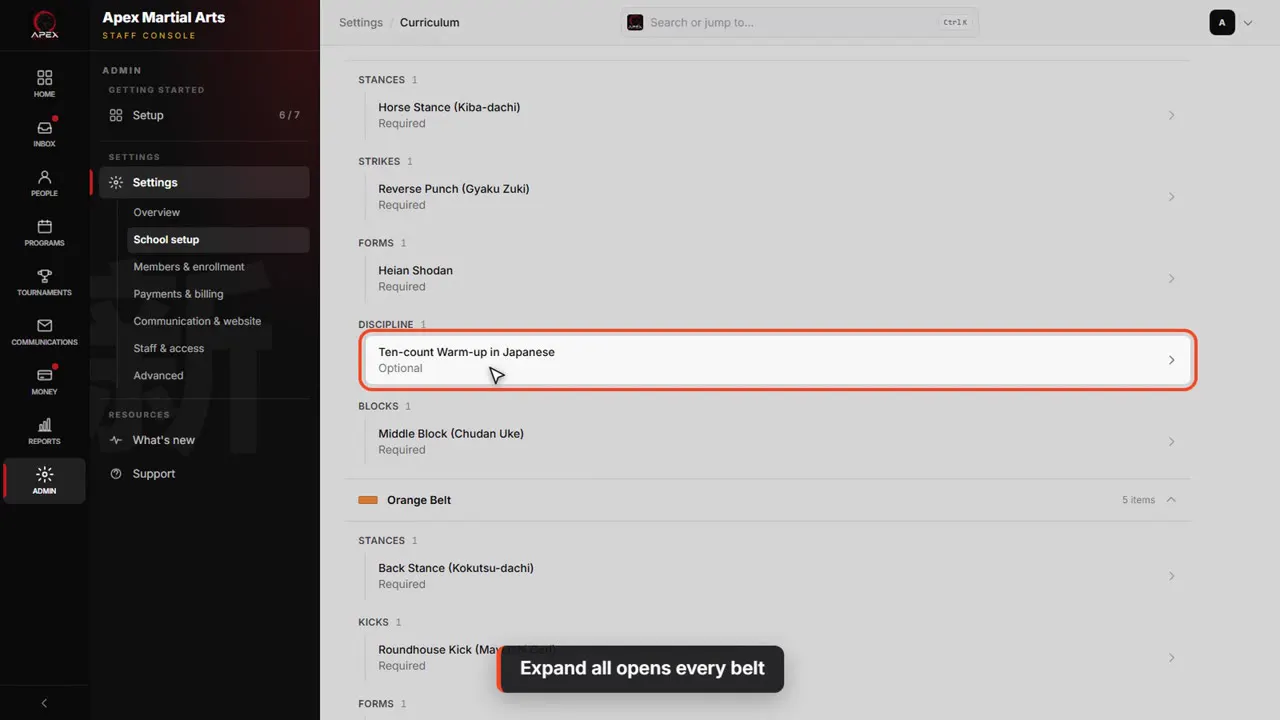
Expand all opens every belt
Expand all opens every belt at once. Here's an optional item at yellow belt. Optional items are still tracked, they just don't hold anyone back.
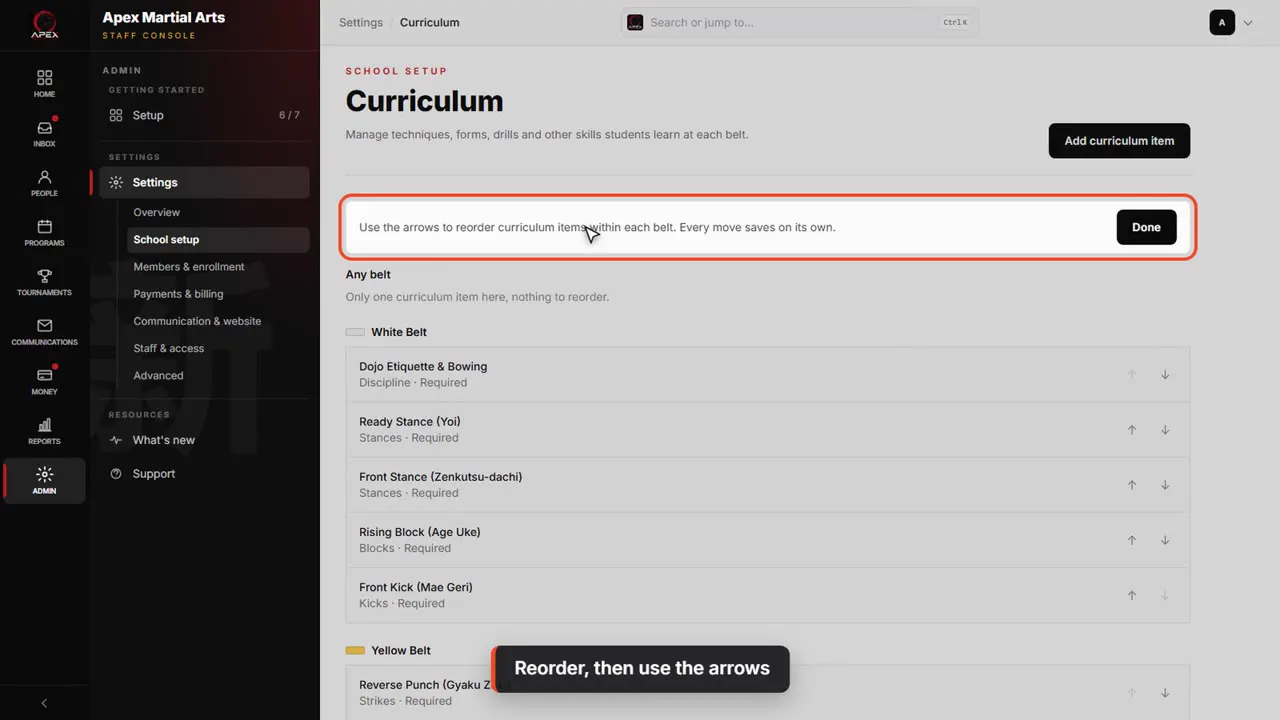
Reorder, then use the arrows
To set the teaching order, click Reorder, then use the arrows to move an item up or down within its belt. Every move saves on its own.
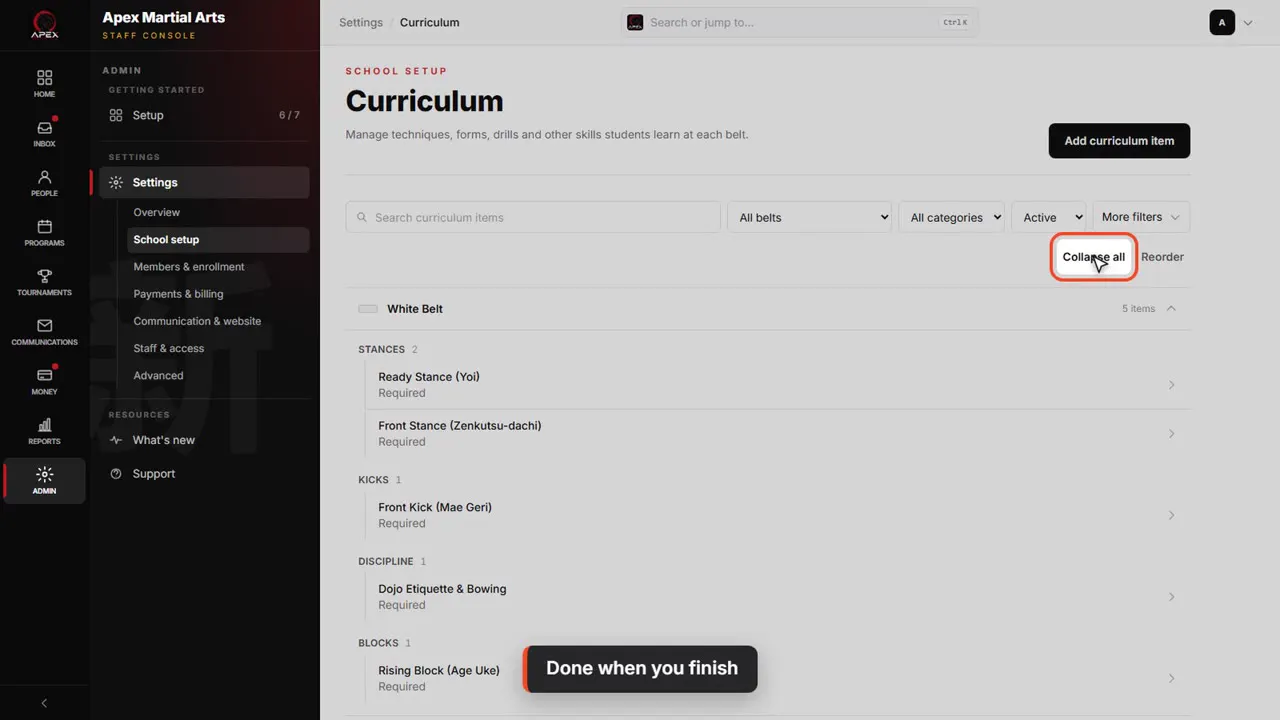
Done when you finish
Click Done when the order looks right, then Collapse all to tidy up.
Add a technique
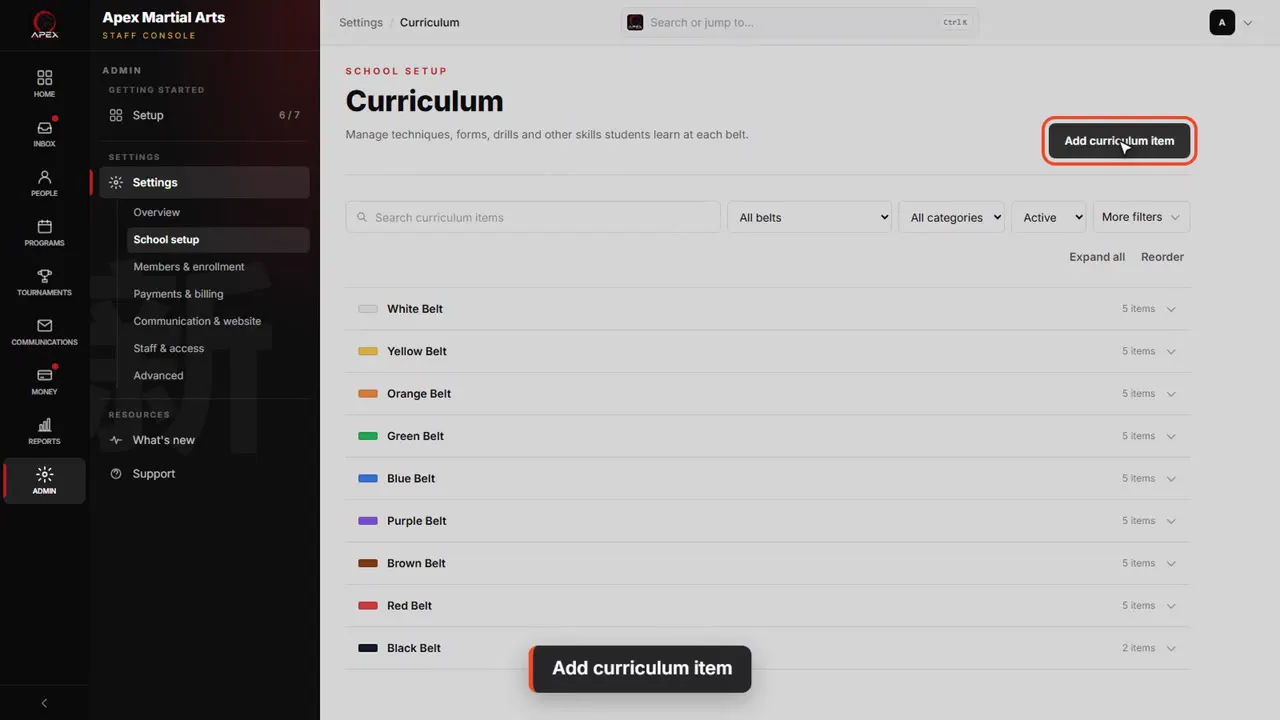
Add curriculum item
To add something new, click Add curriculum item. Let's add a spinning hook kick for brown belts.
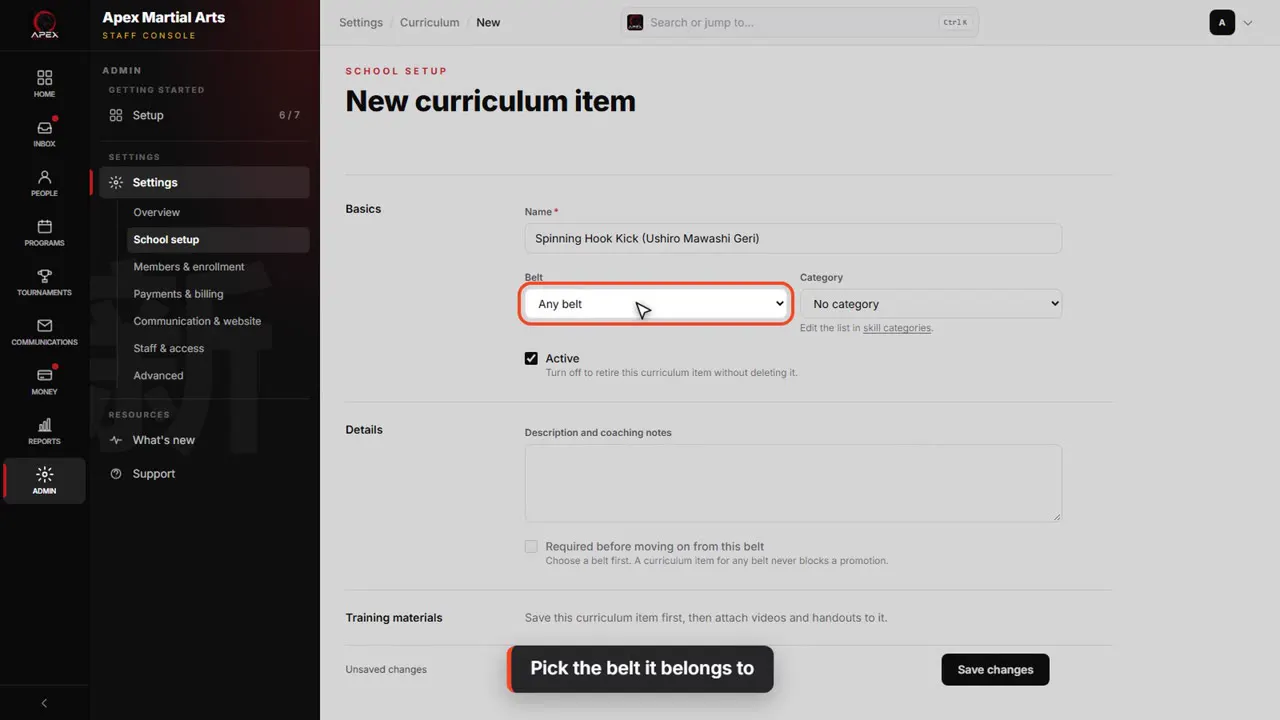
Pick the belt it belongs to
Choose the belt it belongs to. Leave it on Any belt if every student should work on it.
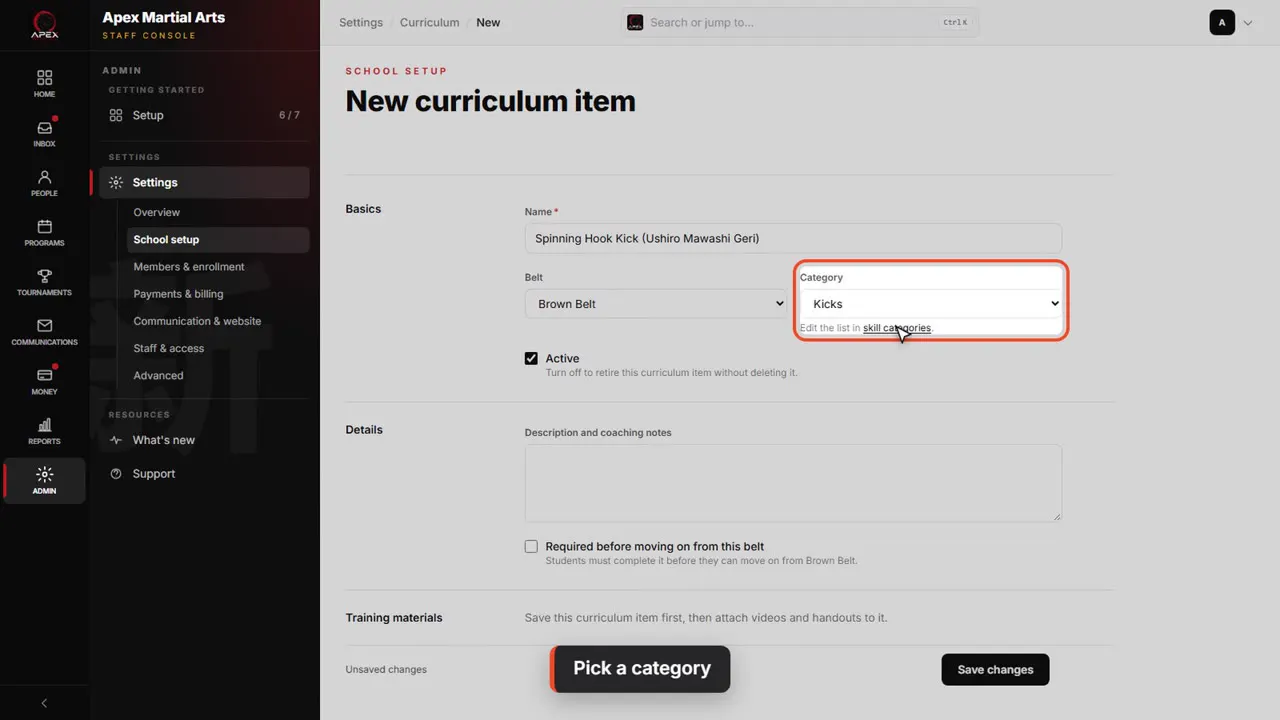
Pick a category
Pick a category from your list. The list itself is managed in Skill categories, linked right under the field.
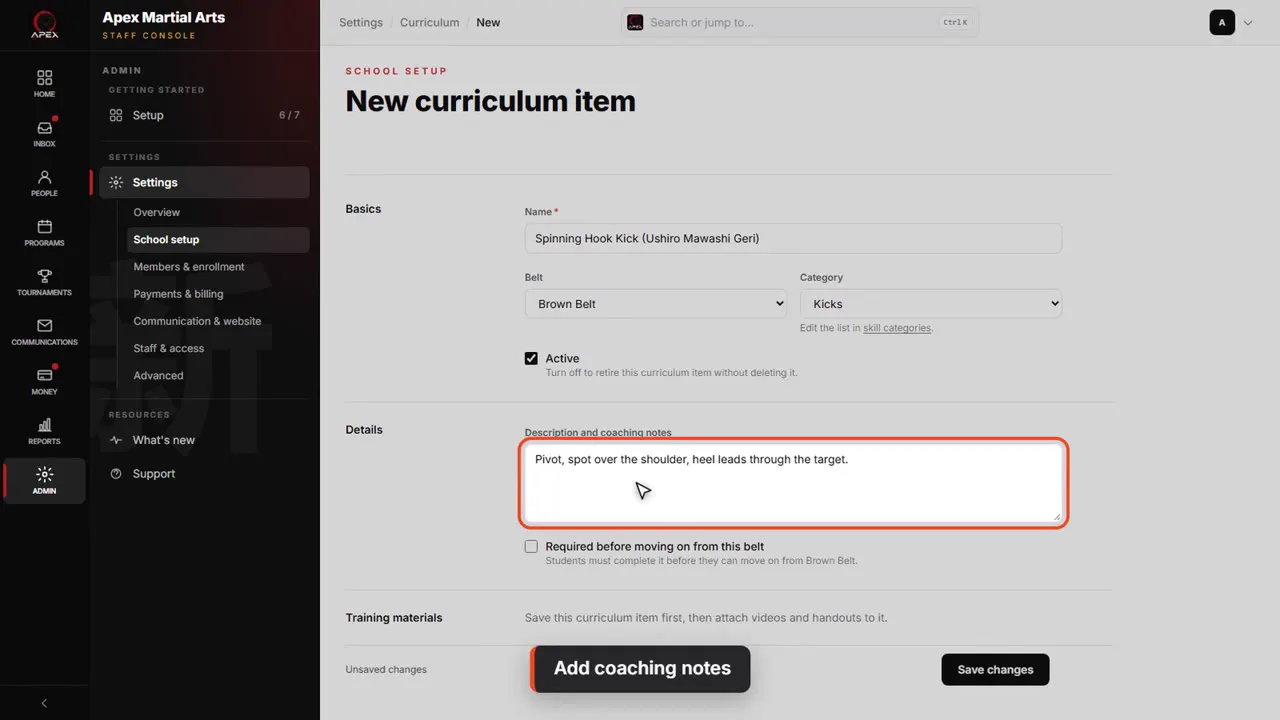
Add coaching notes
Add a description with the coaching notes instructors should see on the mat.
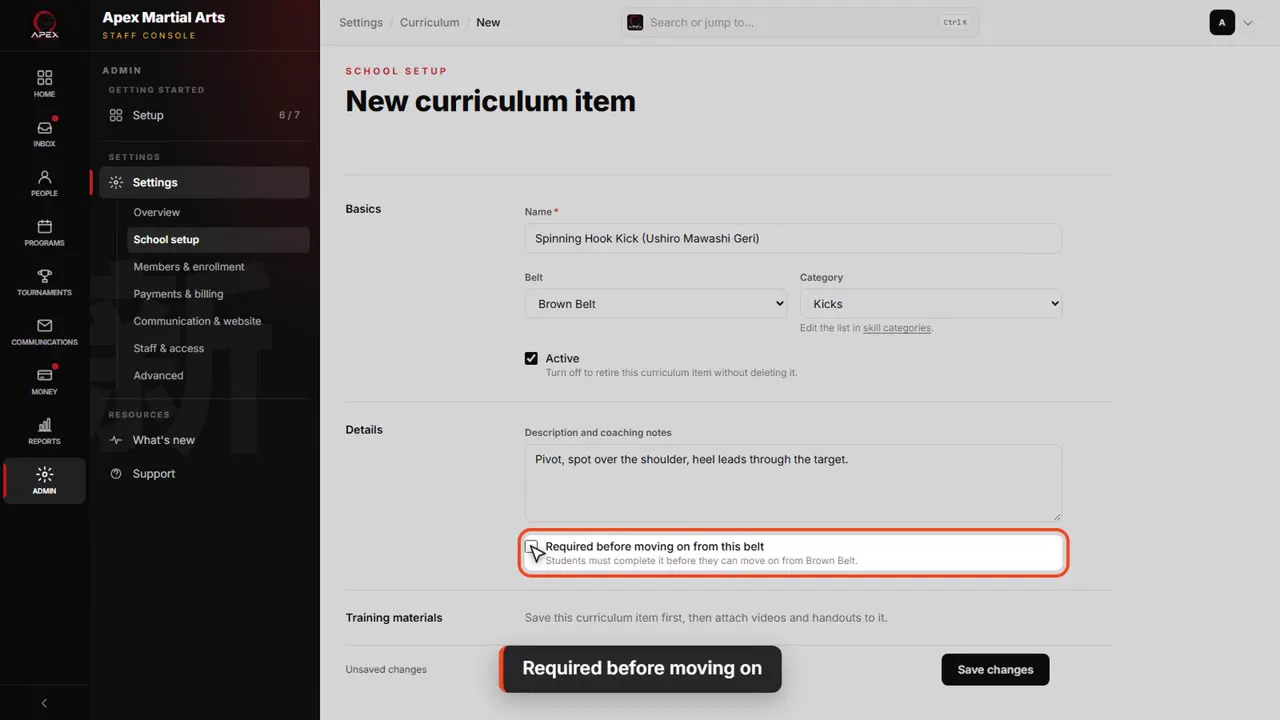
Required before moving on
Tick Required before moving on from this belt if a student must complete it before their next promotion. Items on Any belt can't be required, because they never block a promotion.
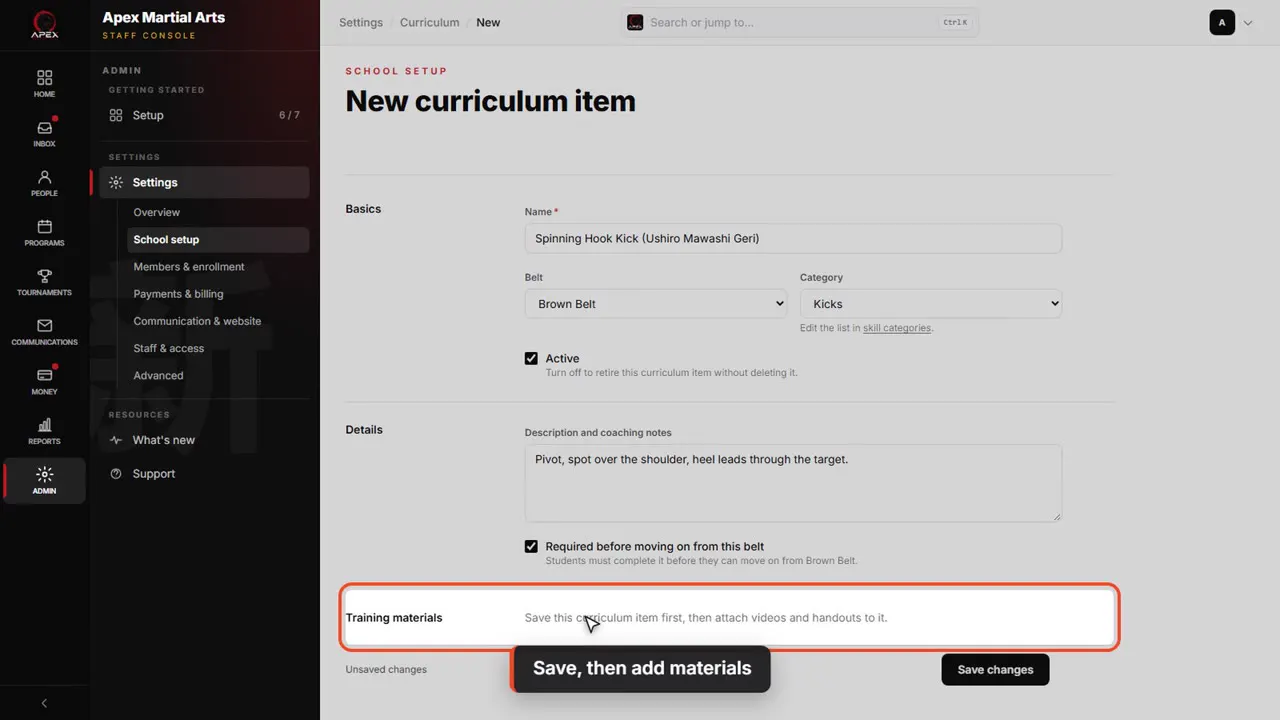
Save, then add materials
Click Save changes to add it to the list. Once it's saved, you can attach videos and handouts to it. We'll leave this one unsaved.
Videos and handouts
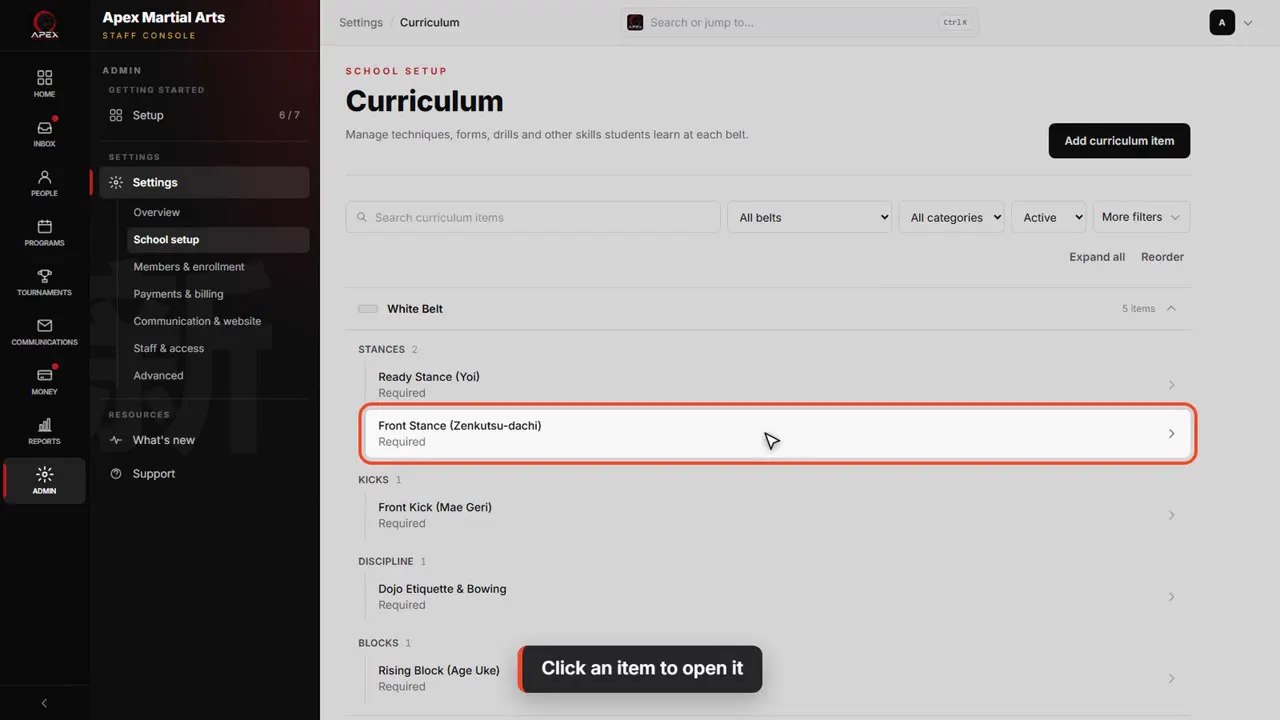
Click an item to open it
To add materials to an item you already have, click it in the list. Let's open Front Stance, at white belt.
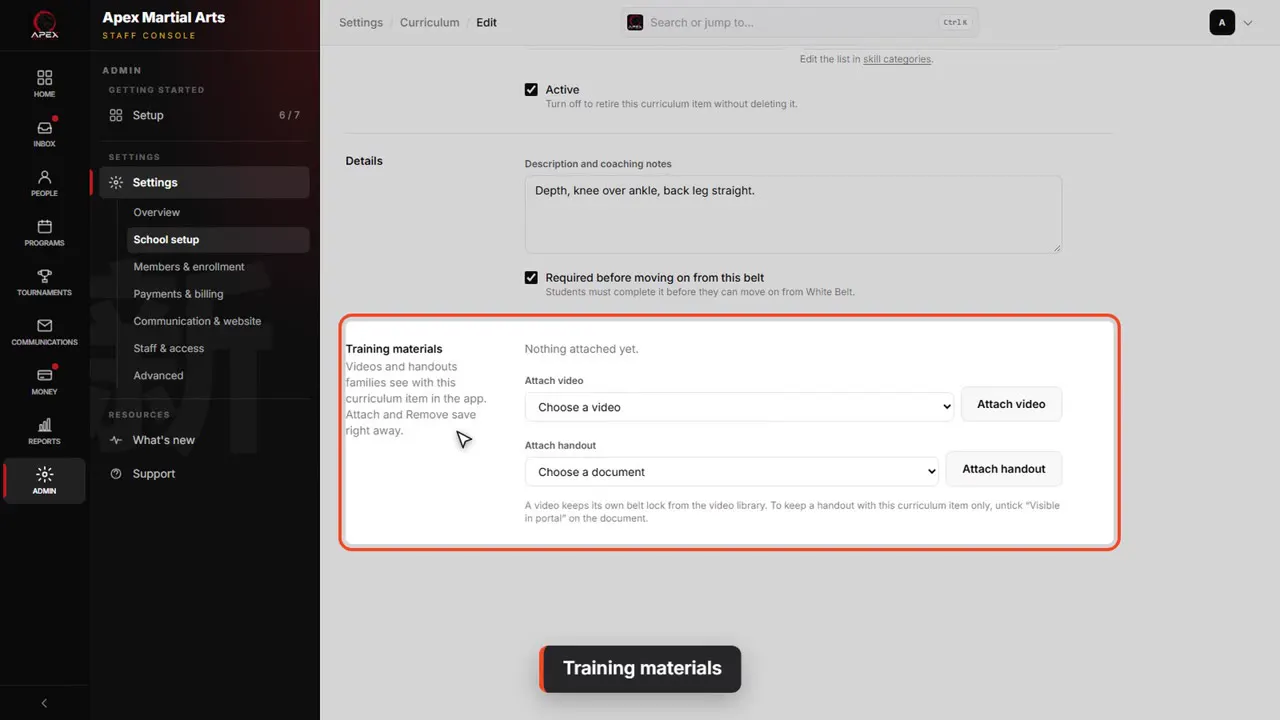
Training materials
Scroll down to Training materials. Videos and handouts you attach here show with this technique in the parent app, so students can practise at home.
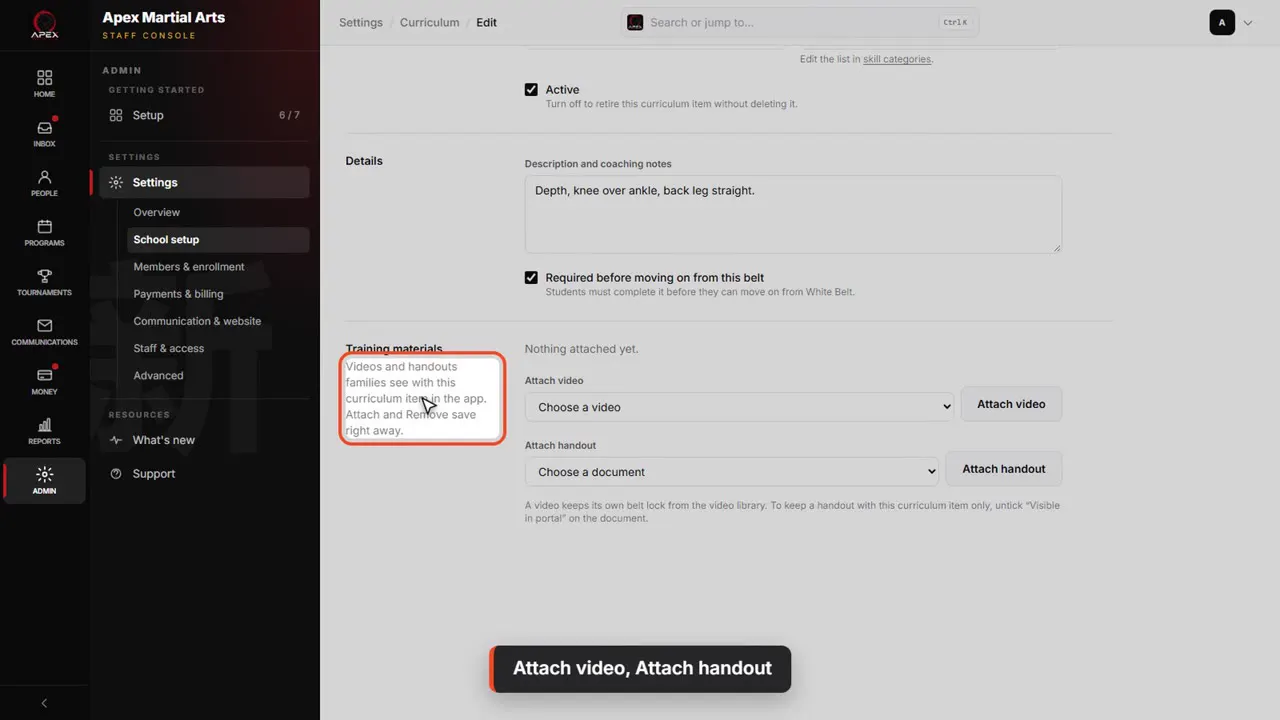
Attach video, Attach handout
Pick a video from your video library, then click Attach video. Attach handout works the same way for your documents. Both save right away.
The video library
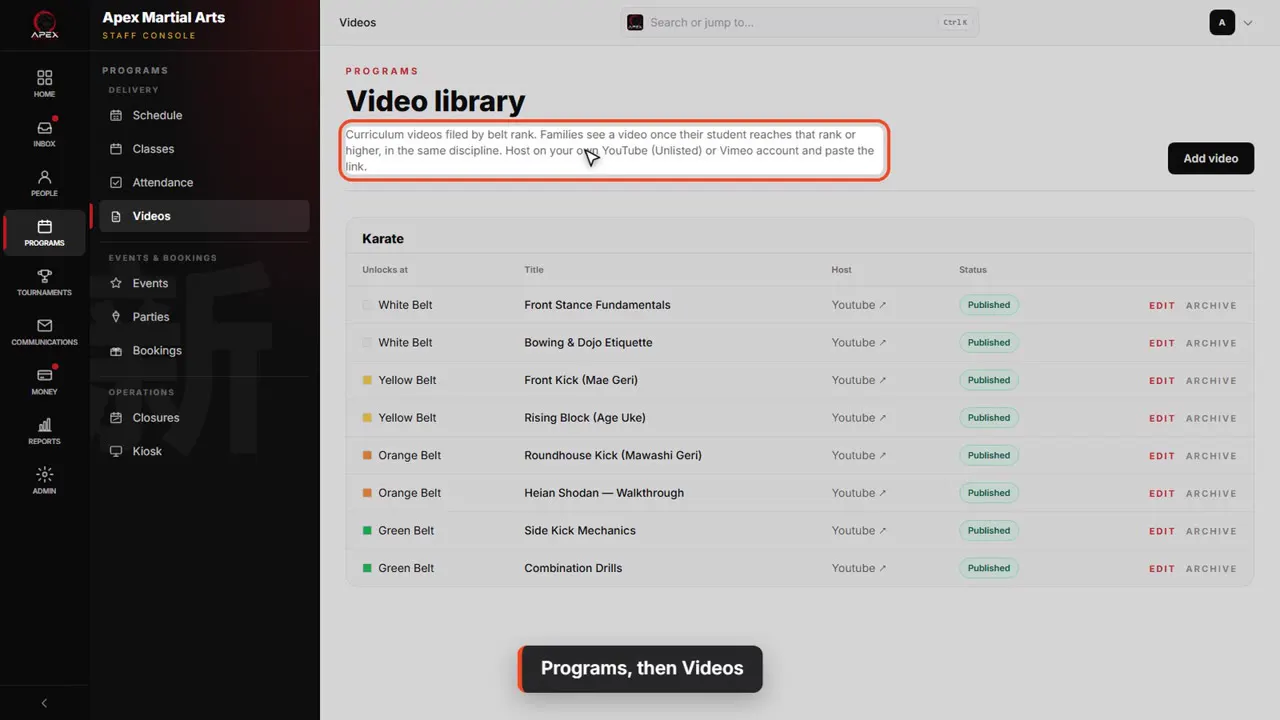
Programs, then Videos
The videos themselves live in the Video library, under Programs, then Videos. Each one unlocks when a student reaches its belt, or any belt above it.
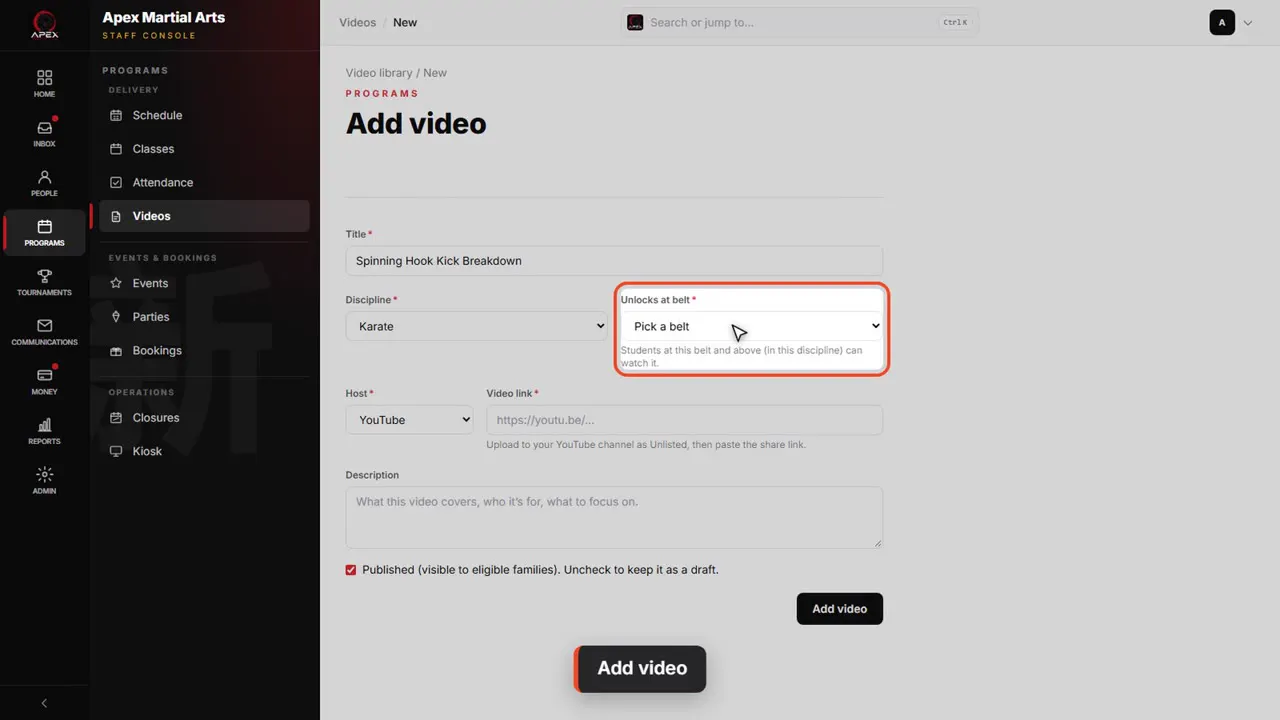
Add video
Click Add video to add one. Give it a title, then pick the belt it unlocks at. Students at that belt and above can watch it.
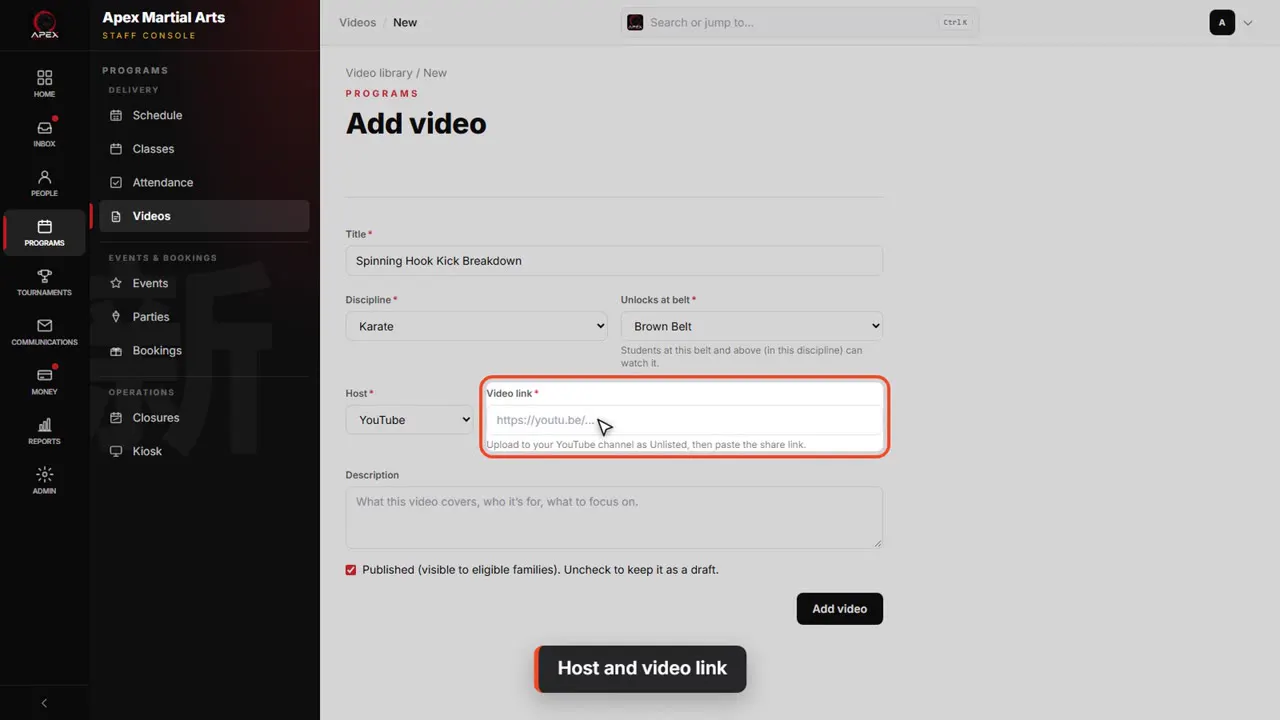
Host and video link
Choose where it is hosted, YouTube or Vimeo, and paste the link. Upload it to your own channel as Unlisted first.
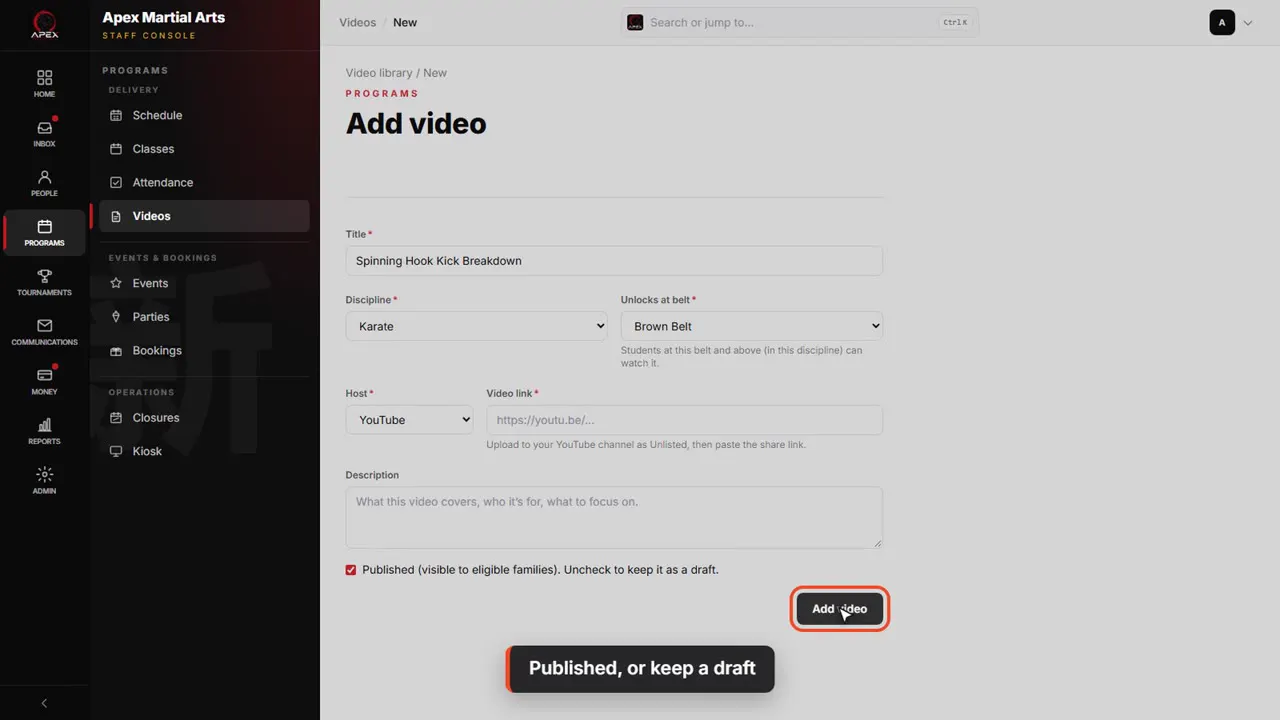
Published, or keep a draft
Leave Published ticked so eligible families can watch it, or untick it to keep a draft. Then click Add video.
Shown with a demo school. Your screens show your own school, and may look a little different.
Read the whole video as text
Your curriculum is what students learn at each belt. In this video you'll see how it's organised, add a new technique, and attach videos families can practise with at home.
You'll find your curriculum under Admin, then Settings, then School setup, then Curriculum. Every technique, form and bit of etiquette lives here.
Items are grouped by the belt they belong to, and each group shows how many items it holds. Click a belt to open or close it.
Inside a belt, items sit under their category, like stances, kicks or blocks, so a long list stays easy to scan.
Under each item it says Required or Optional. Required items must be done before a student can move on from that belt and show up as ready to test.
Expand all opens every belt at once. Here's an optional item at yellow belt. Optional items are still tracked, they just don't hold anyone back.
To set the teaching order, click Reorder, then use the arrows to move an item up or down within its belt. Every move saves on its own.
Click Done when the order looks right, then Collapse all to tidy up.
To add something new, click Add curriculum item. Let's add a spinning hook kick for brown belts.
Choose the belt it belongs to. Leave it on Any belt if every student should work on it.
Pick a category from your list. The list itself is managed in Skill categories, linked right under the field.
Add a description with the coaching notes instructors should see on the mat.
Tick Required before moving on from this belt if a student must complete it before their next promotion. Items on Any belt can't be required, because they never block a promotion.
Click Save changes to add it to the list. Once it's saved, you can attach videos and handouts to it. We'll leave this one unsaved.
To add materials to an item you already have, click it in the list. Let's open Front Stance, at white belt.
Scroll down to Training materials. Videos and handouts you attach here show with this technique in the parent app, so students can practise at home.
Pick a video from your video library, then click Attach video. Attach handout works the same way for your documents. Both save right away.
The videos themselves live in the Video library, under Programs, then Videos. Each one unlocks when a student reaches its belt, or any belt above it.
Click Add video to add one. Give it a title, then pick the belt it unlocks at. Students at that belt and above can watch it.
Choose where it is hosted, YouTube or Vimeo, and paste the link. Upload it to your own channel as Unlisted first.
Leave Published ticked so eligible families can watch it, or untick it to keep a draft. Then click Add video.
That's your curriculum. Next, we'll track it on the mat during class.
Up next · Set up your school
Set your programs and prices
See what families pay for each program, how starter bundles and price changes work, and where family discounts and coupons live.
Watch next: Set your programs and pricesBefore this: Set up your belts
Stuck?
In QuickKicks, open Admin, then Support (or Help, in the simpler menu), and send us a message. Or email hello@quickkicks.app.