
For schools · Money
Take a payment or give a refund
Charge a card, write down a cash or check payment, and give money back in full or in part.
Jump to a part
Step by step
The same steps as the video, with what to look for on each screen. The orange box shows where to look.
Where to take a payment
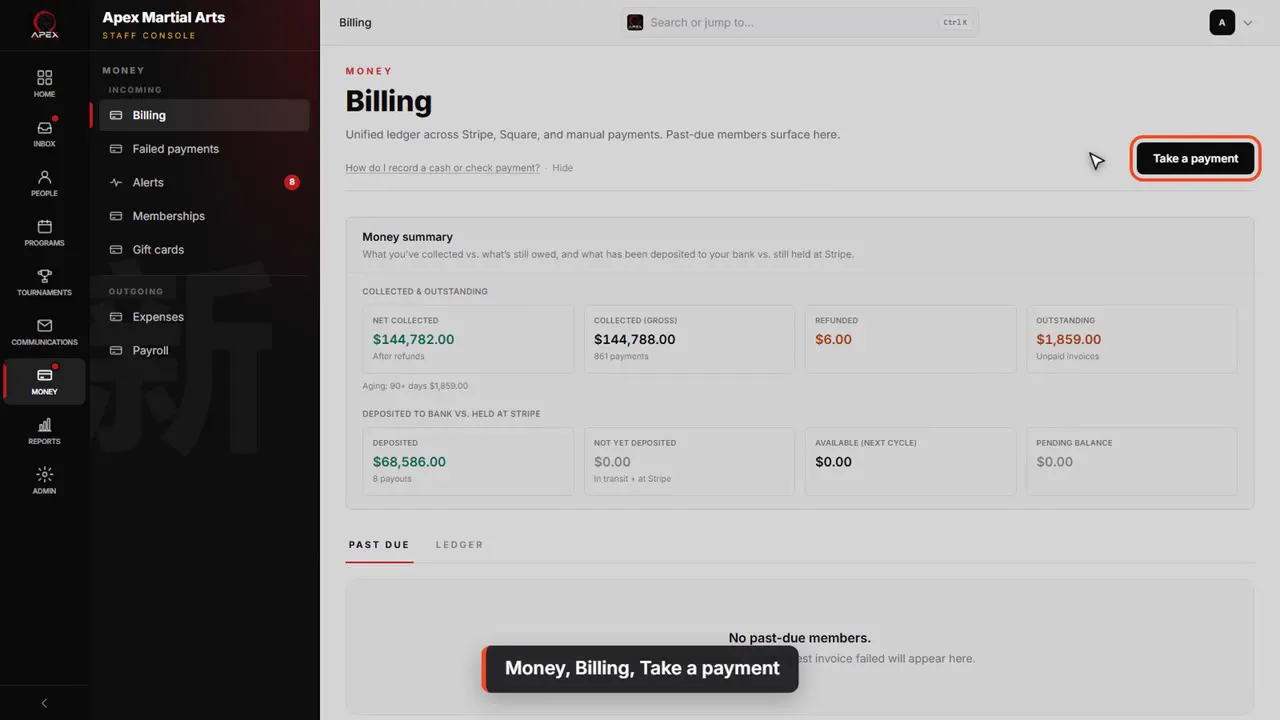
Money, Billing, Take a payment
To take a payment, open Money, then Billing, and click Take a payment.
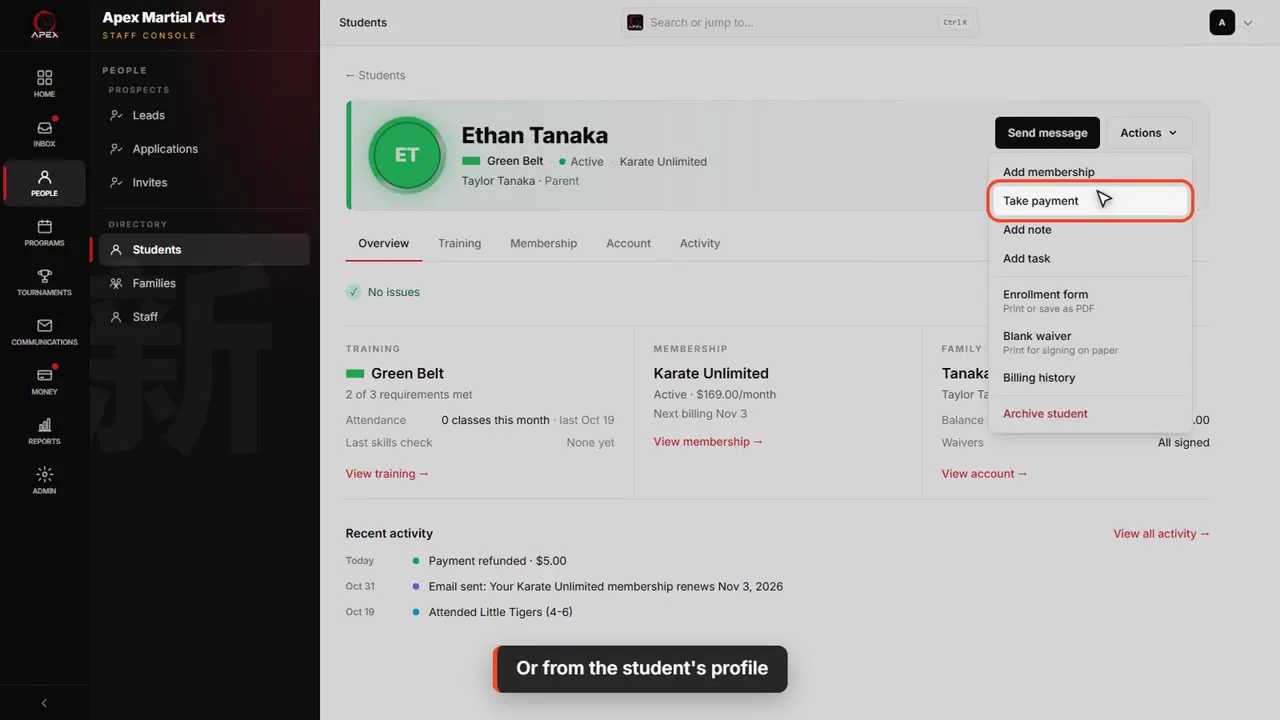
Or from the student's profile
Quicker still: on a student's profile, open Actions and pick Take payment.
The form
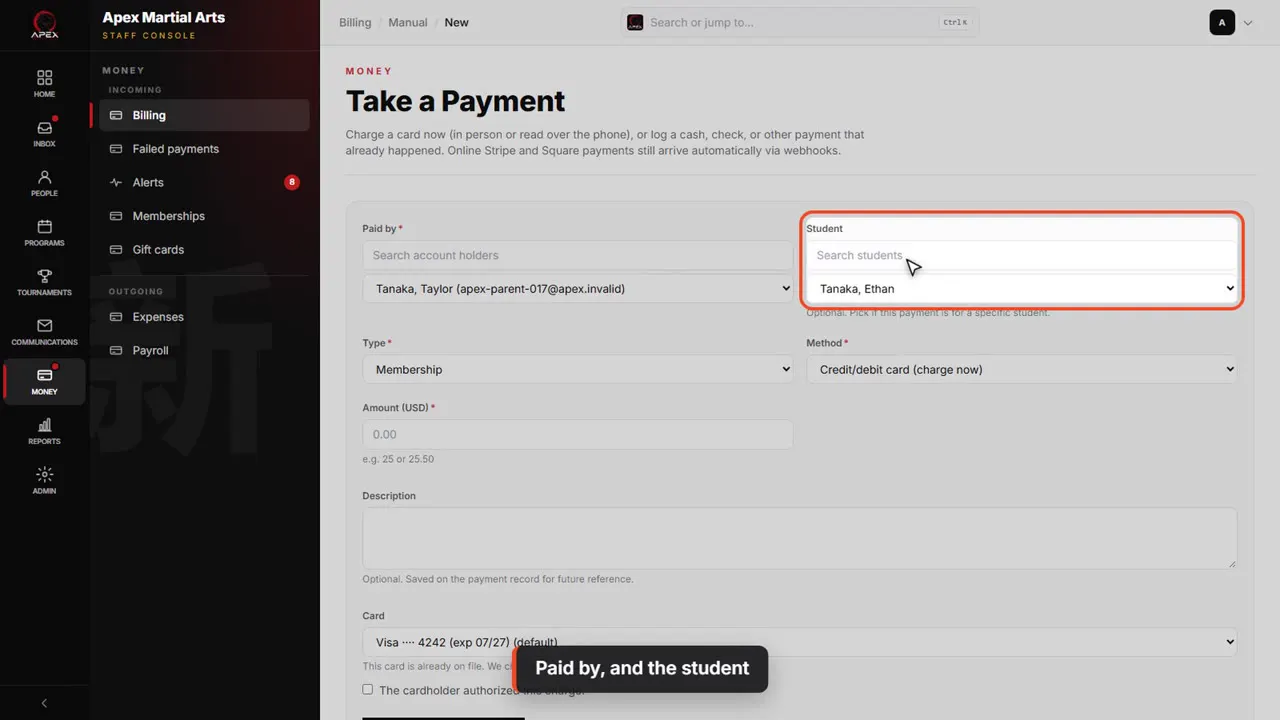
Paid by, and the student
The family is already filled in. Paid by is the account holder, the parent who pays. Student is optional, for a payment that belongs to one child.
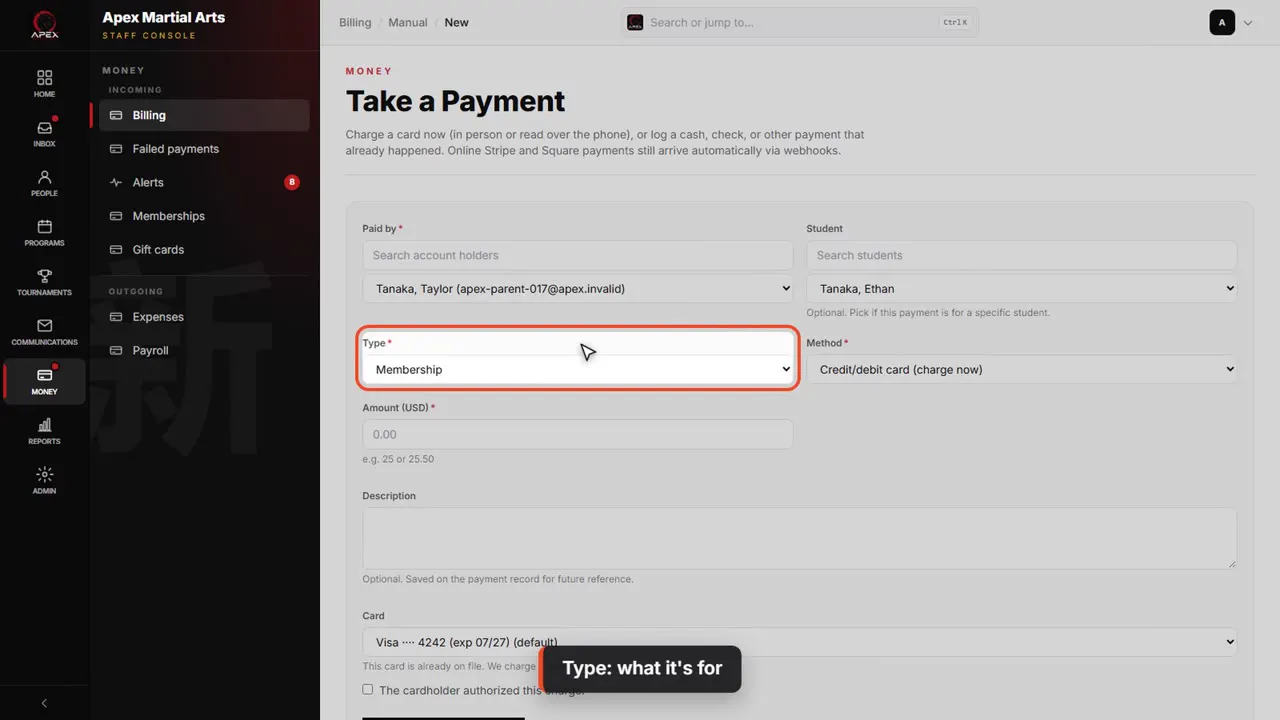
Type: what it's for
Type says what the payment is for: a membership, retail, an event, a test fee, a private lesson, or other. This one is retail.
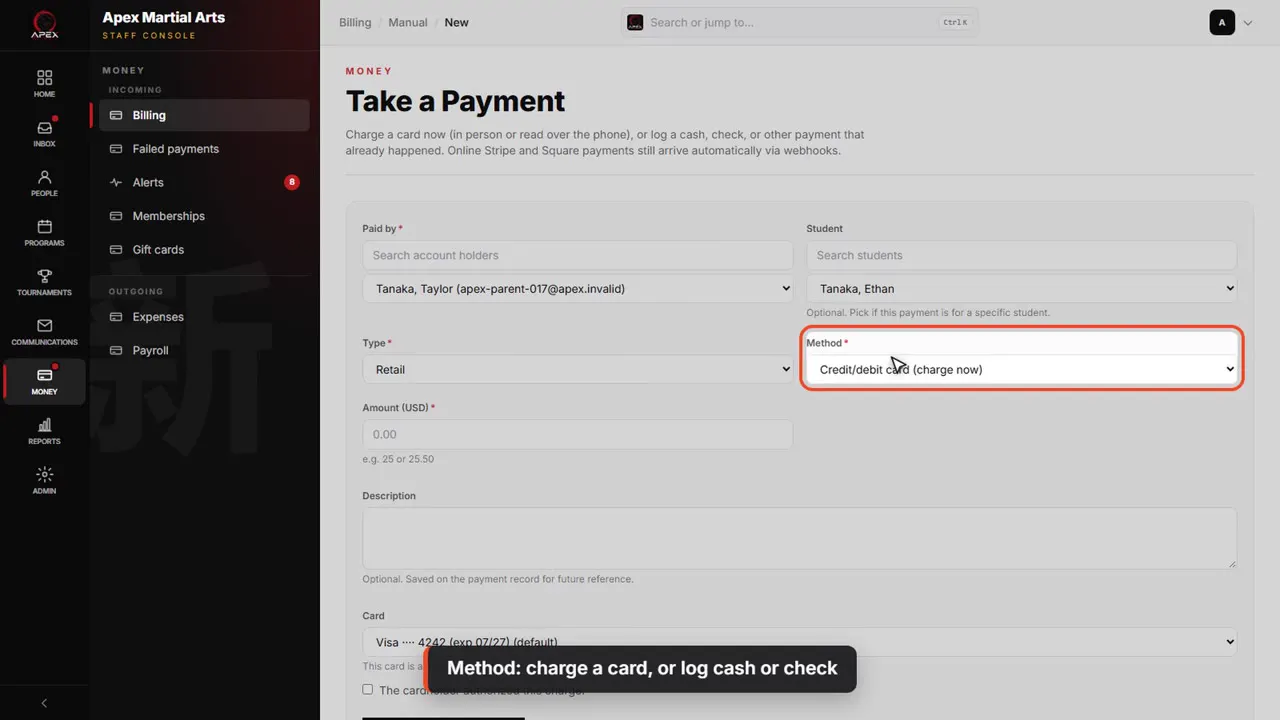
Method: charge a card, or log cash or check
Method matters most. Credit or debit card charges a card right now. Cash, check and other only record money you already have in hand.
Charge a card
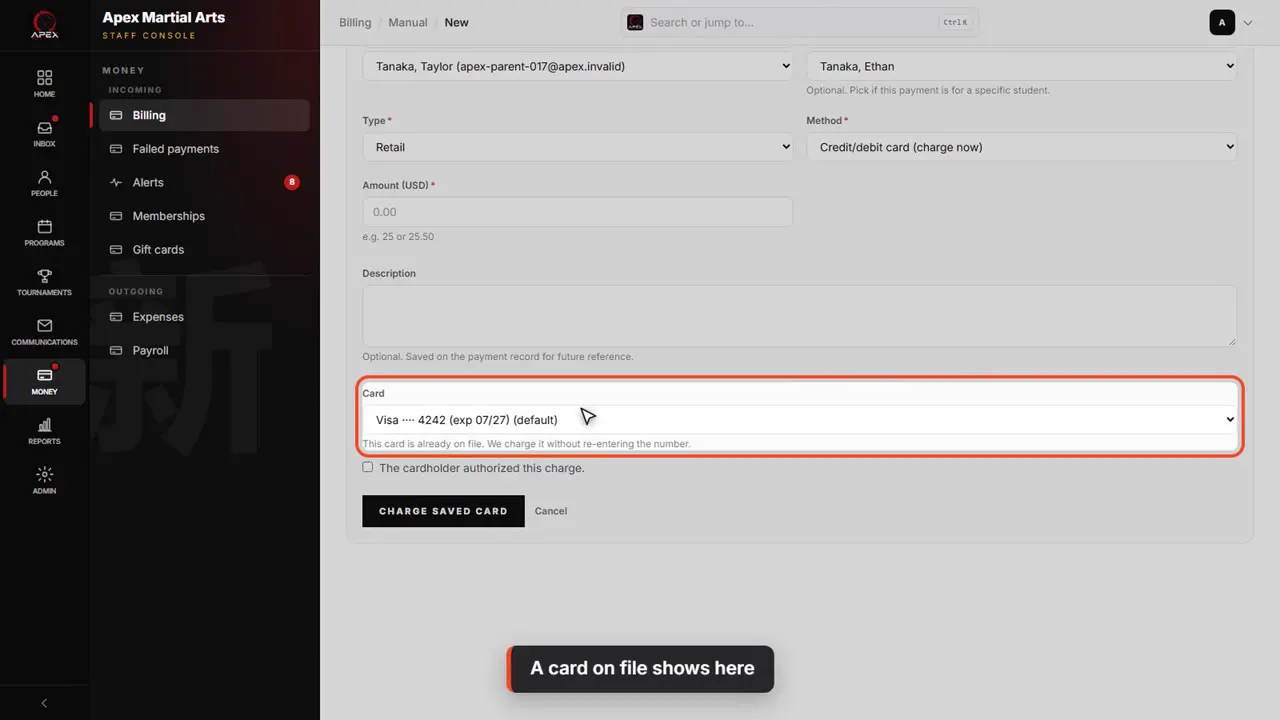
A card on file shows here
With card picked, a card the family already has on file shows here. We charge it without typing the number.
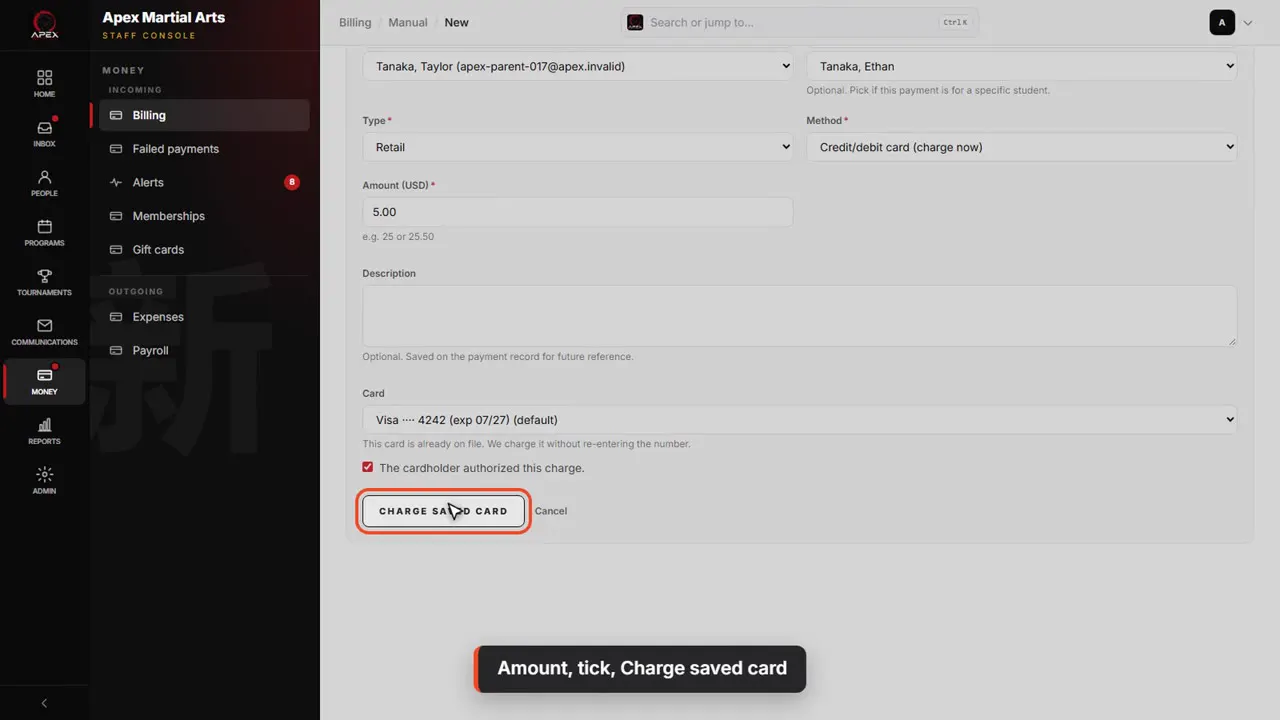
Amount, tick, Charge saved card
Type the amount, tick The cardholder authorized this charge, and click Charge saved card. The family is emailed a receipt.
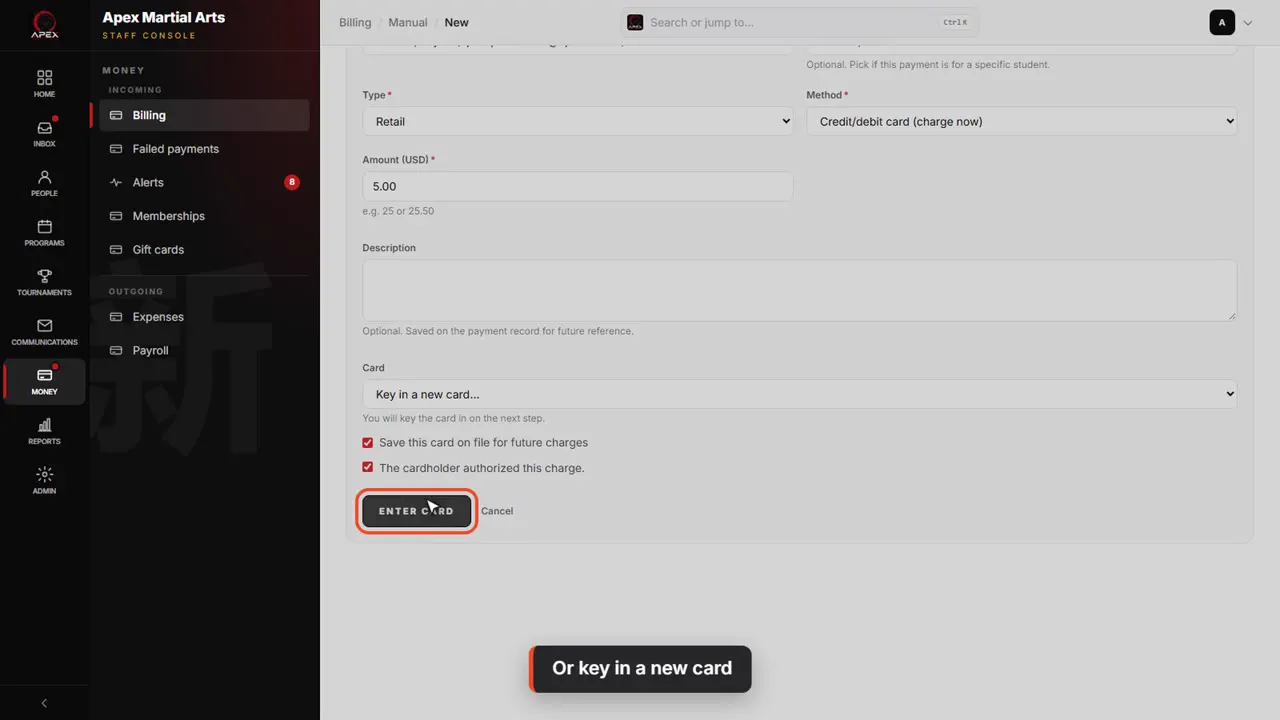
Or key in a new card
For a different card, pick Key in a new card. Leave Save this card on file ticked to keep it for next time, then click Enter card and type it into the secure form.
Cash or check
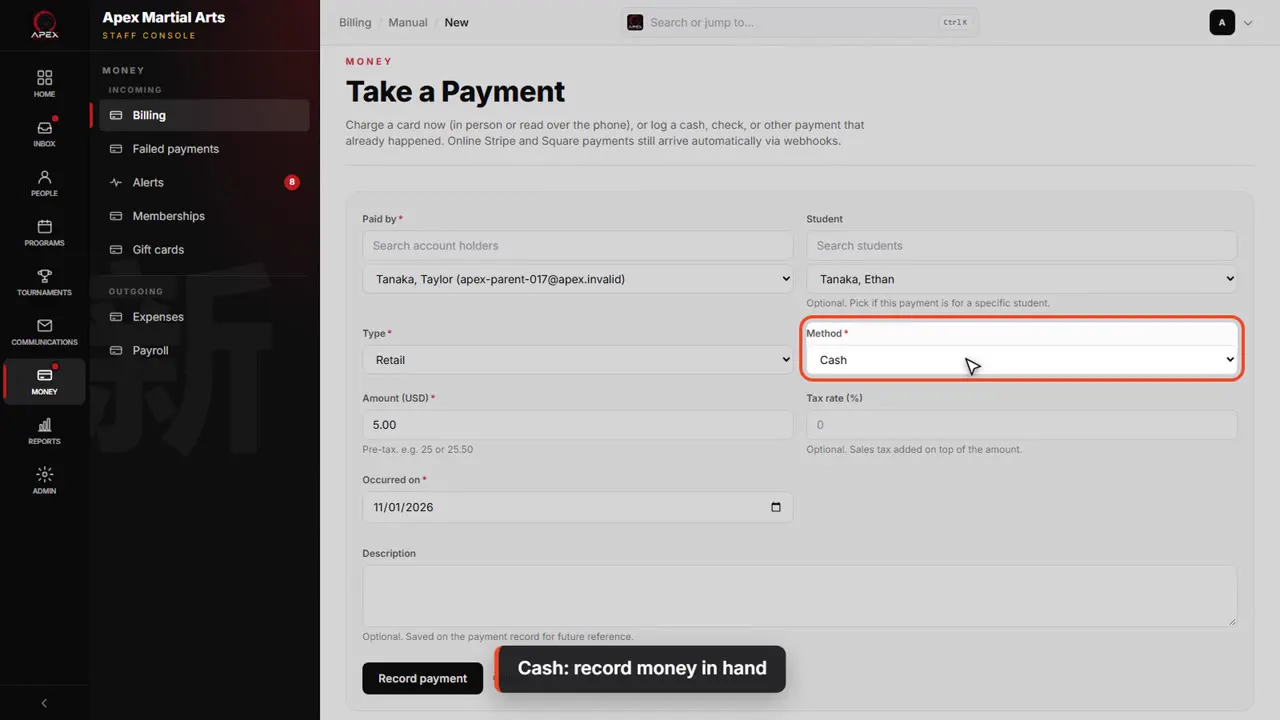
Cash: record money in hand
Now cash. Pick Cash as the method. A check works exactly the same way.
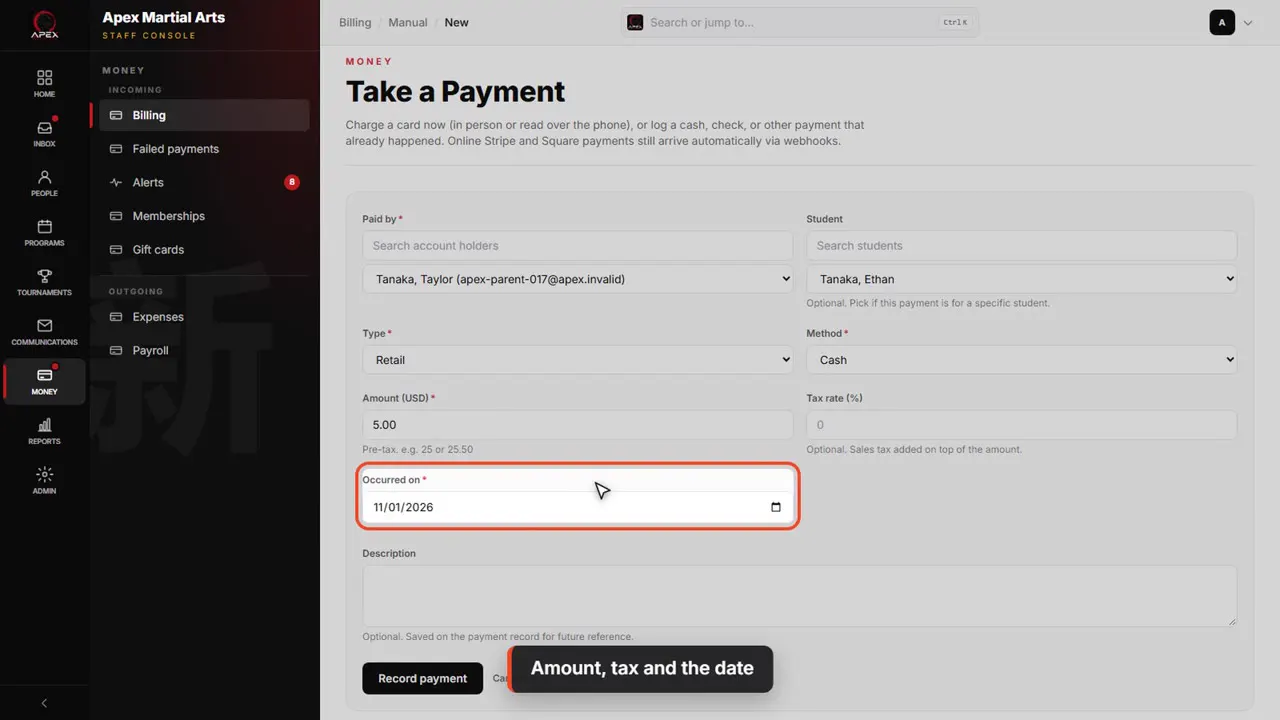
Amount, tax and the date
The amount is already in. Tax rate is optional, and is added on top. Occurred on is the day you took the money.
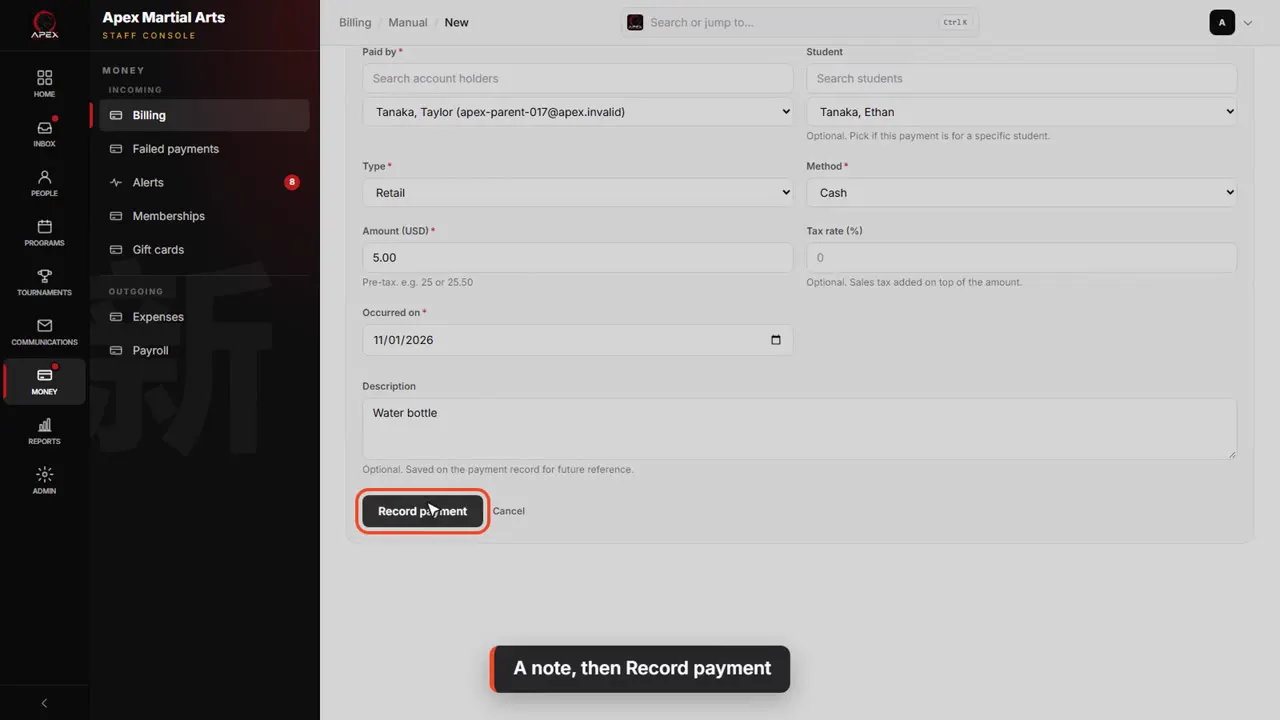
A note, then Record payment
Add a note if it helps, then click Record payment. Cash and check payments send the family no receipt.
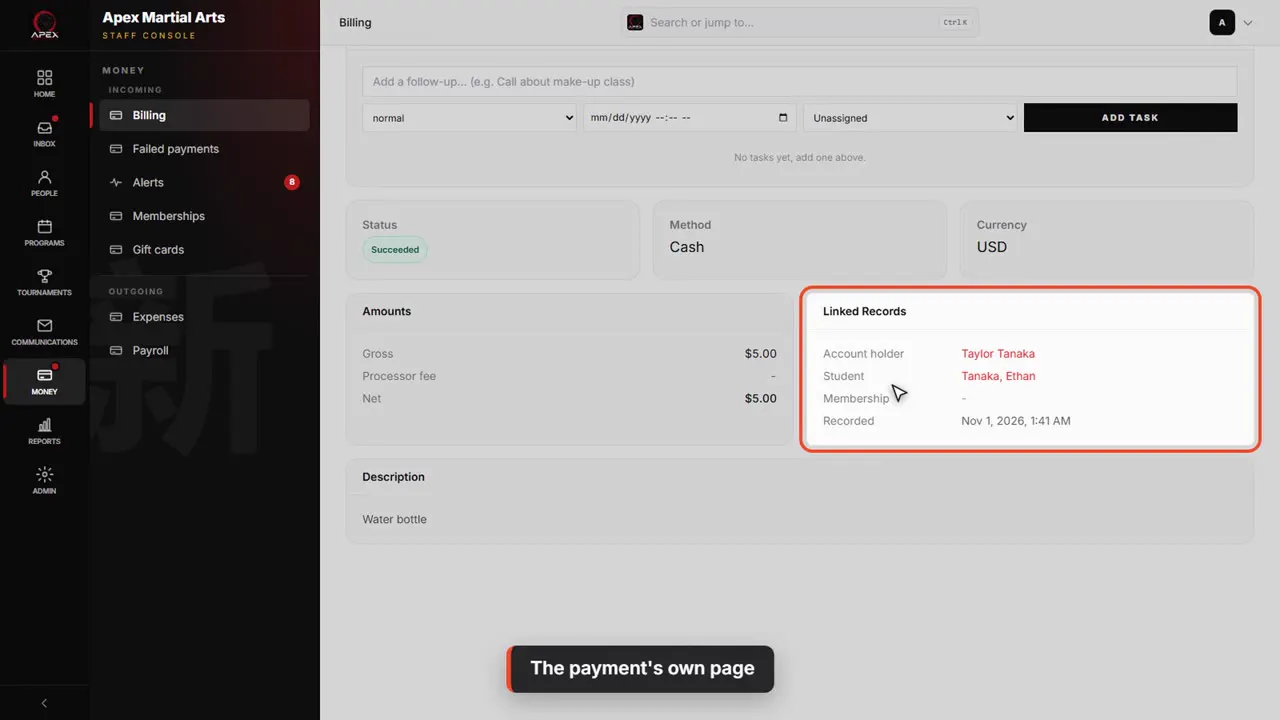
The payment's own page
You land on the payment's own page: the amount, how it was paid, and who paid it.
Refunds
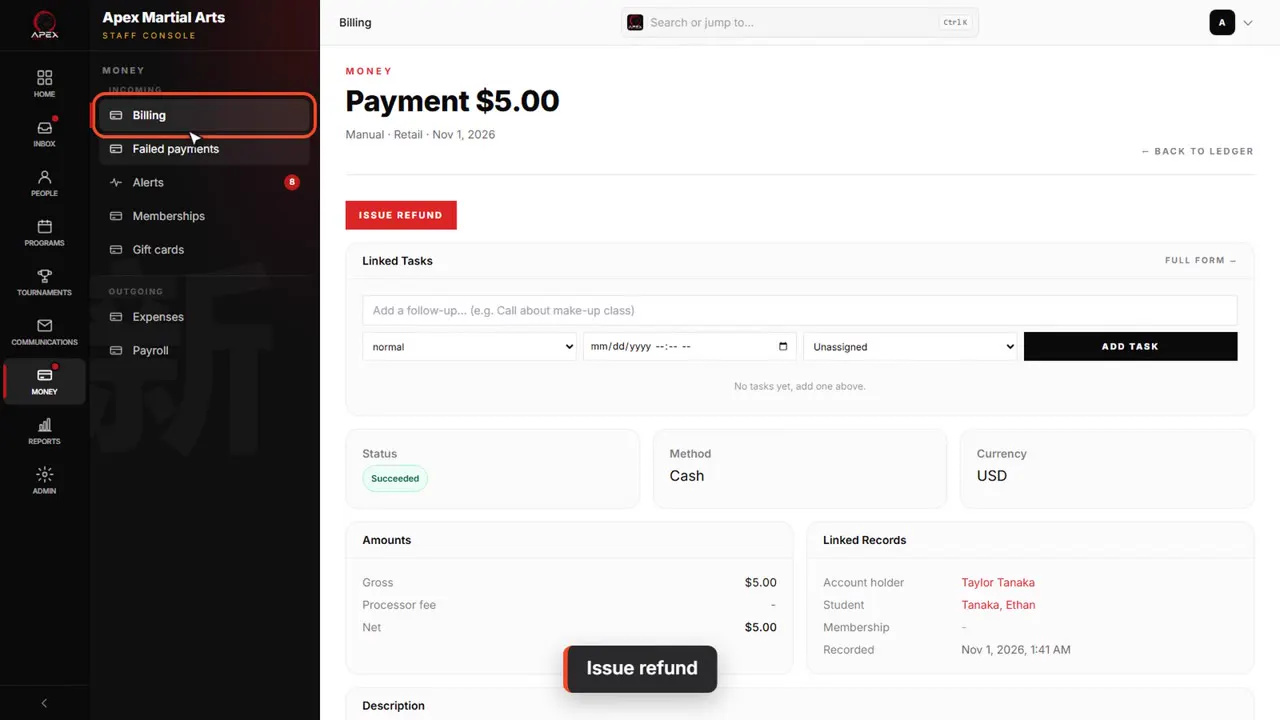
Issue refund
To give money back, open the payment and click Issue refund. To find a payment again, it's under Billing, in the sidebar.
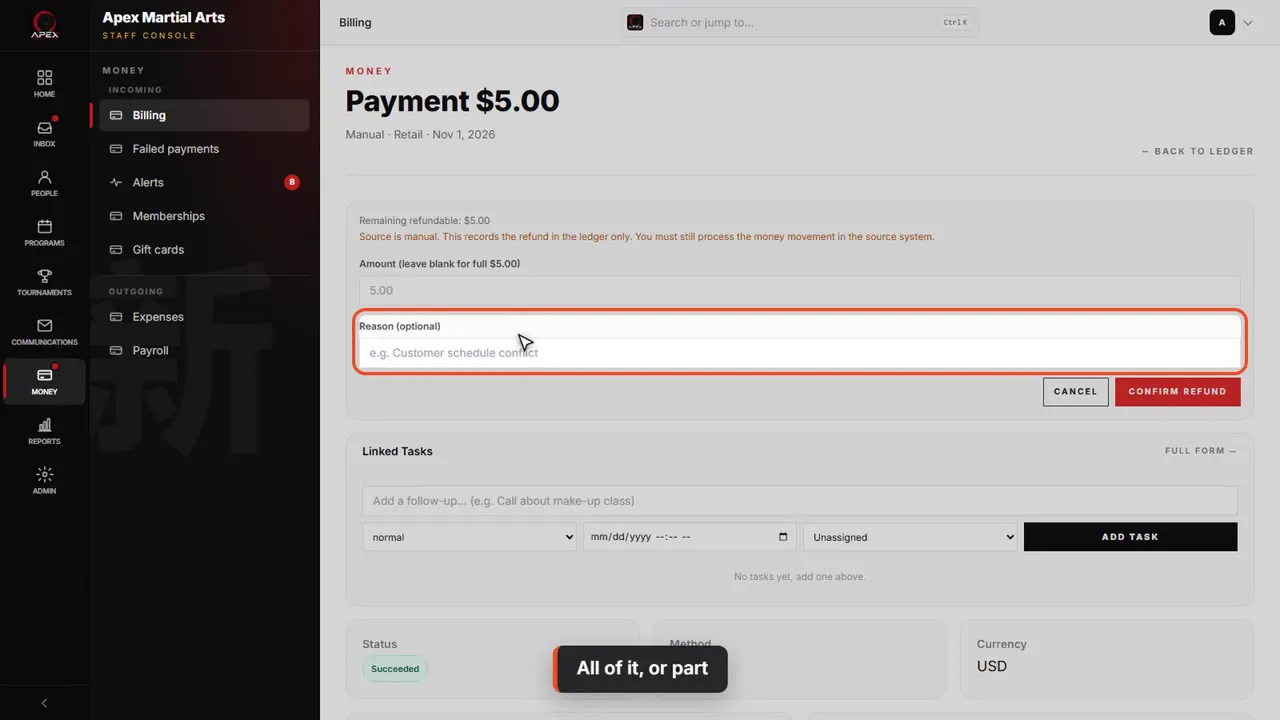
All of it, or part
Leave the amount blank to refund all of it, or type a smaller amount for a partial refund. A reason is optional.
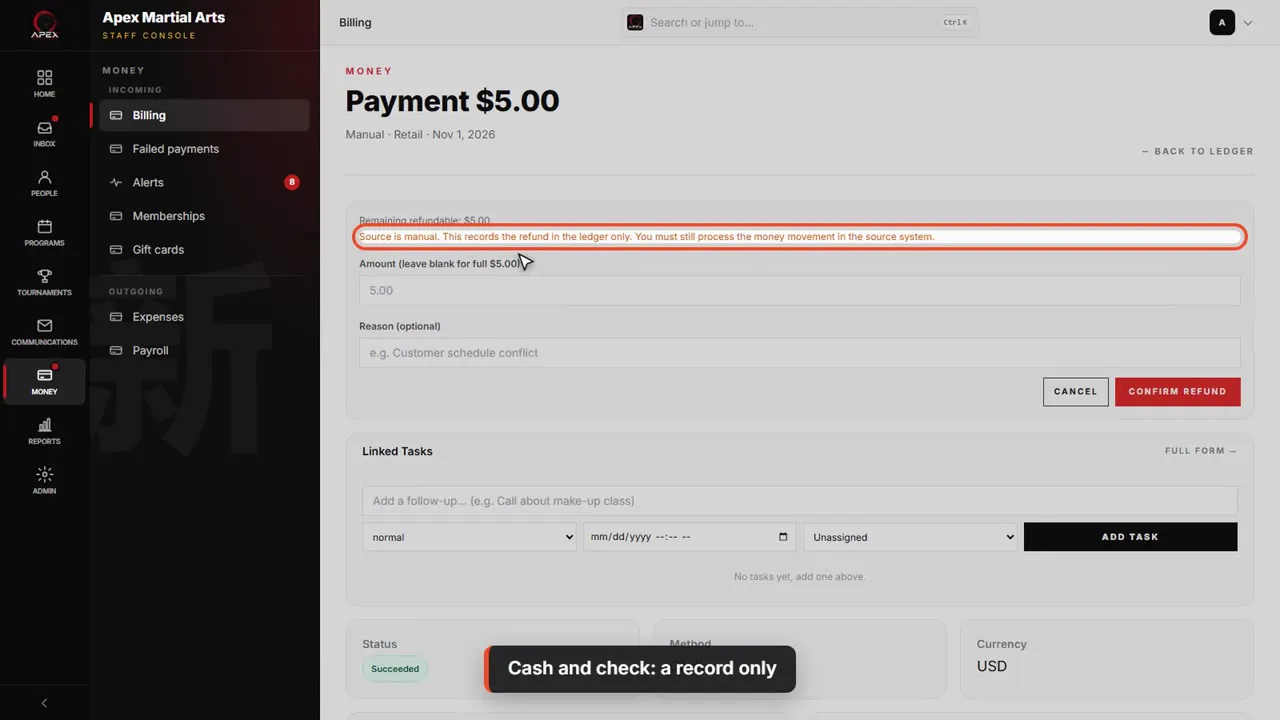
Cash and check: a record only
For cash or check, this only records the refund, so hand the money back yourself. For a card payment, the money goes back to the card through Stripe.
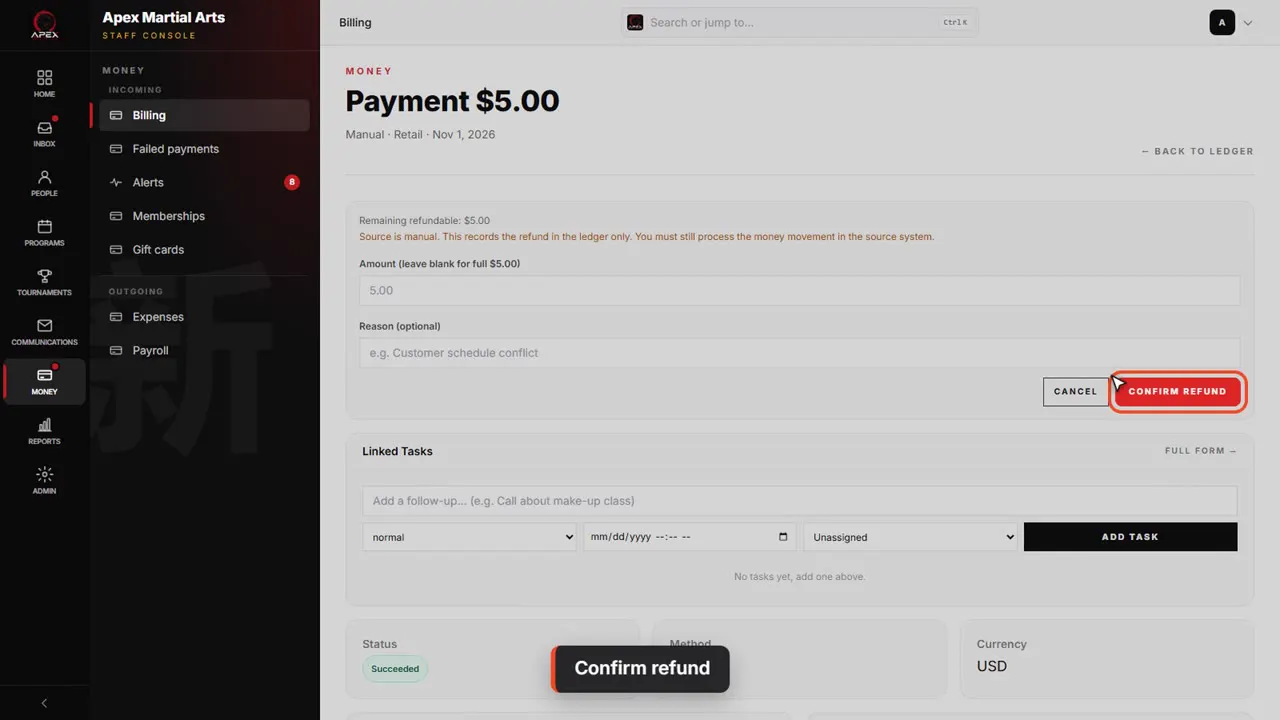
Confirm refund
Click Confirm refund.
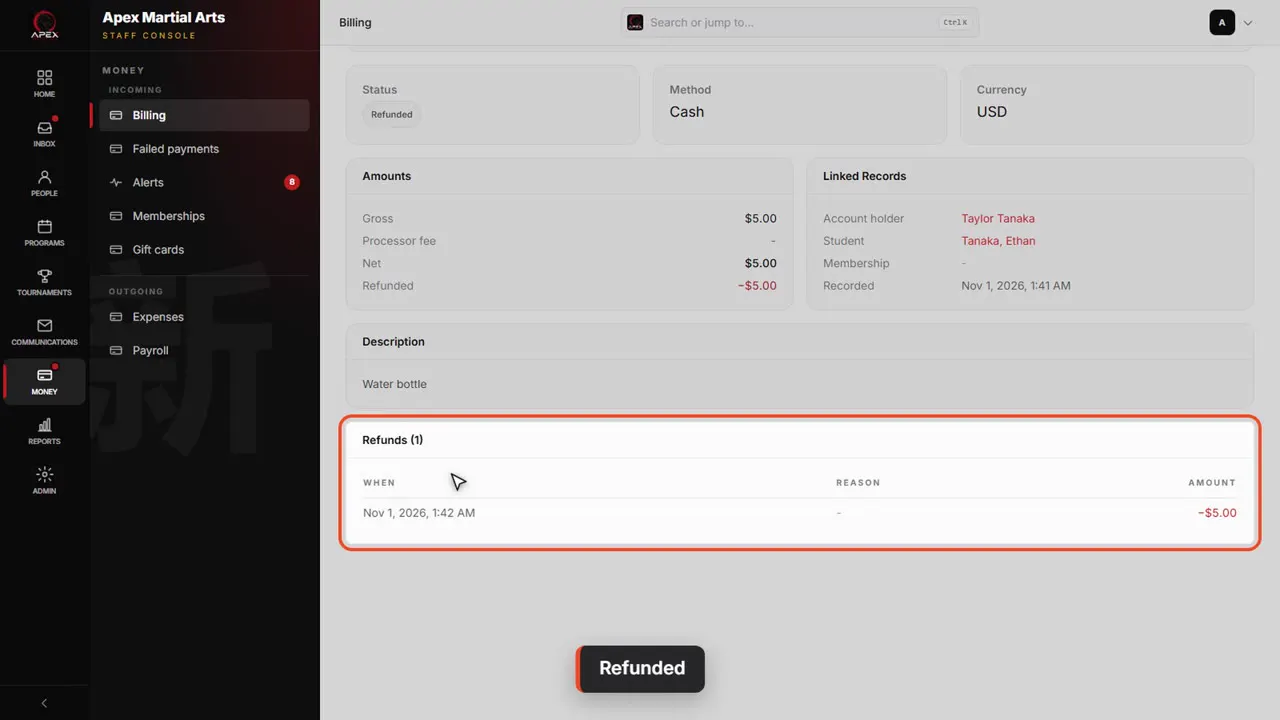
Refunded
The payment now shows Refunded, with the refund listed underneath.
Finding payments later
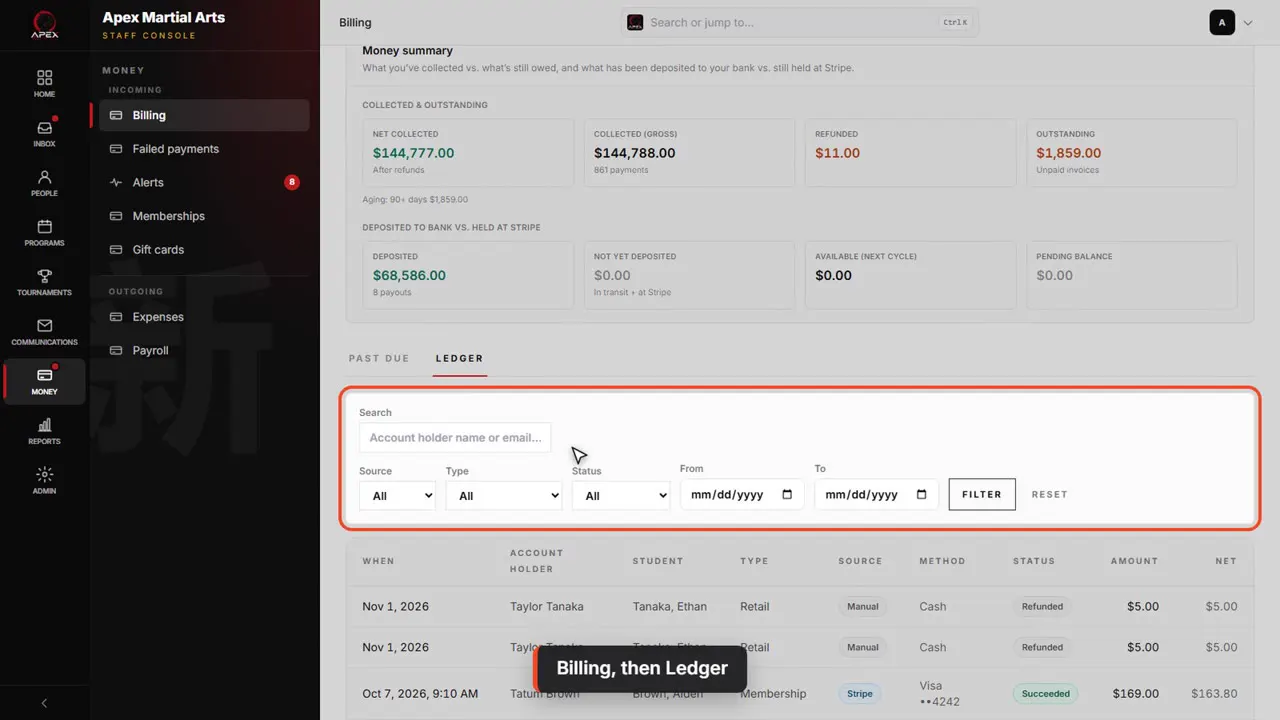
Billing, then Ledger
Every payment and refund is on Billing, under Ledger. Filter by source, type or status, or search for a family by name.
Shown with a demo school. Your screens show your own school, and may look a little different.
Read the whole video as text
In this video you'll take a payment at the front desk, by card, cash or check, and then give one back with a refund.
To take a payment, open Money, then Billing, and click Take a payment.
Quicker still: on a student's profile, open Actions and pick Take payment.
The family is already filled in. Paid by is the account holder, the parent who pays. Student is optional, for a payment that belongs to one child.
Type says what the payment is for: a membership, retail, an event, a test fee, a private lesson, or other. This one is retail.
Method matters most. Credit or debit card charges a card right now. Cash, check and other only record money you already have in hand.
With card picked, a card the family already has on file shows here. We charge it without typing the number.
Type the amount, tick The cardholder authorized this charge, and click Charge saved card. The family is emailed a receipt.
For a different card, pick Key in a new card. Leave Save this card on file ticked to keep it for next time, then click Enter card and type it into the secure form.
Now cash. Pick Cash as the method. A check works exactly the same way.
The amount is already in. Tax rate is optional, and is added on top. Occurred on is the day you took the money.
Add a note if it helps, then click Record payment. Cash and check payments send the family no receipt.
You land on the payment's own page: the amount, how it was paid, and who paid it.
To give money back, open the payment and click Issue refund. To find a payment again, it's under Billing, in the sidebar.
Leave the amount blank to refund all of it, or type a smaller amount for a partial refund. A reason is optional.
For cash or check, this only records the refund, so hand the money back yourself. For a card payment, the money goes back to the card through Stripe.
Click Confirm refund.
The payment now shows Refunded, with the refund listed underneath.
Every payment and refund is on Billing, under Ledger. Filter by source, type or status, or search for a family by name.
That's taking payments and refunds. Every one of them is on the Billing ledger.
Up next · Money
Handle a declined card
Find who is past due, see what QuickKicks does on its own, retry, snooze or waive a payment, and ask the family for a new card.
Watch next: Handle a declined cardBefore this: Memberships: start, pause and cancel
Stuck?
In QuickKicks, open Admin, then Support (or Help, in the simpler menu), and send us a message. Or email hello@quickkicks.app.