
For schools · Set up your school
Add your classes and schedule
Add a class with its days, times, who it’s for, how many fit and who teaches it, then read your weekly schedule.
Jump to a part
Step by step
The same steps as the video, with what to look for on each screen. The orange box shows where to look.
Locations
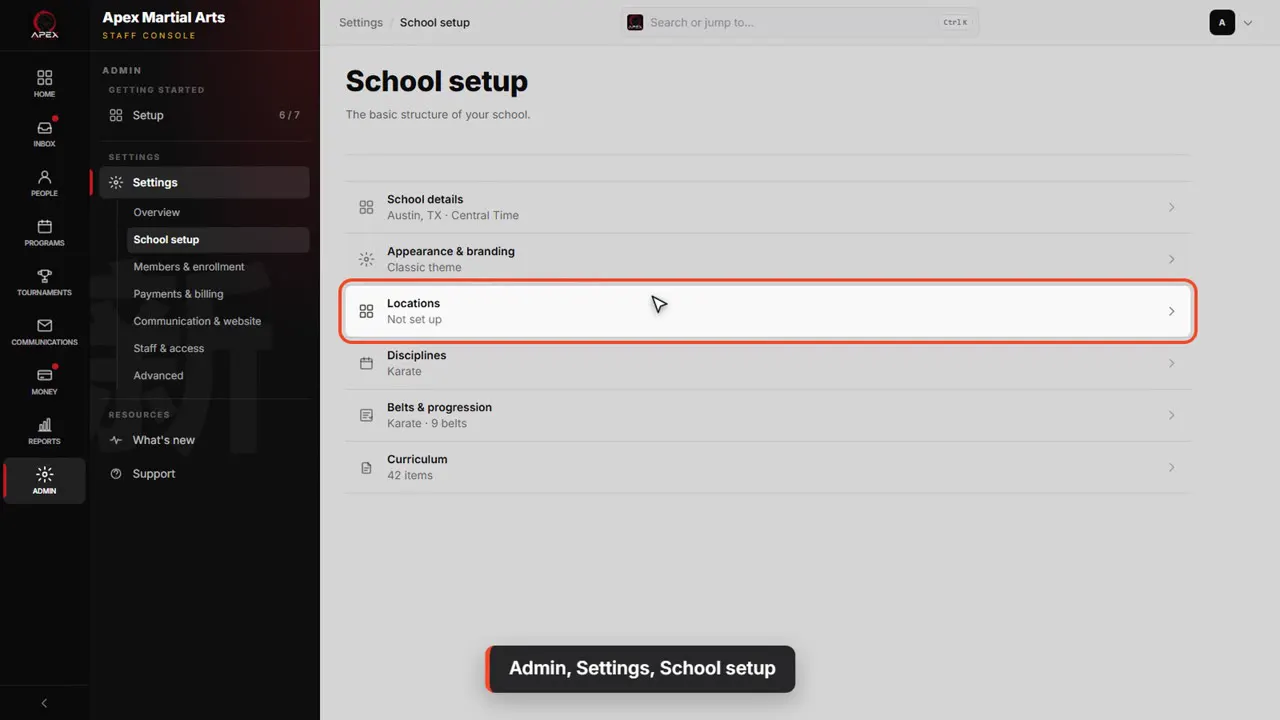
Admin, Settings, School setup
Start with locations. Click Admin, then Settings, then School setup, then Locations.
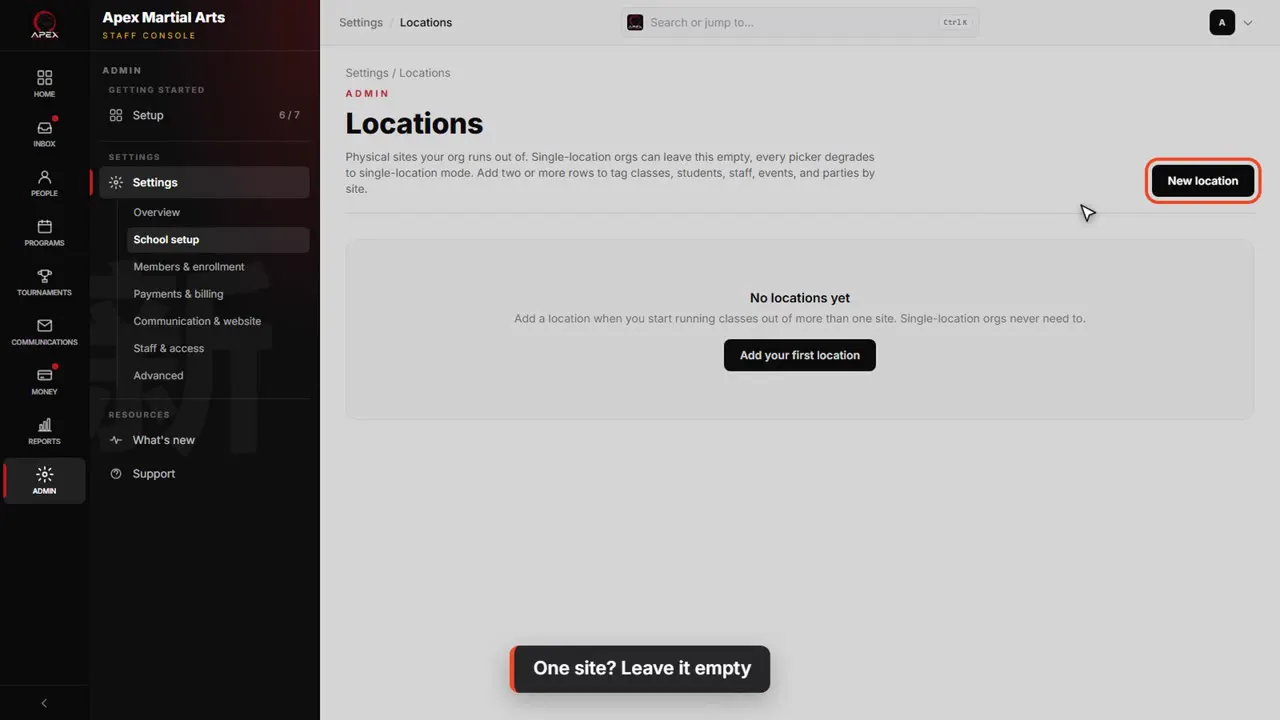
One site? Leave it empty
If you teach at one site, leave this empty, like Apex. When you open a second site, add each one with New location, and every class gets a Location to pick.
Your classes
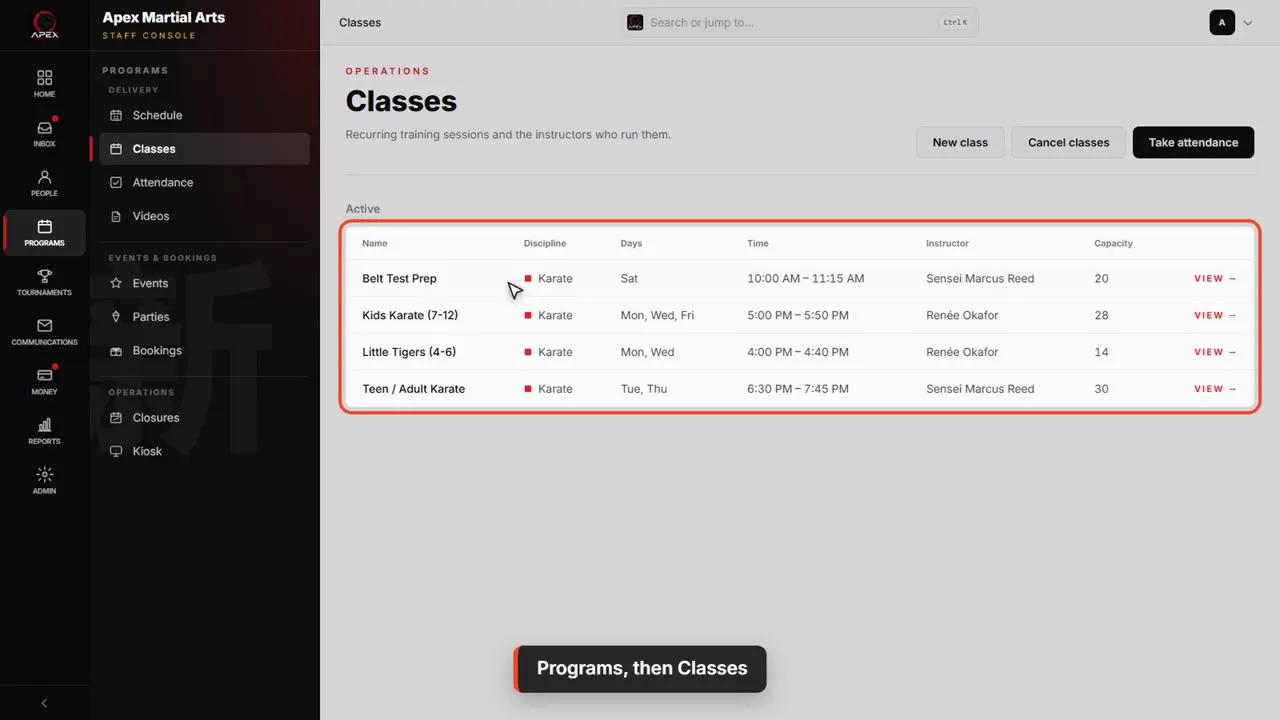
Programs, then Classes
Your classes are under Programs, then Classes. On the list, active classes are at the top. Classes you switch off move to an Inactive list below them.
Add a class
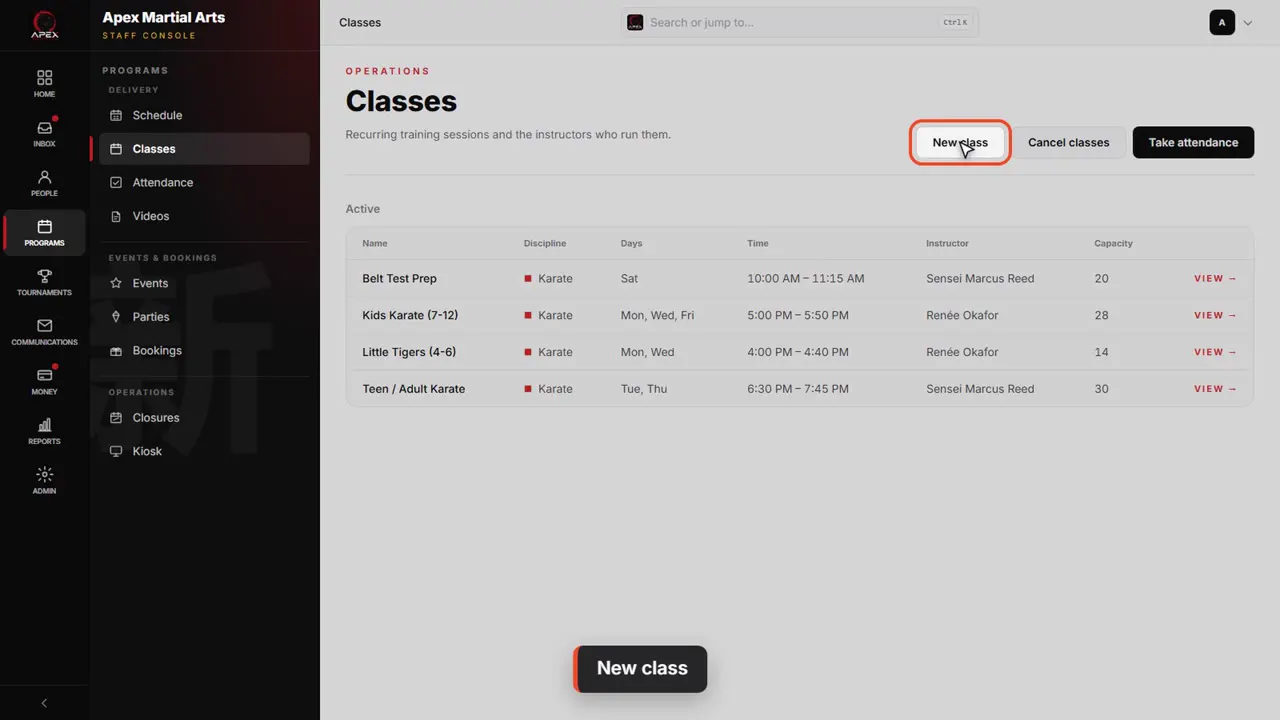
New class
To add one, click New class. Let's set up a demo class.
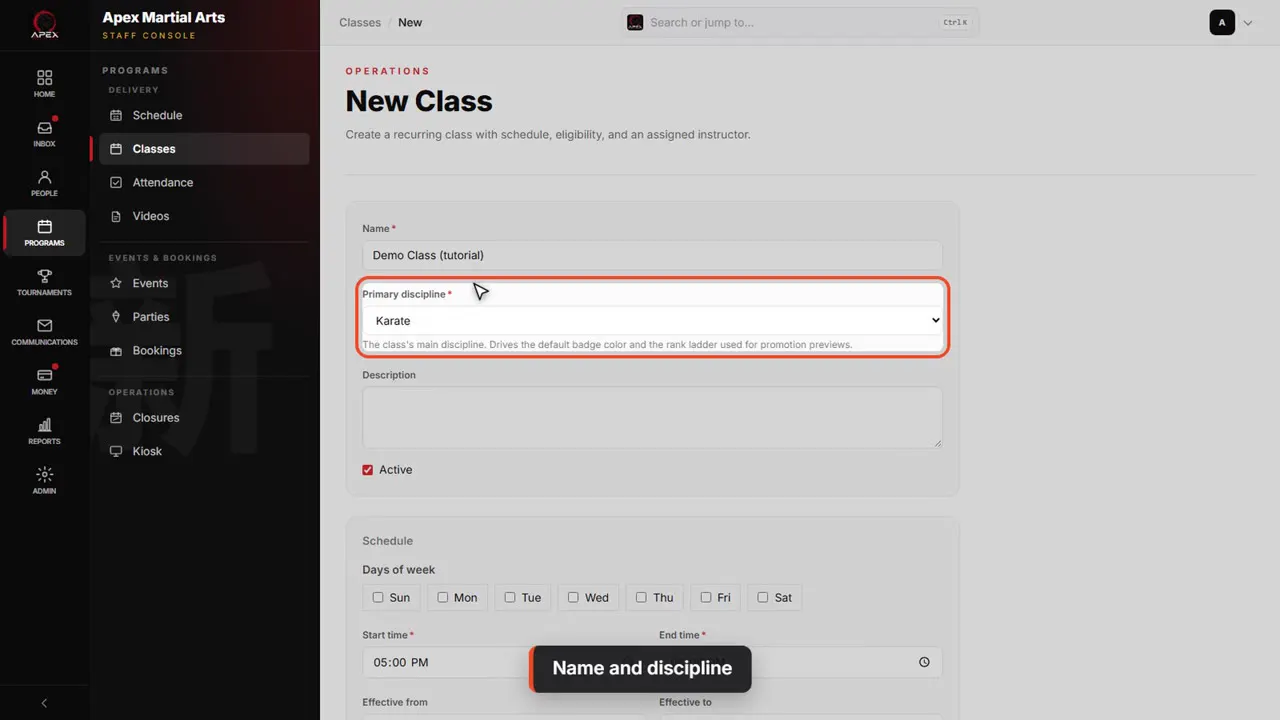
Name and discipline
Give it a name, and pick its discipline. That decides which belt ladder applies to it.
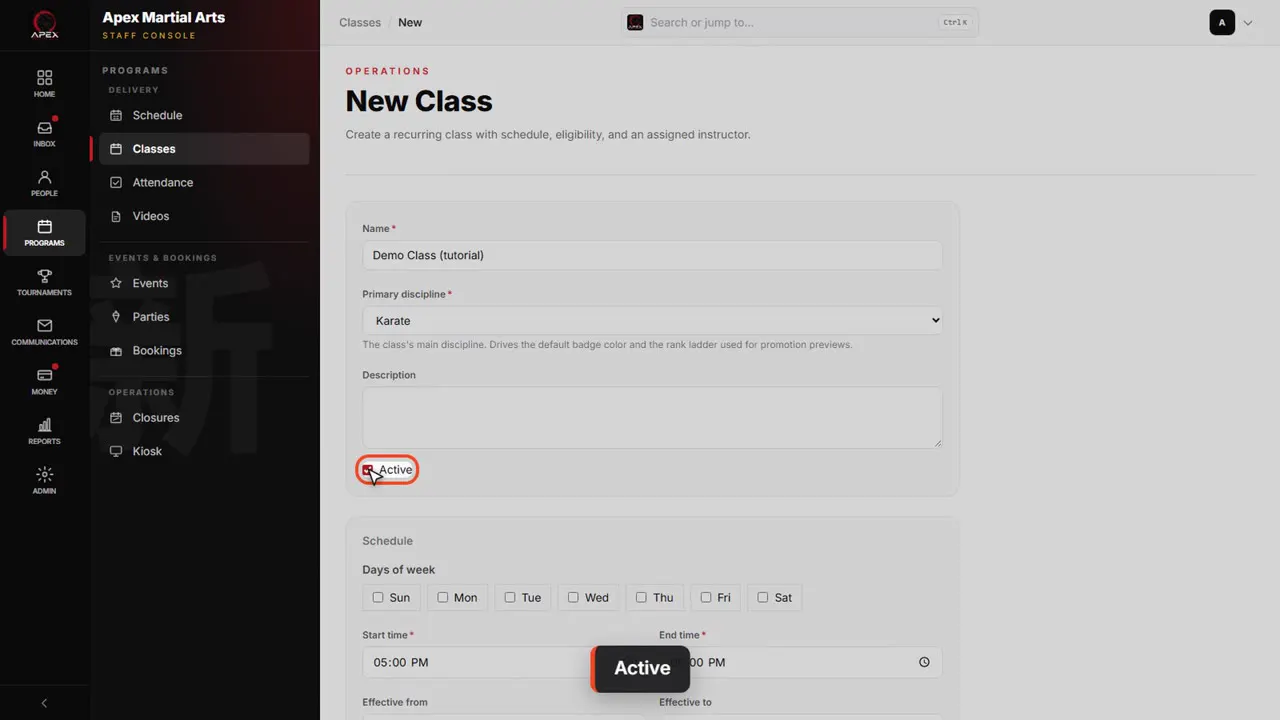
Active
Active puts the class on your schedule and in the parent app. Untick it to set a class up quietly, and tick it when it's ready.
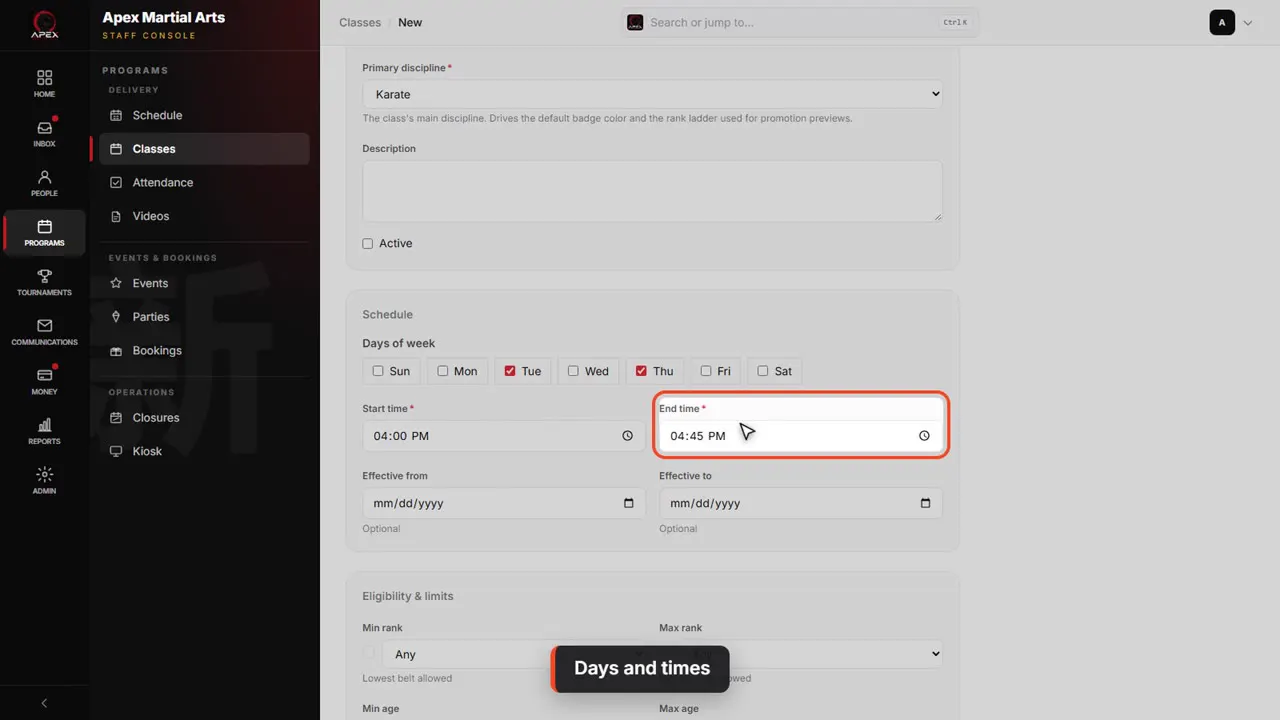
Days and times
Under Schedule, tick the days it runs, then set the start time and the end time, just below. This one runs Tuesdays and Thursdays, four to four forty-five.
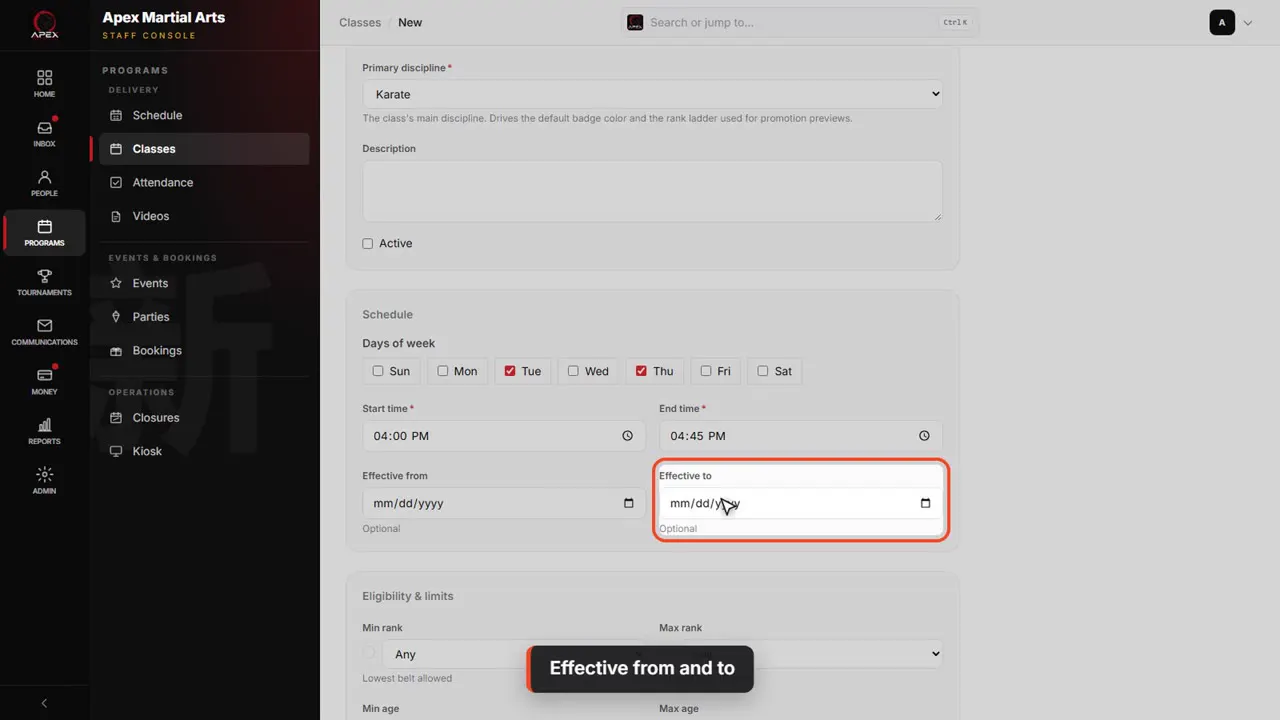
Effective from and to
Effective from and Effective to are optional. Use them for a class that starts later, or only runs for a season.
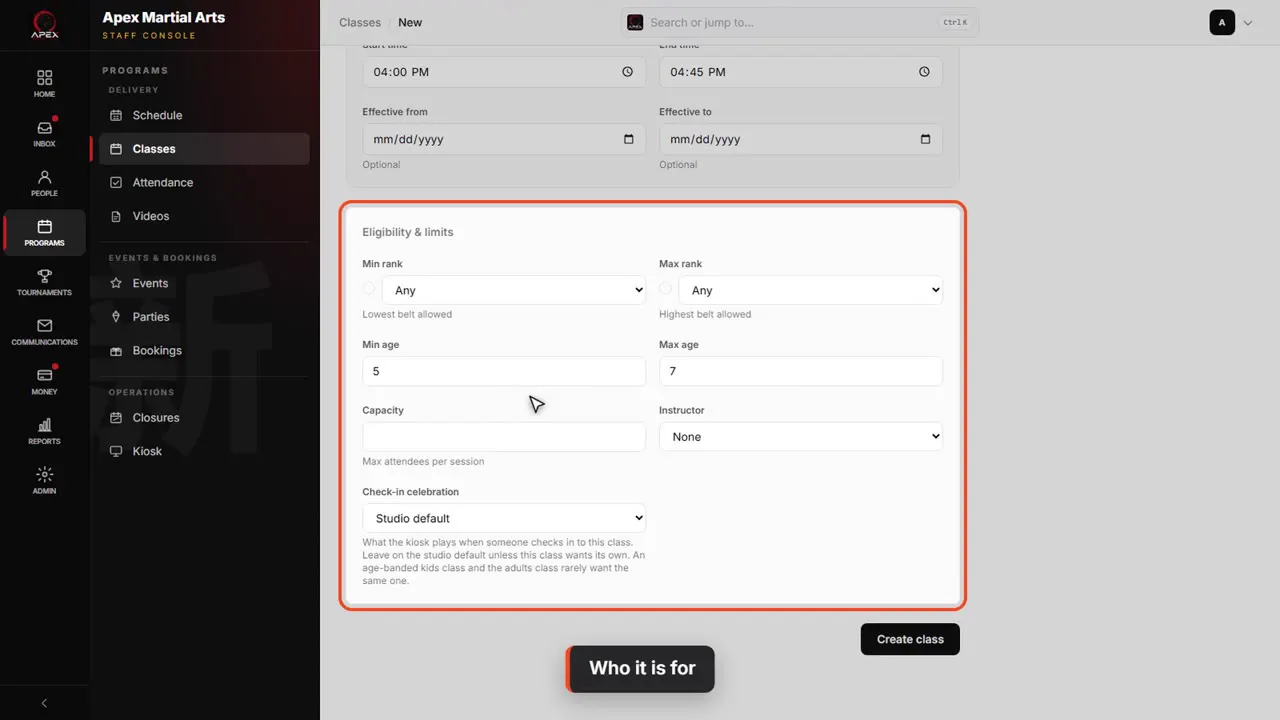
Who it is for
Eligibility sets who it's for: the lowest and highest belt, and the youngest and oldest age. Families only see a class on their schedule when a child fits.
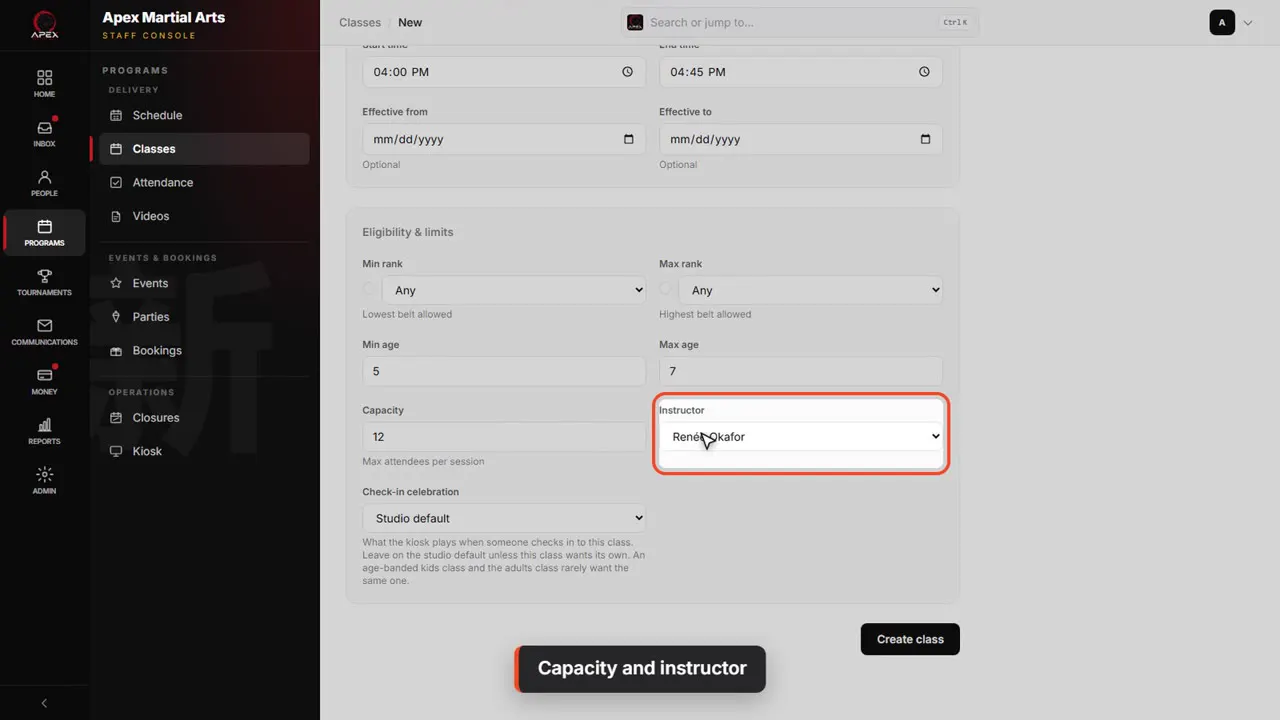
Capacity and instructor
Capacity is the most students in one session. Once it's full, families can't book a trial or a make-up into it. Then pick the instructor who teaches it.
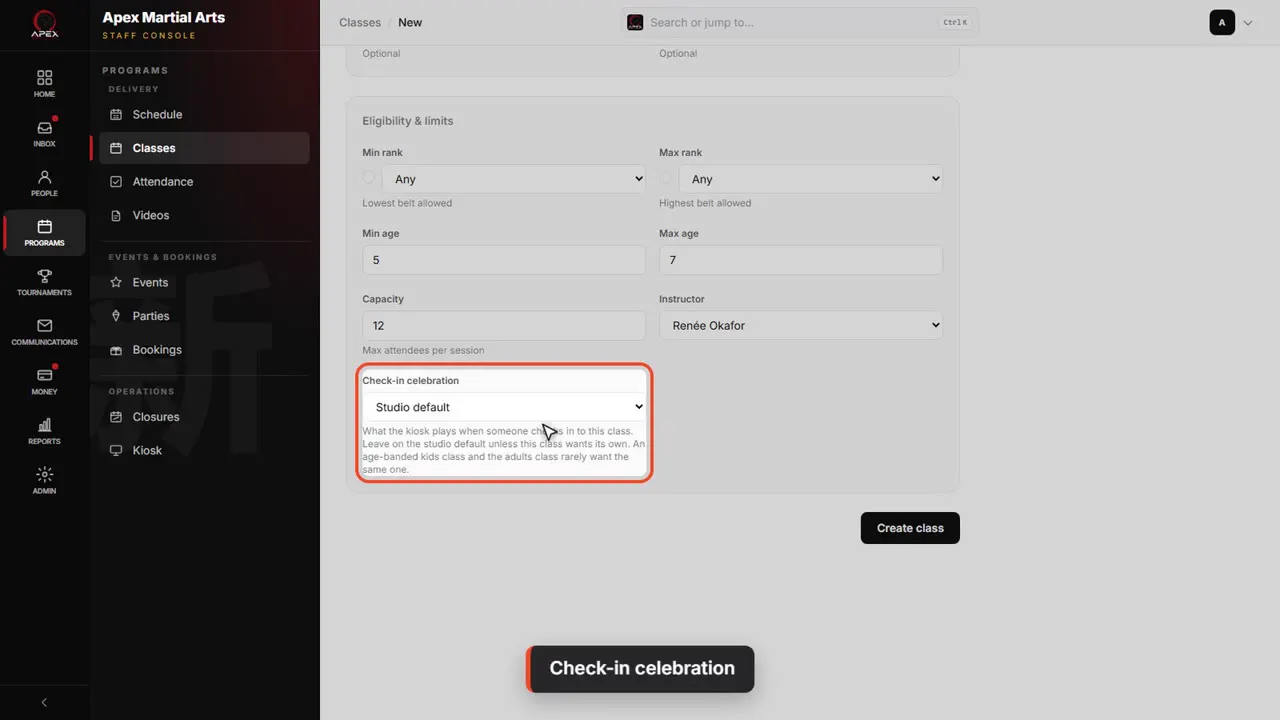
Check-in celebration
Check-in celebration is what the front desk kiosk plays when a student checks in. Leave it on Studio default unless this class wants its own.
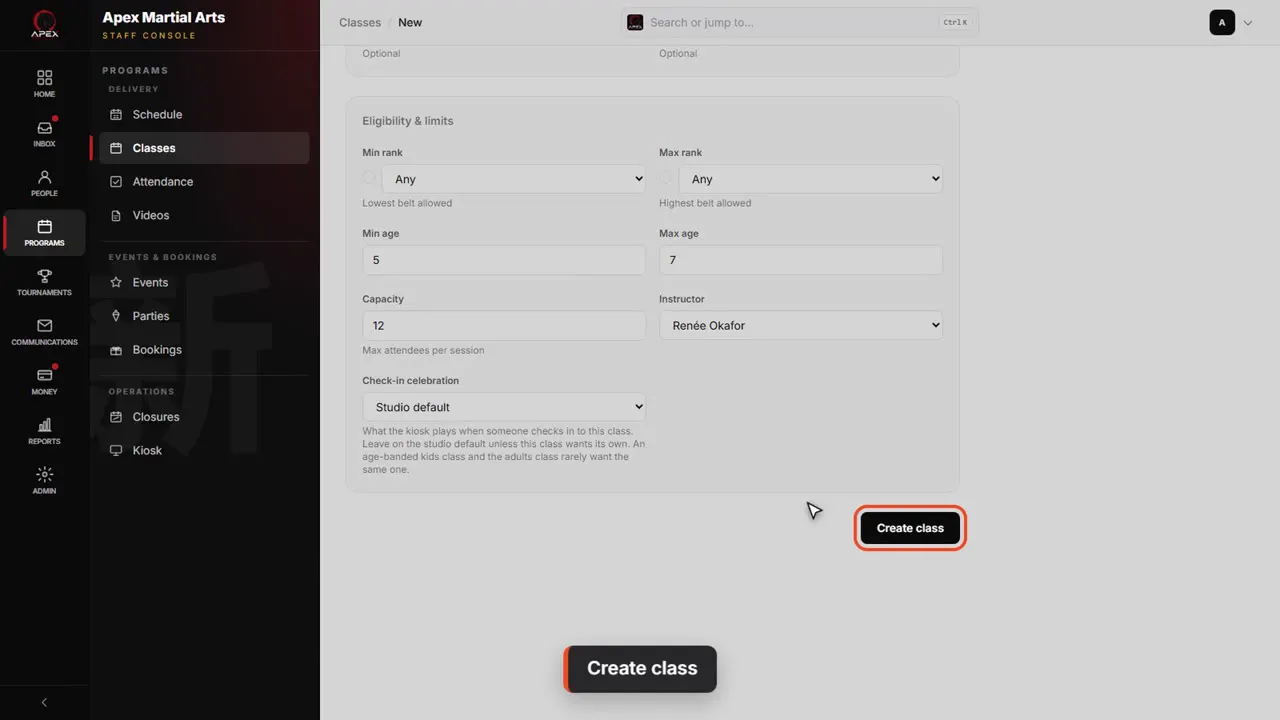
Create class
Click Create class, and it's on your schedule from its first day. We'll leave this demo unsaved.
A class's page
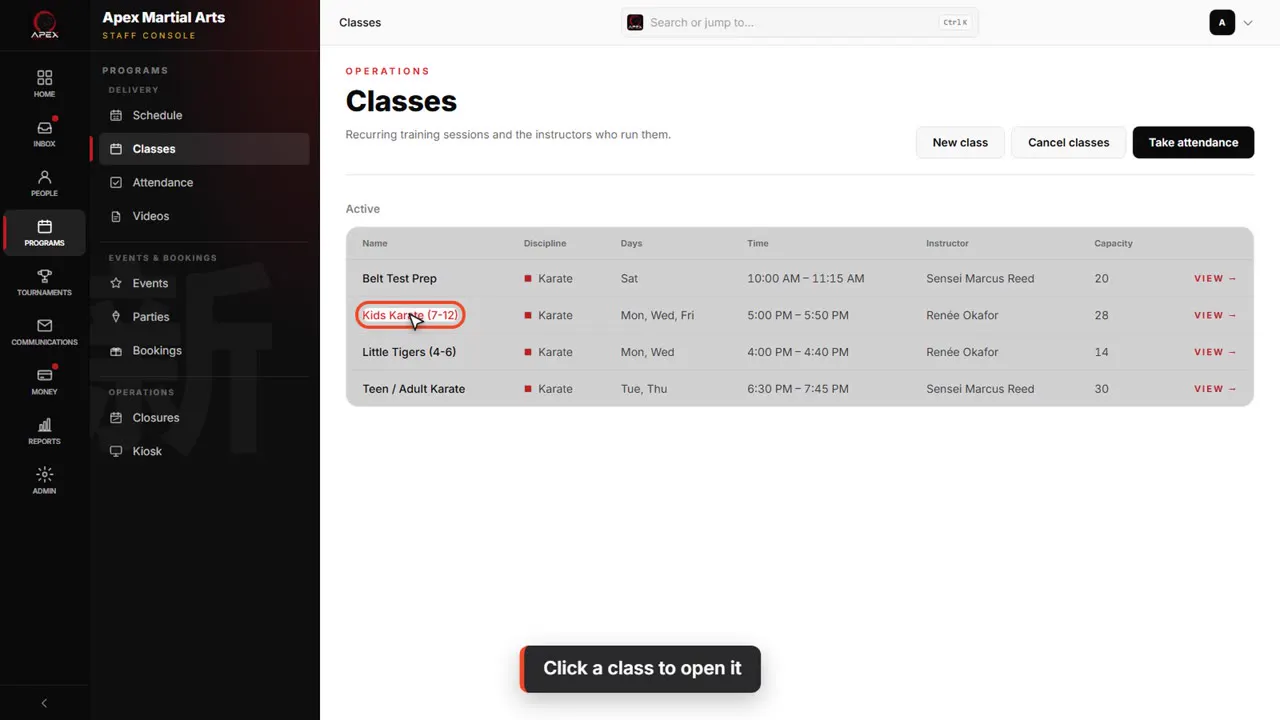
Click a class to open it
Back on the list, click a class to see everything about it. Here's Kids Karate.
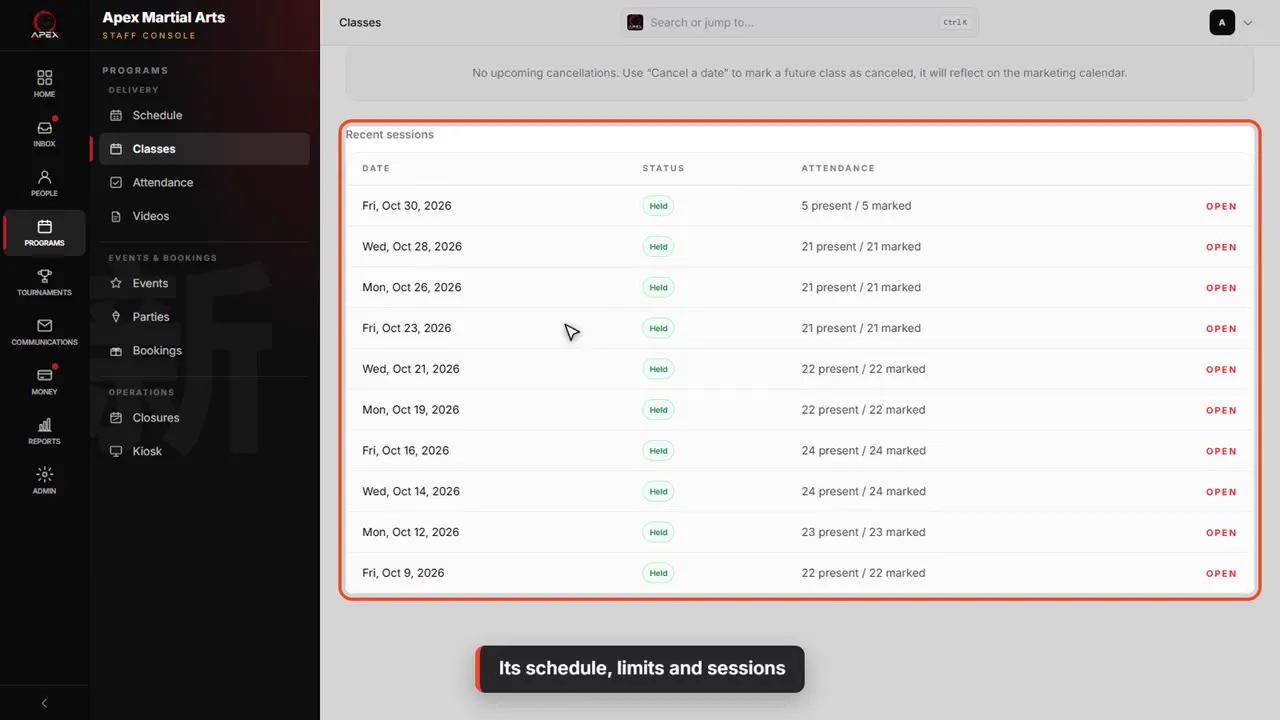
Its schedule, limits and sessions
Its page shows the days and time, who it is for, its capacity and instructor, and the recent sessions with their attendance.
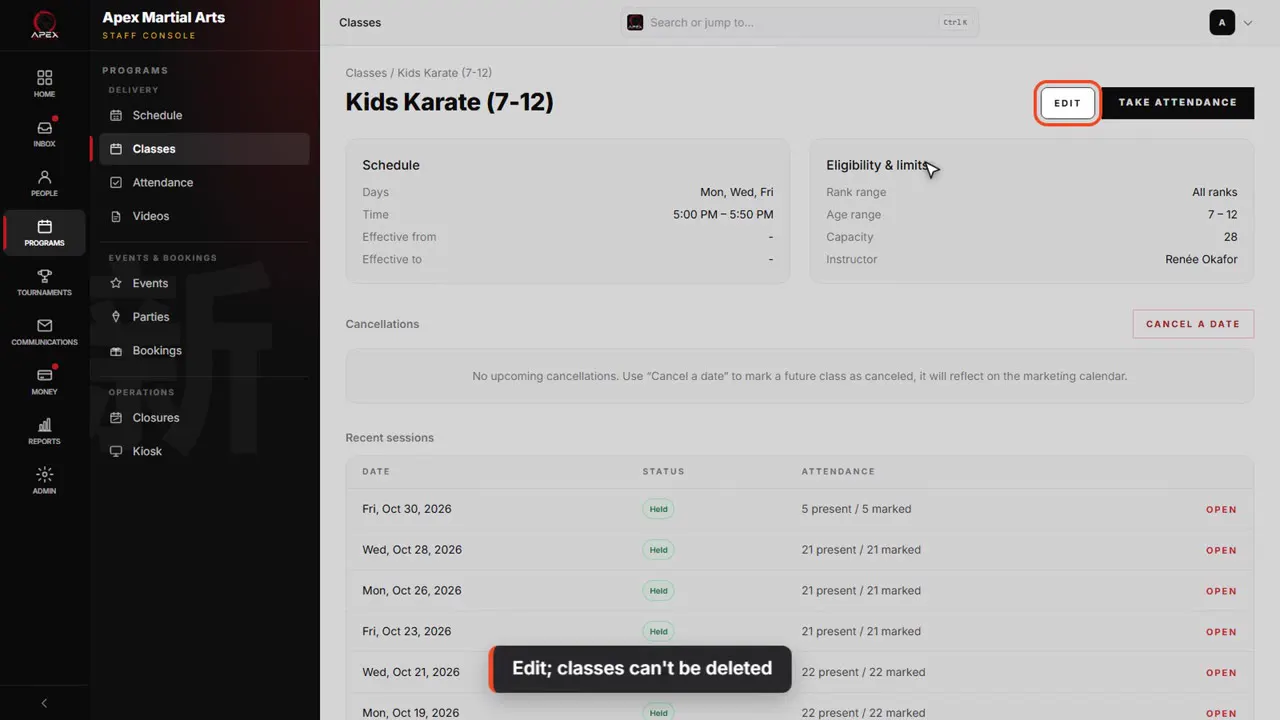
Edit; classes can't be deleted
Click Edit to change anything. A class can't be deleted. To stop running one, untick Active, or set an Effective to date.
The weekly schedule
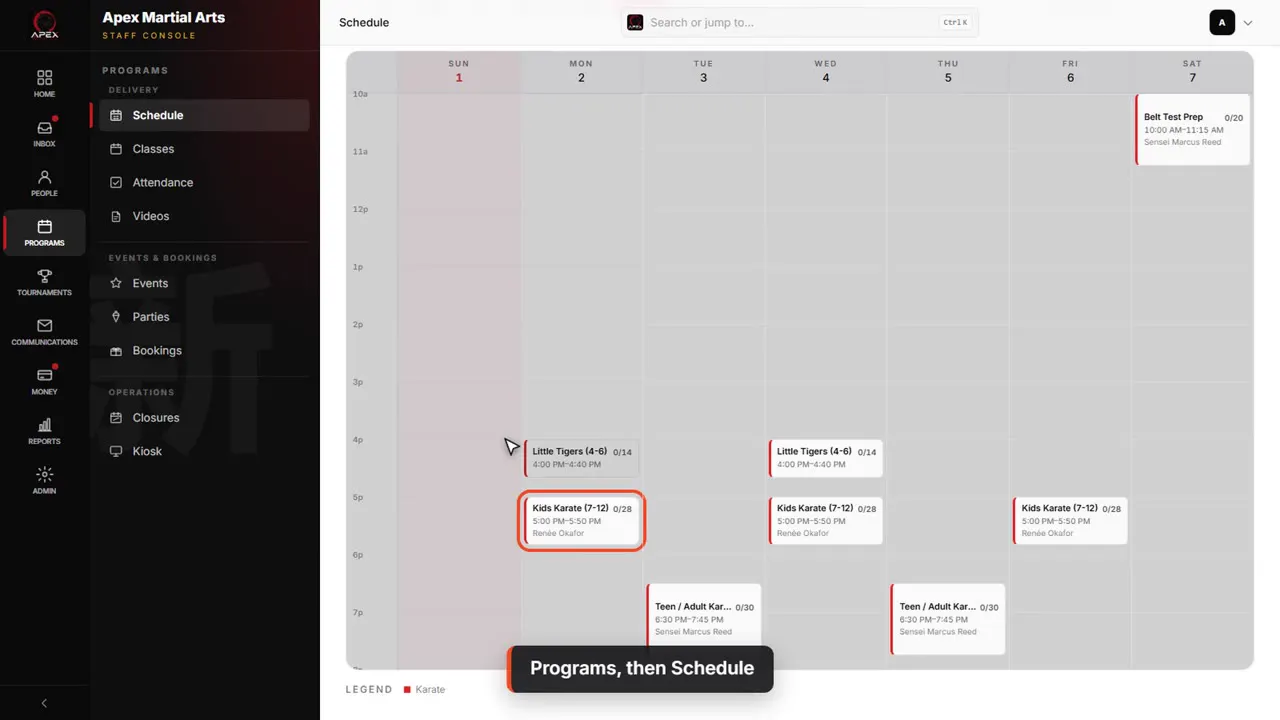
Programs, then Schedule
To see the whole week, click Schedule, under Programs. Every active class is on the grid, with its time and instructor.
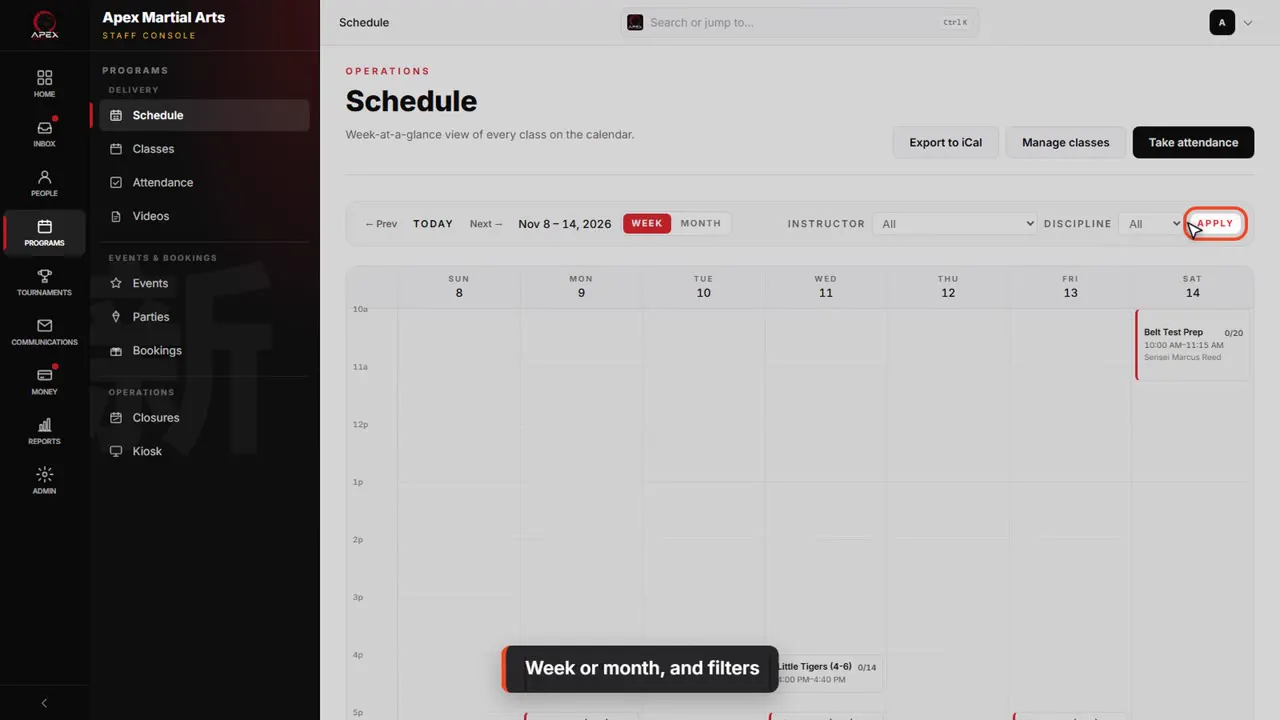
Week or month, and filters
Switch between Week and Month, or click Next to move a week ahead. To see one instructor or discipline, pick it and click Apply.
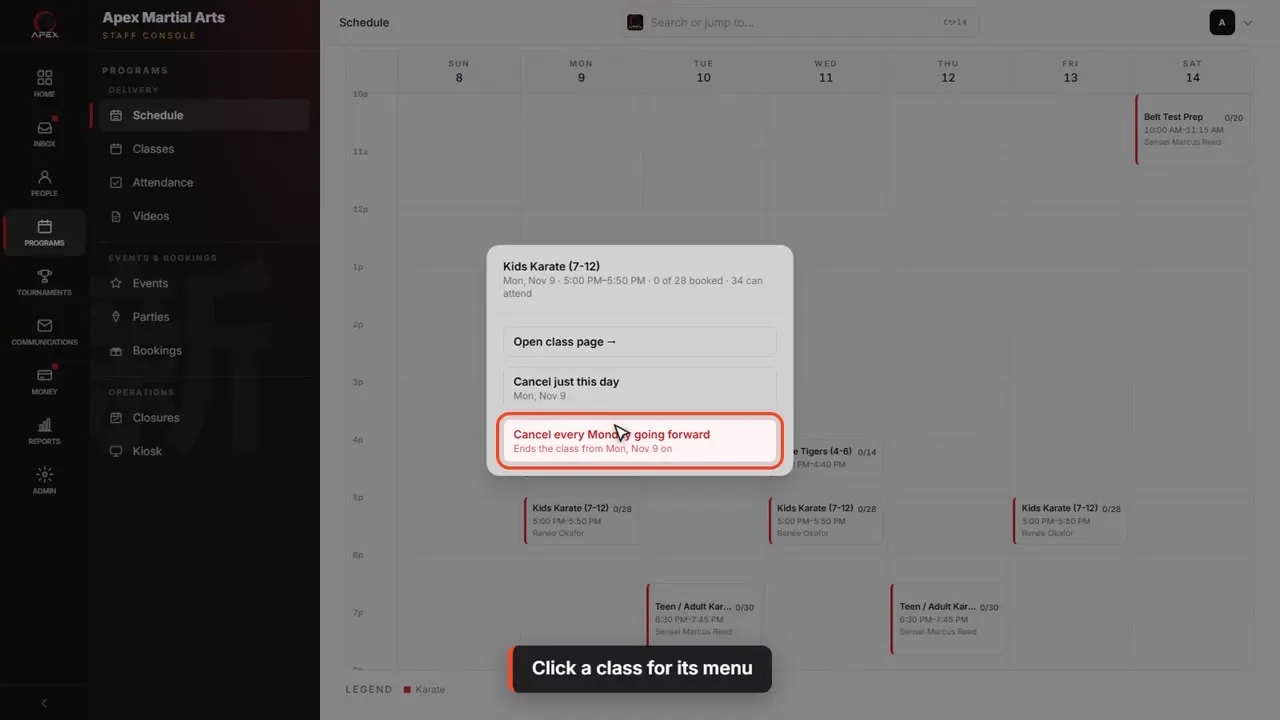
Click a class for its menu
Click a class on the grid to open its page, or cancel just that day, or cancel it every week from then on. Cancelling has a video of its own, so we'll close this.
Shown with a demo school. Your screens show your own school, and may look a little different.
Read the whole video as text
In this video you'll build your timetable: the classes you run each week, who each one is for, and where to see it all on the schedule.
Start with locations. Click Admin, then Settings, then School setup, then Locations.
If you teach at one site, leave this empty, like Apex. When you open a second site, add each one with New location, and every class gets a Location to pick.
Your classes are under Programs, then Classes. On the list, active classes are at the top. Classes you switch off move to an Inactive list below them.
To add one, click New class. Let's set up a demo class.
Give it a name, and pick its discipline. That decides which belt ladder applies to it.
Active puts the class on your schedule and in the parent app. Untick it to set a class up quietly, and tick it when it's ready.
Under Schedule, tick the days it runs, then set the start time and the end time, just below. This one runs Tuesdays and Thursdays, four to four forty-five.
Effective from and Effective to are optional. Use them for a class that starts later, or only runs for a season.
Eligibility sets who it's for: the lowest and highest belt, and the youngest and oldest age. Families only see a class on their schedule when a child fits.
Capacity is the most students in one session. Once it's full, families can't book a trial or a make-up into it. Then pick the instructor who teaches it.
Check-in celebration is what the front desk kiosk plays when a student checks in. Leave it on Studio default unless this class wants its own.
Click Create class, and it's on your schedule from its first day. We'll leave this demo unsaved.
Back on the list, click a class to see everything about it. Here's Kids Karate.
Its page shows the days and time, who it is for, its capacity and instructor, and the recent sessions with their attendance.
Click Edit to change anything. A class can't be deleted. To stop running one, untick Active, or set an Effective to date.
To see the whole week, click Schedule, under Programs. Every active class is on the grid, with its time and instructor.
Switch between Week and Month, or click Next to move a week ahead. To see one instructor or discipline, pick it and click Apply.
Click a class on the grid to open its page, or cancel just that day, or cancel it every week from then on. Cancelling has a video of its own, so we'll close this.
That's your classes and schedule. Next, we'll see how families sign up.
Up next · Set up your school
Get paid
Check your Stripe connection, choose how families pay, decide which fees you pass on, and set sales tax.
Watch next: Get paidBefore this: Set your programs and prices
Stuck?
In QuickKicks, open Admin, then Support (or Help, in the simpler menu), and send us a message. Or email hello@quickkicks.app.